メインコンテンツまでスキップ

· 約10分
moritalous
お知らせ

過去にQiitaに投稿した内容のアーカイブです。

Amazonさんから招待が来たのでecho dotが手に入りました。 でもGoogle Homeも気になりますよね。 ということで、GoogleアシスタントをAlexa Skillにしてしまうことにしました。

12/20にGoogle Assistant SDKが0.4.0にバージョンアップし、日本語にも対応しています。

Alexa Skill Kitのセットアップ

細かい手順は他に任せるとして、要点を抜粋して紹介。

スキル情報

呼び出し名
オーケーグーグル

対話モデル

カスタム対話モデル

Sample UtterancesSlot Type
{q}qSlot (後述のカスタムスロット)

カスタムスロットタイプ

VALUEID (OPTIONAL)SYNONYMS
今日の天気は

あまり理屈はわかりませんが、これで「今日の天気は」はもちろん、 その他の発話に対してもこの対話モデルが選択されます。

リクエストのJSONはこんな感じになります。

{
"session": {
// 省略
},
"request": {
"type": "IntentRequest",
"requestId": "XXXXXXXXXX",
"intent": {
"name": "NewIntent",
"slots": {
"q": {
"name": "q",
"value": "こんにちは"
}
}
},
"locale": "ja-JP",
"timestamp": "XXXXXXXXXX"
},
"context": {
// 省略
},
"version": "1.0"
}

以上でAlexa Skillの設定は完了です。

CentOSとPython環境の構築

MacのVirtualBox上にCent OS 7の環境を構築しました。

Python 3.6のインストールとvirtualenv環境のセットアップ

Lambdaのデプロイパッケージ作成の手順を参考にしました。 https://docs.aws.amazon.com/ja_jp/lambda/latest/dg/with-s3-example-deployment-pkg.html

[centos@localhost ~]$ sudo yum install -y gcc zlib zlib-devel openssl openssl-devel
[centos@localhost ~]$ wget https://www.python.org/ftp/python/3.6.1/Python-3.6.1.tgz
[centos@localhost ~]$ tar -xzvf Python-3.6.1.tgz
[centos@localhost ~]$ cd Python-3.6.1 && ./configure && make
[centos@localhost ~]$ sudo make install
[centos@localhost ~]$ /usr/local/bin/virtualenv ~/shrink_venv
[centos@localhost ~]$ source ~/shrink_venv/bin/activate
(shrink_venv) [centos@localhost ~]$

Google Assistant SDKのセットアップ

公式ドキュメントにそって進めます。

Set Up Hardware and Network Access

https://developers.google.com/assistant/sdk/guides/library/python/embed/setup →省略。

Configure and Test the Audio

https://developers.google.com/assistant/sdk/guides/library/python/embed/audio →今回は音声の入出力は必須ではないので、省略します。

Configure a Developer Project and Account Settings

https://developers.google.com/assistant/sdk/guides/library/python/embed/config-dev-project-and-account →ドキュメントに沿って実施。

あとで以下のものが必要になります。

  • 作成したプロジェクト名
    以下の説明ではAlexa-GoogleAssistant-Skillがプロジェクト名となります。
  • client_secret_<client-id>.json ファイル
    Do not rename this file. とあるのでファイル名もダウンロードしたままで維持する必要があるようです。
    CentOS環境上にコピーしてください。

Install the SDK and Sample Code

https://developers.google.com/assistant/sdk/guides/library/python/embed/install-sample →ドキュメントに沿って実施。ただし、Pythonの環境構築はすでに実施していますので、その部分は飛ばします。

必要なライブラリーの導入

(shrink_venv) [centos@localhost ~]$ python -m pip install --upgrade google-assistant-library
(shrink_venv) [centos@localhost ~]$ python -m pip install --upgrade google-assistant-sdk[samples]

credentialsの生成

(shrink_venv) [centos@localhost ~]$ google-oauthlib-tool --scope https://www.googleapis.com/auth/assistant-sdk-prototype \
--save --headless --client-secrets [client_secret_client-id.json]

client_secret_client-id.jsonは、Google Assistant SDKのセットアップの手順で作成したものです。ファイルパスを指定してください。 コマンドを実行すると以下のように入力待受状態になりますので、メッセージ中のURLにアクセスしてコードを取得してください。

Please visit this URL to authorize this application: https://accounts.google.com/o/oauth2/auth?xxxxxxxxxx
Enter the authorization code:

コード入力後、以下のメッセージが表示されます。

credentials saved: /home/ubuntu/.config/google-oauthlib-tool/credentials.json

保存されたファイルの中身は以下のような形です。この文字列が後で必要になります。

credentials.json (整形済み)
{
"token_uri": "XXXXXXXXXX",
"client_id": "XXXXXXXXXX",
"refresh_token": "XXXXXXXXXX",
"scopes": [
"XXXXXXXXXX"
],
"client_secret": "XXXXXXXXXX"
}

Register the Device

https://developers.google.com/assistant/sdk/guides/library/python/embed/register-device →ドキュメントに沿って実施。 SDKのバージョン0.4.0から追加された手順と思います。

(shrink_venv) [centos@localhost ~]$ googlesamples-assistant-devicetool register-model --manufacturer "Assistant SDK developer" \
--product-name "Alexa-GoogleAssistant-Skill" --type LIGHT --model Alexa-GoogleAssistant-Skill-Model

--manufacturerはサンプルのまま、--product-nameはなんでもOK?、--typeは必須なのでとりあえずLIGHT--modelはグローバルユニークな文字列である必要があるようです。

モデル名について

Note that this name must be globally unique so you should use your Google Developer Project ID as a prefix to help avoid collisions (for example, my-dev-project-my-model1).

Run the Sample Code

https://developers.google.com/assistant/sdk/guides/library/python/embed/run-sample サンプルを実行します。

(shrink_venv) [centos@localhost ~]$ googlesamples-assistant-hotword --project_id Alexa-GoogleAssistant-Skill --device_model_id Alexa-GoogleAssistant-Skill-Model
device_model_id: Alexa-GoogleAssistant-Skill-Model
device_id: XXXXXXXXXX

...

--project_idはGoogle Developer上で作成したプロジェクト名、--device_model_idは先程決めたモデル名です。 初回実行時にデバイスIDが自動生成されるようです。 このデバイスIDは後ほど必要になります。

マイクに向かってOK Googleというと反応すると思います。 今回はLambda化が目的なので、Ctrl+cで抜けて問題ありません。

Google Assistant SDKの日本語対応

https://developers.google.com/assistant/sdk/guides/assistant-settings ドキュメントが上の手順からの続きではありませんのでご注意。

デバイス登録がうまくできると、AndroidアプリのGoogleアシスタントの設定に登録したデバイスが表示されます。 そのデバイスの設定で、言語設定ができます。 たぶん。

また、SDKの呼び出しパラメーターにlang設定があるので、ja-JPを設定すると、日本語で返事をしてくれます。

以上でGoogle Assistant SDKのセットアップは完了です。

Lambdaファンクションの作成

Google Assistant SDKのサンプル

ドキュメントには記載がないのですが、サンプルの中に、音声ではなくテキストを入力してテキストを返すものが含まれていました。

(shrink_venv) [centos@localhost ~]$ python -m googlesamples.assistant.grpc.textinput --device-model-id [デバイスモデルID] --device-id [デバイスID]
E1230 11:54:46.796841462 2399 ev_epollex_linux.cc:1482] Skipping epollex becuase GRPC_LINUX_EPOLL is not defined.
E1230 11:54:46.796894329 2399 ev_epoll1_linux.cc:1261] Skipping epoll1 becuase GRPC_LINUX_EPOLL is not defined.
E1230 11:54:46.796909730 2399 ev_epollsig_linux.cc:1761] Skipping epollsig becuase GRPC_LINUX_EPOLL is not defined.
INFO:root:Connecting to embeddedassistant.googleapis.com
: Hello
Hello
<@assistant> What can I do for you?
: What time is it now
What time is it now
<@assistant> It's 11:55.
: Good bye
Good bye
<@assistant> Goodbye
: ^CAborted!
(shrink_venv) [centos@localhost ~]$

ソースはGitHubにありましたので、これを改良してLambda化を目指します。 https://github.com/googlesamples/assistant-sdk-python/blob/master/google-assistant-sdk/googlesamples/assistant/grpc/textinput.py

textinputサンプルからの変更点

以下の点を変更します。

  • サンプルではCtrl+cで抜けるまでやり取りが続けられましたが、1回の応答で処理を終了するように変更
  • デバイスモデル名、デバイスIDを環境変数で指定できるように変更
  • credentials.jsonについてはファイルパスではなくてjson文字列を環境変数で指定できるように変更
  • (当然ですが)Lambdaの作法に合わせる対応
  • (当然ですが)Alexaからのリクエストを受けれるように、また、Alexaの求めるレスポンスが返せるように変更

Lambdaファンクション

出来上がったソースがこちら。 ソース全体はこちら

---省略---
credentials_json = os.getenv('GA_CREDENTIALS','{"token_uri": "token_uri", "client_id": "client_id", "refresh_token": "refresh_token", "scopes": ["scopes"], "client_secret": "client_secret"}')
lang = os.getenv('GA_LANG', 'en-US') # en-US, ja-JP
device_model_id = os.getenv('GA_DEVICE_MODEL_ID', 'XXXXX')
device_id = os.getenv('GA_DEVICE_ID', 'XXXXX')
error_msg=os.getenv('GA_ERROR_MSG', 'No Response')
---省略---

def assist(text_query):
credentials = google.oauth2.credentials.Credentials(token=None,
**json.loads(credentials_json))
http_request = google.auth.transport.requests.Request()
credentials.refresh(http_request)

# Create an authorized gRPC channel.
grpc_channel = google.auth.transport.grpc.secure_authorized_channel(
credentials, http_request, api_endpoint)

with textinput.SampleTextAssistant(lang, device_model_id, device_id,
grpc_channel, grpc_deadline) as assistant:
text_response = assistant.assist(text_query=text_query)
return text_response

---省略---

def lambda_handler(event, context):
text_query=text_query=event['request']['intent']['slots']['q']['value']
logging.info('Query text is %s', text_query)

text_response = assist(text_query=text_query)
if text_response == None:
logging.info('Response text is None')
text_response = error_msg

logging.info('Response text is %s', text_response)

session_attributes={}
card_title=text_query+' -> ' + text_response
speech_output=text_response
reprompt_text=text_response
should_end_session=True

return build_response(session_attributes, build_speechlet_response(
card_title, speech_output, reprompt_text, should_end_session))

---省略---

デプロイパッケージの作成

AWSのドキュメントを参考にしました。 https://docs.aws.amazon.com/ja_jp/lambda/latest/dg/with-s3-example-deployment-pkg.html

(shrink_venv) [centos@localhost ~]$ cd $VIRTUAL_ENV
(shrink_venv) [centos@localhost shrink_venv]$ cd lib/python3.6/site-packages/
/home/ubuntu/env
(shrink_venv) [centos@localhost site-packages]$ zip -r9 ~/DeployPackage.zip *
(shrink_venv) [centos@localhost site-packages]$ cd ~
(shrink_venv) [centos@localhost ~]$ zip -g ~/DeployPackage.zip lambda_function.py

作成したzipファイルをマネジメントコンソールからアップロードし、Lambdaファンクションとして登録します。

終わりに

  • 複数回の会話のやり取りはできません。改良の余地あり
  • 応答が複数に別れる場合に最後の部分しか返答がありません。SDKの仕様?
  • となりにおいていたAndroidスマホも「オーケーグーグル」に反応して同じ答えを返します(声は違うけど)。😀
  • 結局、天気を聞くぐらいしか用途がありません。😀

· 約3分
moritalous
お知らせ

過去にQiitaに投稿した内容のアーカイブです。

(2017/12/21更新) 12/19の更新で、公式に日本語に対応したようです。 https://github.com/alexa/alexa-avs-sample-app/commit/f78290baf141c53604ed3ee79ffd8fb1a74fad37

そのため、この記事は用無しとなりました。

今まで見てくださった1206名の皆様、いいねをくださった10名の皆様、ありがとうございました!


本日(11/15)からAmazon Echo購入の招待メールが配信されているようですが、私のところにまだ来ていません。 悔しいので、alexa-avs-sample-appを日本語化してみました。

公式サイト

【GitHub】 https://github.com/alexa/alexa-avs-sample-app

【Quick Start Guides】 Raspberry Pi https://github.com/alexa/alexa-avs-sample-app/wiki/Raspberry-Pi

Windows https://github.com/alexa/alexa-avs-sample-app/wiki/Windows

日本語化の方法

Raspberry piでは以前導入したことがあったので、今回はWindowsに導入しました。 導入手順は、上記Quick Start Guidesのとおりです。

ただ、そのままでは、Javaのアプリ(Alexa Voice Service Sample Java Client)が日本語に対応しておらず、日本語が選べないので、少しだけ細工します。 mvn installを実行する前に、変更します。

設定ファイル

samples\javaclient\config.json

-"locale":"en-US",
+"locale":"ja-JP",

Javaソース

samples\javaclient\src\main\java\com\amazon\alexa\avs\config\DeviceConfig.java

 public class DeviceConfig {
private static final String DEFAULT_HOST = "https://avs-alexa-na.amazon.com";
public static final String FILE_NAME = "config.json";
private static final List<Locale> SUPPORTED_LOCALES = new ArrayList<>();
static {
SUPPORTED_LOCALES.add(Locale.US);
SUPPORTED_LOCALES.add(Locale.UK);
SUPPORTED_LOCALES.add(Locale.GERMANY);
+ SUPPORTED_LOCALES.add(Locale.JAPAN);
}

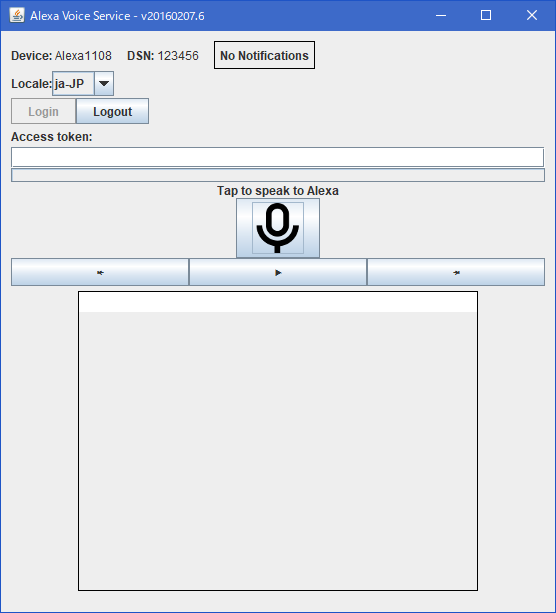
こんだけ。 成功すれば、Localeja-JPに設定できるようになります。

キャプチャ.PNG

色々やってみた

Google PlayからAmazon Alexaアプリをインストールしてスキルを追加してみました。

  • 天気予報
  • radiko.jp
  • ピカチュウトーク

全部動きました!Echo買わなくても一通りのことができそう!!

QiitaでAlexa関連のサイト

Skill作って見ようと思います。

Amazon Echo を日本語でセットアップする。  https://qiita.com/takustaqu/items/10d2fb58dbcbf94b1304 Raspberry Pi2 で Alexaに話してみる  https://qiita.com/areaz_/items/f181ddbbb2f53d6d98e4 Raspberry pi 2BでAmazon Alexaを動かしてみた  https://qiita.com/noimi/items/f107df4ff8b754fd0df0 Alexa Skill Kitを触ってみる  https://qiita.com/Darmuck/items/07dfd996ad4e90e1d605 はじめてのAlexa  https://qiita.com/kei_0324/items/e97fe52df9e0a91ad5bf

· 約3分
moritalous
お知らせ

過去にQiitaに投稿した内容のアーカイブです。

Raspberry Pi3じゃなくてもGoogle Assistantができるみたいなので、Raspberry Pi1で試してみました。 たぶんZeroでもできると思います。 (Zero W買えませんでした)

Python全くわかりませんが、手順に沿ったらできました。 「OK Google」は対応してないのかな?

参考サイト

ハードウェア

  • Raspberry pi1
  • スピーカー … 100均で買った
  • マイク … LogicoolのWebcam C200が手元にあった

セットアップ

Install Python 3

$ sudo apt-get update
$ sudo apt-get install python3 python3-venv

作業用ディレクトリの作成

$ cd ~
$ mkdir MyGoogleHome
$ cd MyGoogleHome
$ python3 -m venv env
$ env/bin/python -m pip install --upgrade pip setuptools
$ source env/bin/activate

OAuthクライアントIDの作成とJSONファイルの入手

https://developers.google.com/assistant/sdk/prototype/getting-started-other-platforms/config-dev-project-and-account を参考に、client_secret_<client-id>.jsonを入手。

Authorization

$ pip install --upgrade google-auth-oauthlib[tool]
$ google-oauthlib-tool --client-secrets [jsonファイル] --scope https://www.googleapis.com/auth/assistant-sdk-prototype --save --headless

コマンド実行後、「このURLにアクセスしてね」的なメッセージが出力され、コードの入力待ち状態になります。 ブラウザでURLにアクセスし、指示に従ってコードを入手。入手したコードをターミナルに貼り付ける。

サンプルプログラムの入手

$ sudo apt-get install portaudio19-dev libffi-dev libssl-dev
$ pip install --upgrade google-assistant-sdk[samples]

おそらく、google-assistant-sdkそのものもダウンロードしてくると思われます。 結構時間かかります。。。

サンプル実行

$ googlesamples-assistant-pushtotalk
$ googlesamples-assistant-pushtotalk 
INFO:root:Connecting to embeddedassistant.googleapis.com
Press Enter to send a new request... ←エンターを入力して英語で質問開始。
INFO:root:Recording audio request.
INFO:root:End of audio request detected
INFO:root:Transcript of user request: "who is the first American President". ←自動で質問が終わったことを検知して、質問した内容が出力
INFO:root:Playing assistant response. ←音声出力
INFO:root:Finished playing assistant response.
Press Enter to send a new request... ←エンター待ちになって、繰り返す

すごーい

終わりに

英語が喋れなので、AndroidのGoogle翻訳アプリに喋ってもらいました。

· 約4分
moritalous
お知らせ

過去にQiitaに投稿した内容のアーカイブです。

ブラウザからのユーザーアクセスであればamazon-cognito-identity-jsを使ってユーザーの追加、ログインは簡単にできますが、どうにかサーバーサイドでできないものか、調査しました。 Javaのプログラムからユーザー追加やログイン(トークンの取得)ができましたので紹介します。

前準備(マネジメントコンソール)

ユーザープールを作成します。ユーザーの登録以降のフローは異なりますが、ユーザープールを作成する手順まではこちらのサイトが参考になると思います。

前準備(Java)

AWS SDKを使う設定をします。Gradleの場合は、build.gradleに以下の内容を追加します。

build.gradle
    // https://mvnrepository.com/artifact/com.amazonaws/aws-java-sdk-cognitoidp
compile group: 'com.amazonaws', name: 'aws-java-sdk-cognitoidp', version: '1.11.123'

AWSCognitoIdentityProviderの作成

AWSCredentialsProviderとリージョン(今回は東京リージョン)を引数に渡して、AWSCognitoIdentityProviderを作成します。

AWSCredentialsProviderの作成方法は色々あるようですが、今回はこちらを参考にProfileCredentialsProviderを使用しました。

AWSCredentialsProvider credentialsProvider = new ProfileCredentialsProvider("プロファイル名");

AWSCognitoIdentityProvider client = AWSCognitoIdentityProviderClientBuilder.standard()
.withCredentials(credentialsProvider)
.withRegion(Regions.AP_NORTHEAST_1)
.build();

ユーザーの新規作成

ユーザーを新規作成します。 ユーザープールIDはマネジメントコンソールで確認できます。

AdminCreateUserRequest adminCreateUserRequest = new AdminCreateUserRequest();
adminCreateUserRequest
.withUserPoolId("ユーザープールID")
.withUsername("新規作成するユーザーのユーザー名")
.withTemporaryPassword("新規作成するユーザーの一時パスワード");
AdminCreateUserResult response = client.adminCreateUser(adminCreateUserRequest);

トークンの取得

ユーザーIDとパスワードを使ってトークンを取得します。クライアントIDはマネジメントコンソール上の「Apps」のところにあります。 ※Appsの設定のEnable sign-in API for server-based authentication (ADMIN_NO_SRP_AUTH)は有効になっている必要があります。

Map<String, String> authParameters = new HashMap<>();
authParameters.put("USERNAME", "ユーザー名");
authParameters.put("PASSWORD", "パスワード");

AdminInitiateAuthRequest request = new AdminInitiateAuthRequest();
request
.withAuthFlow(AuthFlowType.ADMIN_NO_SRP_AUTH)
.withUserPoolId("ユーザープールID")
.withClientId("クライアントID")
.withAuthParameters(authParameters);

AdminInitiateAuthResult response = client.adminInitiateAuth(request);

成功するとトークンが取得できます。(加工しています)

System.out.println(response.getAuthenticationResult().toString());
トークン取得成功時
{
AccessToken: xxxxx,
ExpiresIn: 3600,
TokenType: Bearer,
RefreshToken: yyyyy,
IdToken: zzzzz,
}

ただし、新規作成したばかりのユーザーは、パスワード変更の必要があるため、トークンは取得できません。その場合、ChallengeNameが「NEW_PASSWORD_REQUIRED」となってしまいますので、次の一時パスワード変更を行います。 (トークン取得成功時はChallengeNameがnull、トークン取得失敗時はAuthenticationResultがnullになるようです)

System.out.println(response.getChallengeName());
トークン取得失敗時
NEW_PASSWORD_REQUIRED

一時パスワード変更

一時パスワード変更処理です。adminInitiateAuthのレスポンスで受け取るChallengeNameとSessionが必要になります。

Map<String, String> challengeResponses = new HashMap<>();
challengeResponses.put("USERNAME", "ユーザー名");
challengeResponses.put("NEW_PASSWORD", "変更後の新しいパスワード");

AdminRespondToAuthChallengeRequest request = new AdminRespondToAuthChallengeRequest();
request
.withChallengeName(adminInitiateAuthResult.getChallengeName())
.withUserPoolId("ユーザープールID")
.withClientId("クライアントID")
.withSession(adminInitiateAuthResult.getSession())
.withChallengeResponses(challengeResponses);

AdminRespondToAuthChallengeResult response = client.adminRespondToAuthChallenge(request);

上手く行けば、この手順を持ってトークンが取得できます。

System.out.println(response.getAuthenticationResult().toString());
{
AccessToken: xxxxx,
ExpiresIn: 3600,
TokenType: Bearer,
RefreshToken: yyyyy,
IdToken: zzzzz,
}

トークンの更新

リフレッシュトークンを使用してのトークンの更新は、トークンの取得と同様adminInitiateAuthメソッドにて行います。 authParametersの値とAuthFlowが違うだけです

Map<String, String> authParameters = new HashMap<>();
authParameters.put("REFRESH_TOKEN", "リフレッシュトークン");

AdminInitiateAuthRequest request = new AdminInitiateAuthRequest();
request
.withAuthFlow(AuthFlowType.REFRESH_TOKEN_AUTH)
.withUserPoolId("ユーザープールID")
.withClientId("クライアントID")
.withAuthParameters(authParameters);

AdminInitiateAuthResult response = client.adminInitiateAuth(request);

取得したトークンの利用方法など

勉強中です。

· 約5分
moritalous
お知らせ

過去にQiitaに投稿した内容のアーカイブです。

AWS IoTのデータをKibanaに表示するを実際にやってみました。

記事の投稿以降、AWS IoTが直接Elasticsearch Serviceと連携できる様になったとのことで、そのあたりも試しました。

【アップデート】 AWS IoT が Elasticsearch Service と CloudWatch に連携できるようになりました https://aws.amazon.com/jp/blogs/news/aws-iot-update/

なんと、サーバー側はノンコーディングです。

Elasticsearchインスタンスを立ち上げる

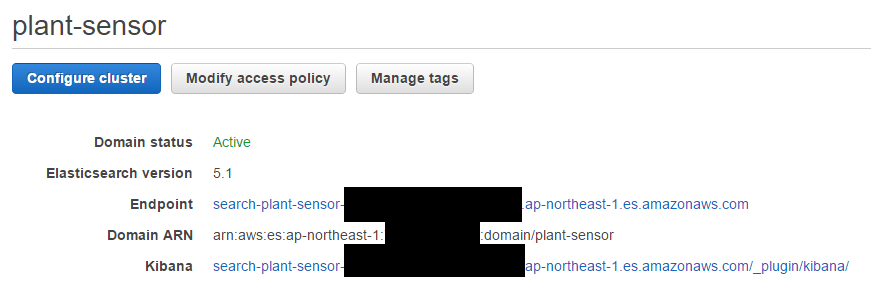
元記事と基本的に同じです。 まずは、立ち上がりが遅いElasticsearchを先に立ち上げておきましょう。 Domain nameを plant-sensor、Instance typeはt2.micro.elasticsearchが選べなかったのでt2.small.elasticsearch (Free tire eligible)、Instance countは 1、Strage typeは EBS に設定します。

image

Kibana のURLをクリックするとKibana4の画面が表示されます。EndpointのURLはAWS IoTで使います(自動で設定されます)。

AWS IoTでThingやRuleを作成

元記事の通りしようとしても、画面構成が違うのか、メニューが見つかりません。なので、順を追って解説します。

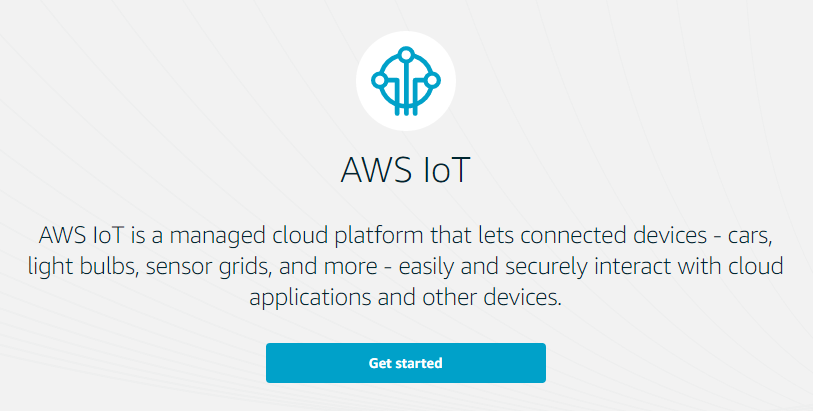
image (こんな感じでしたっけ?)

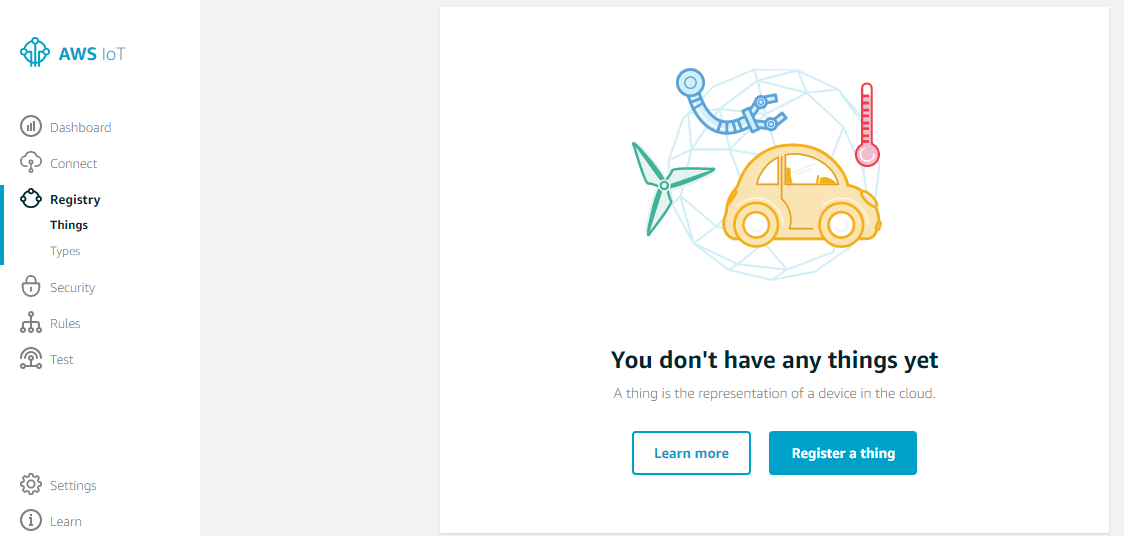
「Get started」を押します。そして、左メニューの[Registory]->[Things]を選択します。 「Register a thing」を押します。

image

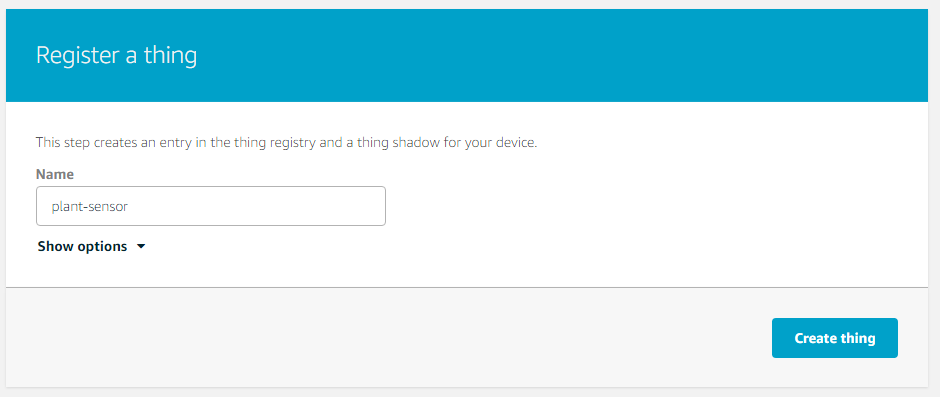
plant-sensor という名前のThingを作成。

image

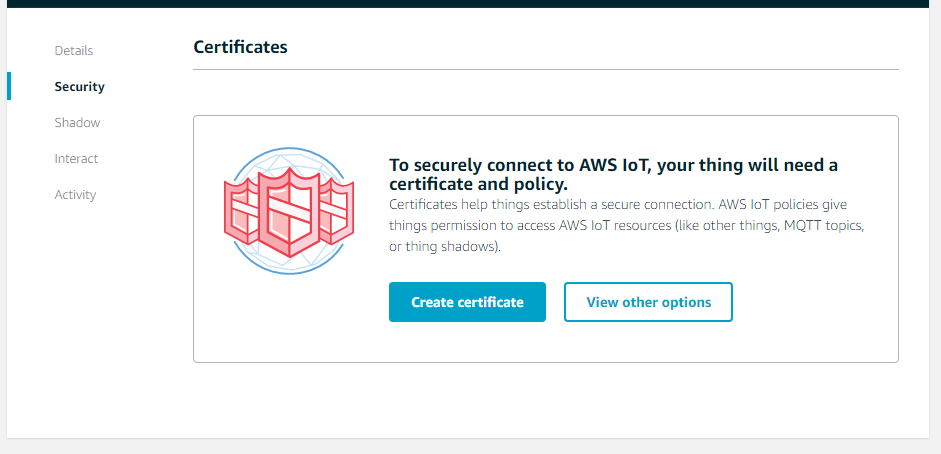
左メニューの[Security]を選び、「Create certificate」を選択します。

image

色々ダウンロードできますので、一旦すべてダウンロードした後、「Activate」を押します。

ダウンロードできるもの

  • A certificate for this thing
  • A public key
  • A private key
  • A root CA for AWS IoT

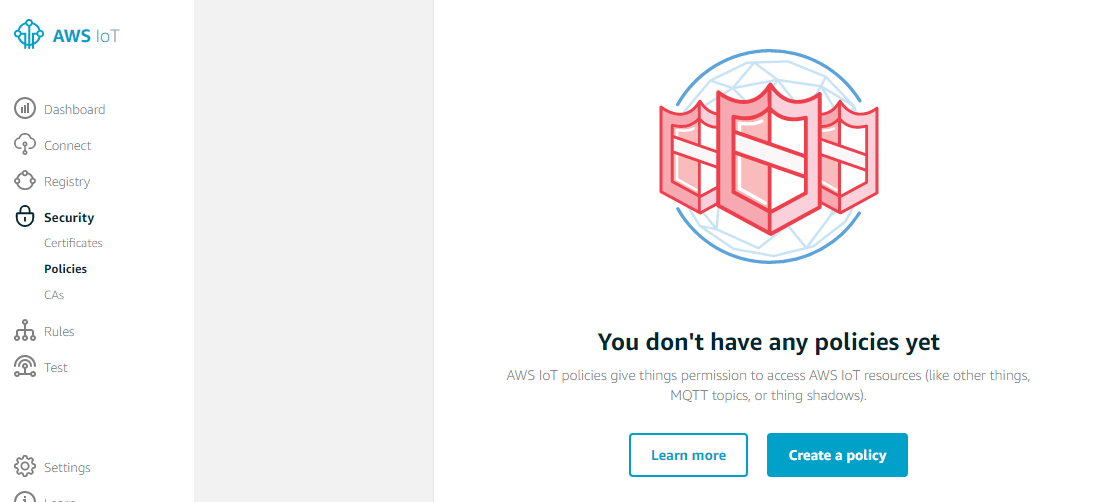
続いてPolicyを作成。トップ画面の左メニューの[Policies]を選び、「Create a Policy」を選択します。

image

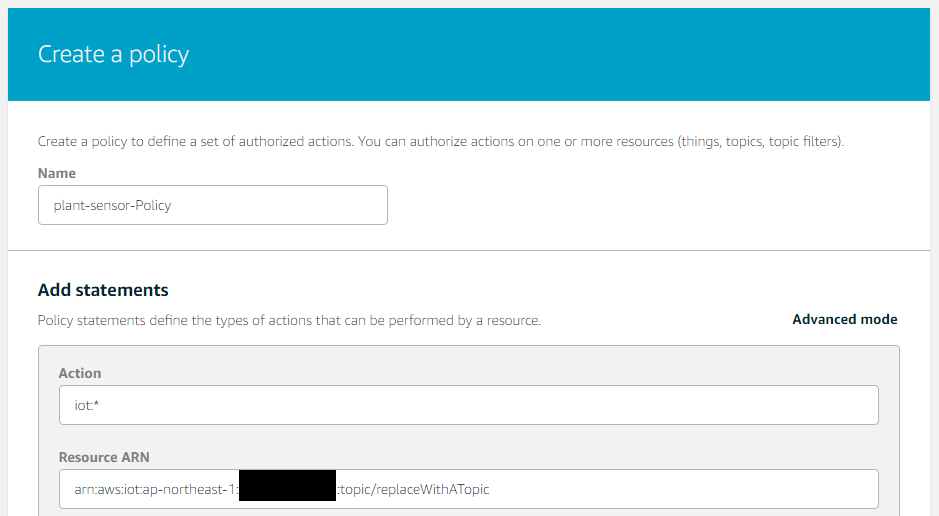
名前をつけ、とりあえずActionはiot:*としました。Resource ARNについてですが、キャプチャではtopic/replaceWithATopicとなってますが、plant/sensorsまたは*/*などに変えましょう。

image image

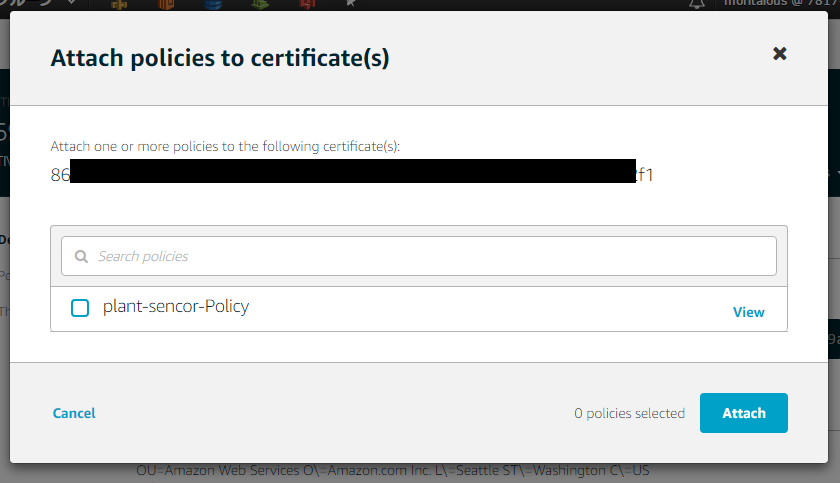
certificateとPolicyの紐付け 左メニューの[Certificates]を再度選び、先程作成したceritificateを選択。「Actions」メニューの「Attatch policy」を選ぶ。

image

同様に、「Attatch thing」も行います。

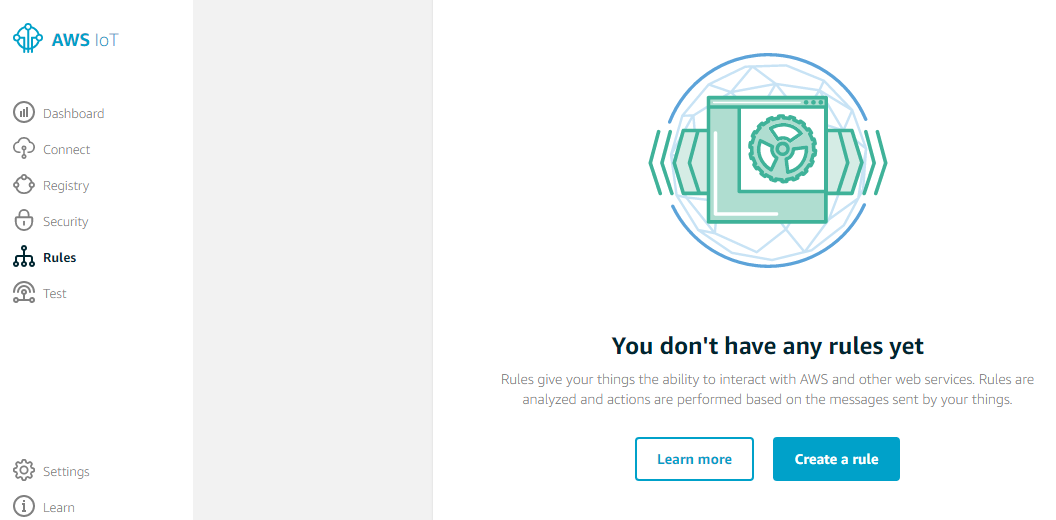
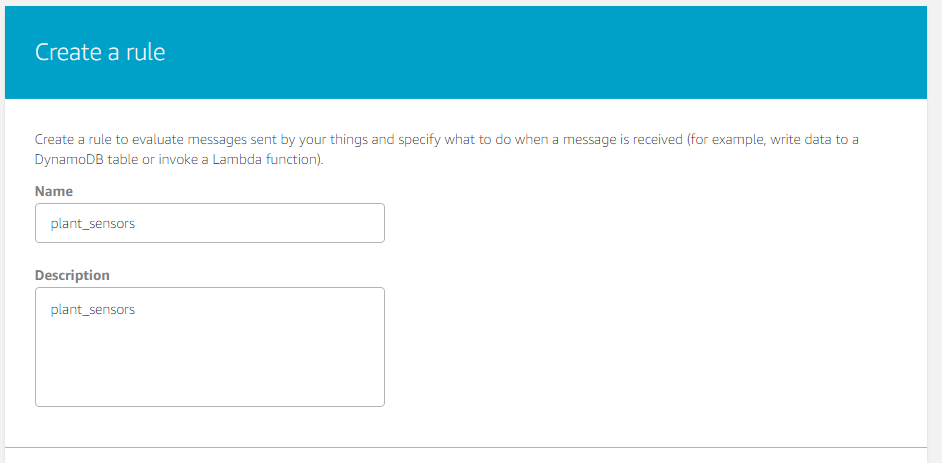
最後にRuleを作成します。トップ画面の左メニューの[Rules]を選び、「Create a rule」を選択します。

image

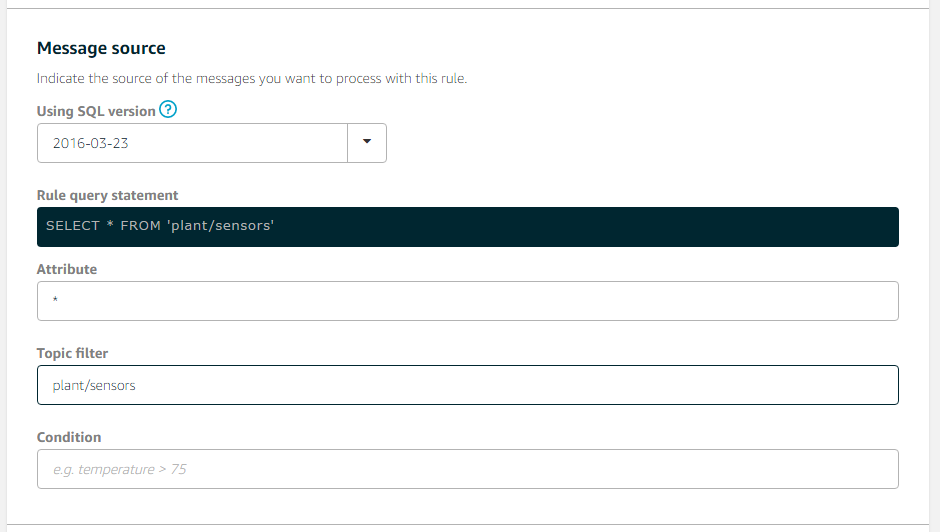
今回は plant/sensors というトピック名でデータを飛ばそうと思うので、Topic filterに plant/sensors を設定します。

image

image

Actionの指定は、「Add Action」ボタンを押して行います。

image

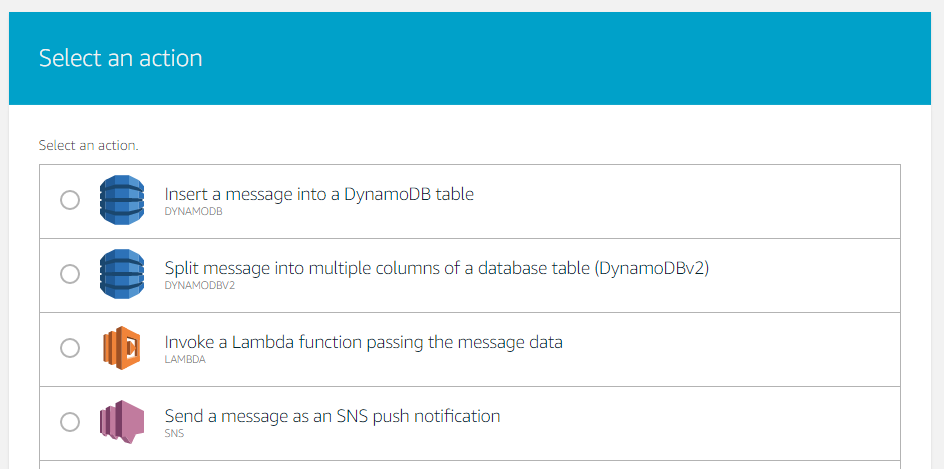
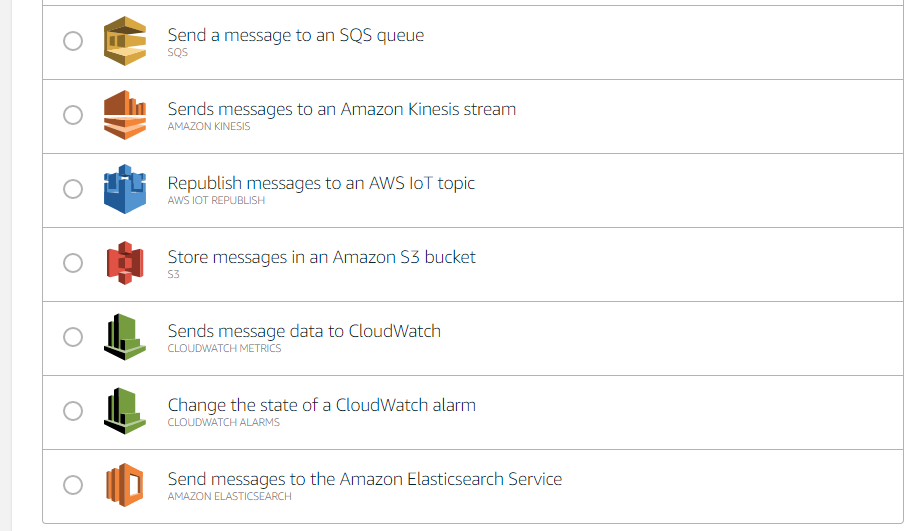
2017/3/14時点で以下のActionが選べます。一番下の「Elasticsearch Service」を選びます。

image image

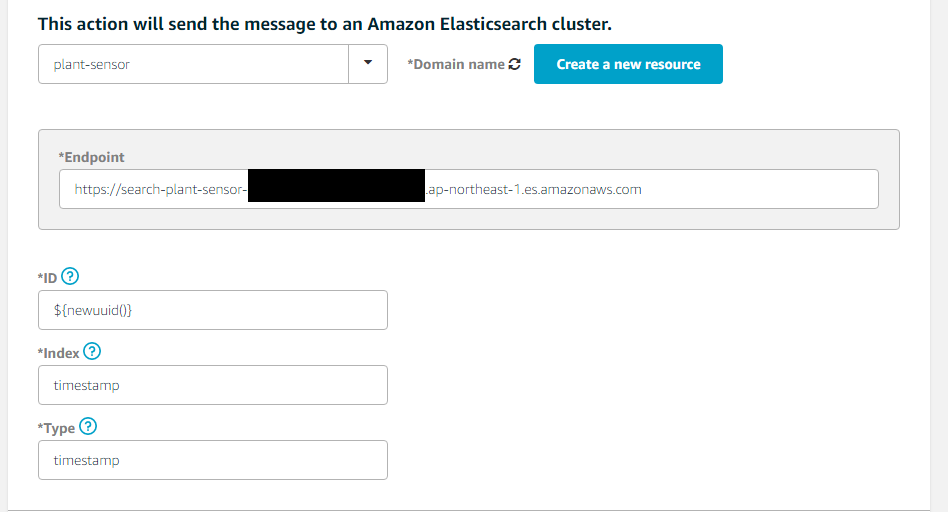
Elasticsearch Service用の設定画面が出ます。 IDに${newuuid()}、Indexにtimestamp、Typeにtimestampと指定し、IAMロールも追加します。

image

これで、Thing, Certificate, Policy, Ruleが作成できました。元記事のように一覧では表示されないようです。

仮想的なIoTデバイスを作成

元記事の通り、plant-sensor.jsを作成します。 そして実行です。

実行してみましょう。

$ npm init
$ npm install --save aws-iot-device-sdk
$ node plant-sensor.js
connect
{"timestamp":"2017-03-14T15:19:47.401Z","humidity":45,"temperature":19,"lux":32701,"moisture":309}
{"timestamp":"2017-03-14T15:19:48.405Z","humidity":43,"temperature":19,"lux":33473,"moisture":309}
{"timestamp":"2017-03-14T15:19:49.406Z","humidity":44,"temperature":19,"lux":30713,"moisture":295}
{"timestamp":"2017-03-14T15:19:50.408Z","humidity":42,"temperature":20,"lux":31499,"moisture":296}
{"timestamp":"2017-03-14T15:19:51.414Z","humidity":46,"temperature":20,"lux":30687,"moisture":315}
{"timestamp":"2017-03-14T15:19:52.417Z","humidity":46,"temperature":20,"lux":31960,"moisture":302}
{"timestamp":"2017-03-14T15:19:53.420Z","humidity":45,"temperature":20,"lux":30782,"moisture":301}

Kibanaでダッシュボードを作成する

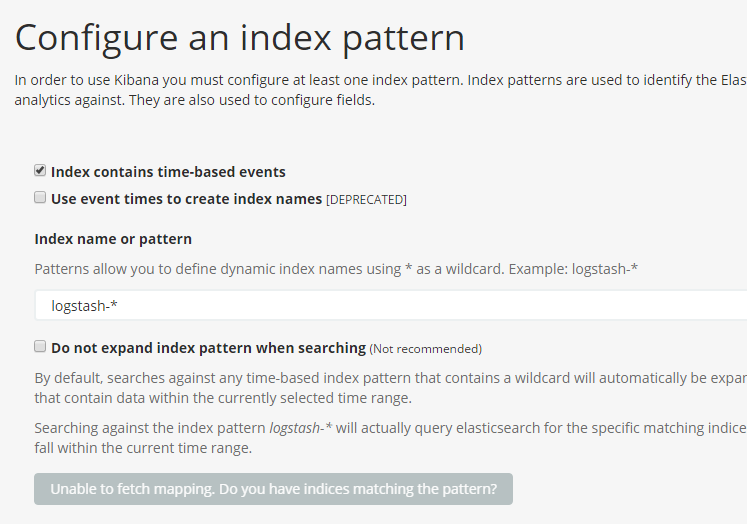
Kibanaを起動すると、エラー画面のような形となりますが、初期設定ができていないからだと思います。

image

Index name or patternのところにtimestampといれると、設定できます。

image

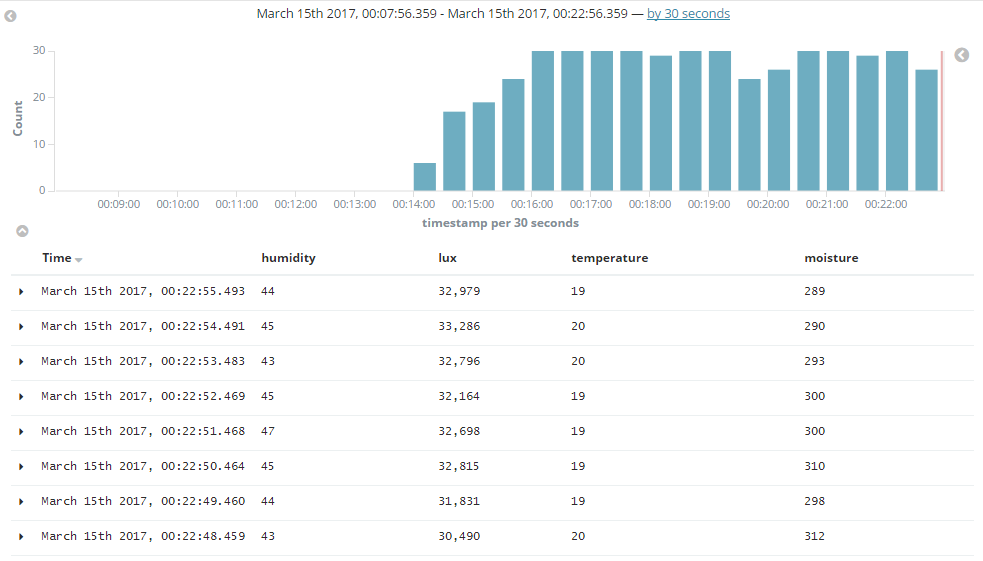
Discoverタブを見てみると、ちゃんとデータが来ているのを確認できます。

image

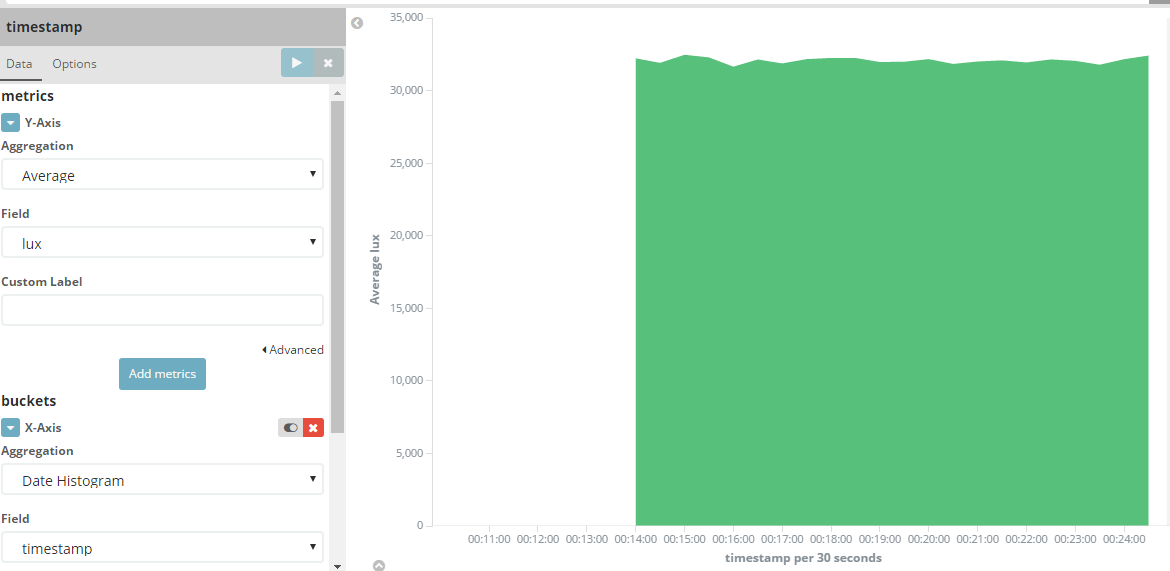
では、チャートを作ってみましょう。Visualizeタブで、以下の様な感じでグラフを作成します。

image

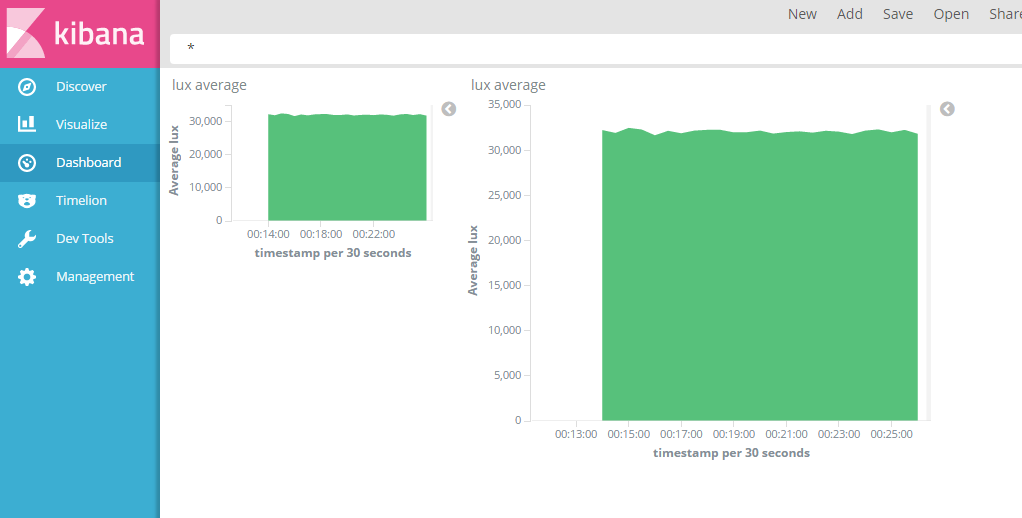
最後にダッシュボードを作成します。Dashboardタブを選択して、Add visualization で先ほど作成したチャートをポンポンと選択していくだけです!

image

終わりに

元記事を作成された、@hideyuki さん、勝手に更新版を投稿してしまいました。ありがとうございます。