- Windows 10 Pro 21H2
Log4Shellに脆弱な環境をSpring Bootでつくる
過去にQiitaに投稿した内容のアーカイブです。
勉強がてら、話題のLog4Shellに脆弱な環境を作ってみます。 Log4j2のバージョン2.14.0を使っていると簡単に脆弱な環境を作れました。すぐにバージョンアップしないと危険です!
脆弱性に対するSpring公式サイトの解説
https://spring.io/blog/2021/12/10/log4j2-vulnerability-and-spring-boot
題材
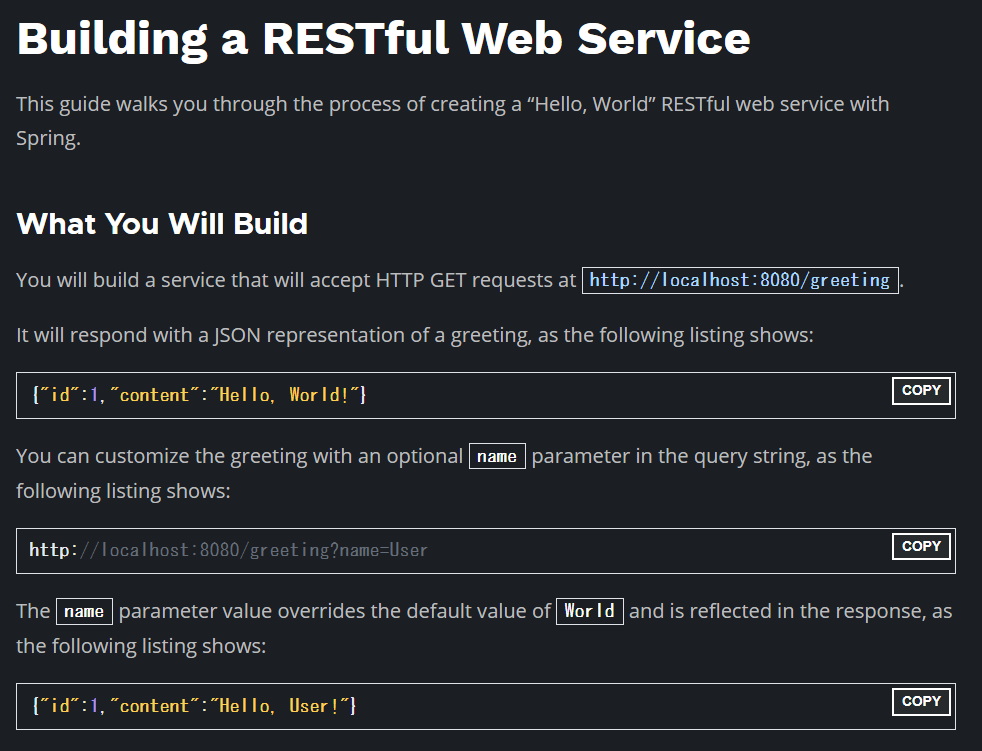
公式のGetting Started Guidesの中にあるBuilding a RESTful Web Serviceをベースにします。
- GitHubからソースコードの取得
https://github.com/spring-guides/gs-rest-service/archive/main.zip
completeフォルダー内に完成したソースが含まれます。
│  build.gradle
│  gradlew
│  gradlew.bat
│  manifest.yml
│  mvnw
│  mvnw.cmd
│  pom.xml
│  settings.gradle
│
├─.mvn
│  └─wrapper
│          maven-wrapper.jar
│          maven-wrapper.properties
│
├─gradle
│  └─wrapper
│          gradle-wrapper.jar
│          gradle-wrapper.properties
│
└─src
    ├─main
    │  └─java
    │      └─com
    │          └─example
    │              └─restservice
    │                      Greeting.java
    │                      GreetingController.java
    │                      RestServiceApplication.java
    │
    └─test
        └─java
            └─com
                └─example
                    └─restservice
                            GreetingControllerTests.java
ログ出力にLog4J2を使うように修正
Log4j2を使うように変更します。バージョンは脆弱性のある2.14.0です。
https://docs.spring.io/spring-boot/docs/current/reference/html/howto.html#howto.logging.log4j
<?xml version="1.0" encoding="UTF-8"?>
<project xmlns="http://maven.apache.org/POM/4.0.0" xmlns:xsi="http://www.w3.org/2001/XMLSchema-instance" xsi:schemaLocation="http://maven.apache.org/POM/4.0.0 https://maven.apache.org/xsd/maven-4.0.0.xsd">
    <modelVersion>4.0.0</modelVersion>
    <parent>
        <groupId>org.springframework.boot</groupId>
        <artifactId>spring-boot-starter-parent</artifactId>
        <version>2.5.2</version>
        <relativePath /> <!-- lookup parent from repository -->
    </parent>
    <groupId>com.example</groupId>
    <artifactId>rest-service-complete</artifactId>
    <version>0.0.1-SNAPSHOT</version>
    <name>rest-service-complete</name>
    <description>Demo project for Spring Boot</description>
    <properties>
        <java.version>1.8</java.version>
+       <log4j2.version>2.14.0</log4j2.version>
    </properties>
    <dependencies>
        <dependency>
            <groupId>org.springframework.boot</groupId>
            <artifactId>spring-boot-starter-web</artifactId>
        </dependency>
        <dependency>
            <groupId>org.springframework.boot</groupId>
            <artifactId>spring-boot-starter-test</artifactId>
            <scope>test</scope>
        </dependency>
+       <dependency>
+           <groupId>org.springframework.boot</groupId>
+           <artifactId>spring-boot-starter</artifactId>
+           <exclusions>
+               <exclusion>
+                   <groupId>org.springframework.boot</groupId>
+                   <artifactId>spring-boot-starter-logging</artifactId>
+               </exclusion>
+           </exclusions>
+       </dependency>
        <dependency>
            <groupId>org.springframework.boot</groupId>
            <artifactId>spring-boot-starter-log4j2</artifactId>
        </dependency>
    </dependencies>

    <build>
        <plugins>
            <plugin>
                <groupId>org.springframework.boot</groupId>
                <artifactId>spring-boot-maven-plugin</artifactId>
            </plugin>
        </plugins>
    </build>

</project>
HTTPリクエストのHTTPヘッダーをログ出力するように変更
package com.example.restservice;

import java.util.concurrent.atomic.AtomicLong;

import org.springframework.web.bind.annotation.GetMapping;
import org.springframework.web.bind.annotation.RequestParam;
import org.springframework.web.bind.annotation.RestController;


+ import java.util.Map;
+ import org.slf4j.Logger;
+ import org.slf4j.LoggerFactory;
+ import org.springframework.web.bind.annotation.RequestHeader;


@RestController
public class GreetingController {


+   static protected Logger logger = LoggerFactory.getLogger(GreetingController.class);

    private static final String template = "Hello, %s!";
    private final AtomicLong counter = new AtomicLong();

    @GetMapping("/greeting")
-   public Greeting greeting(@RequestParam(value = "name", defaultValue = "World") String name) {
+   public Greeting greeting(@RequestParam(value = "name", defaultValue = "World") String name,
+           @RequestHeader Map<String, String> headers) {
+
+       headers.forEach((key, value) -> {
+           logger.info(String.format("Header '%s' = %s", key, value));
+       });

        return new Greeting(counter.incrementAndGet(), String.format(template, name));
    }
}
なんとこれだけで、脆弱です。
起動します。
./mvnw spring-boot:run
確認
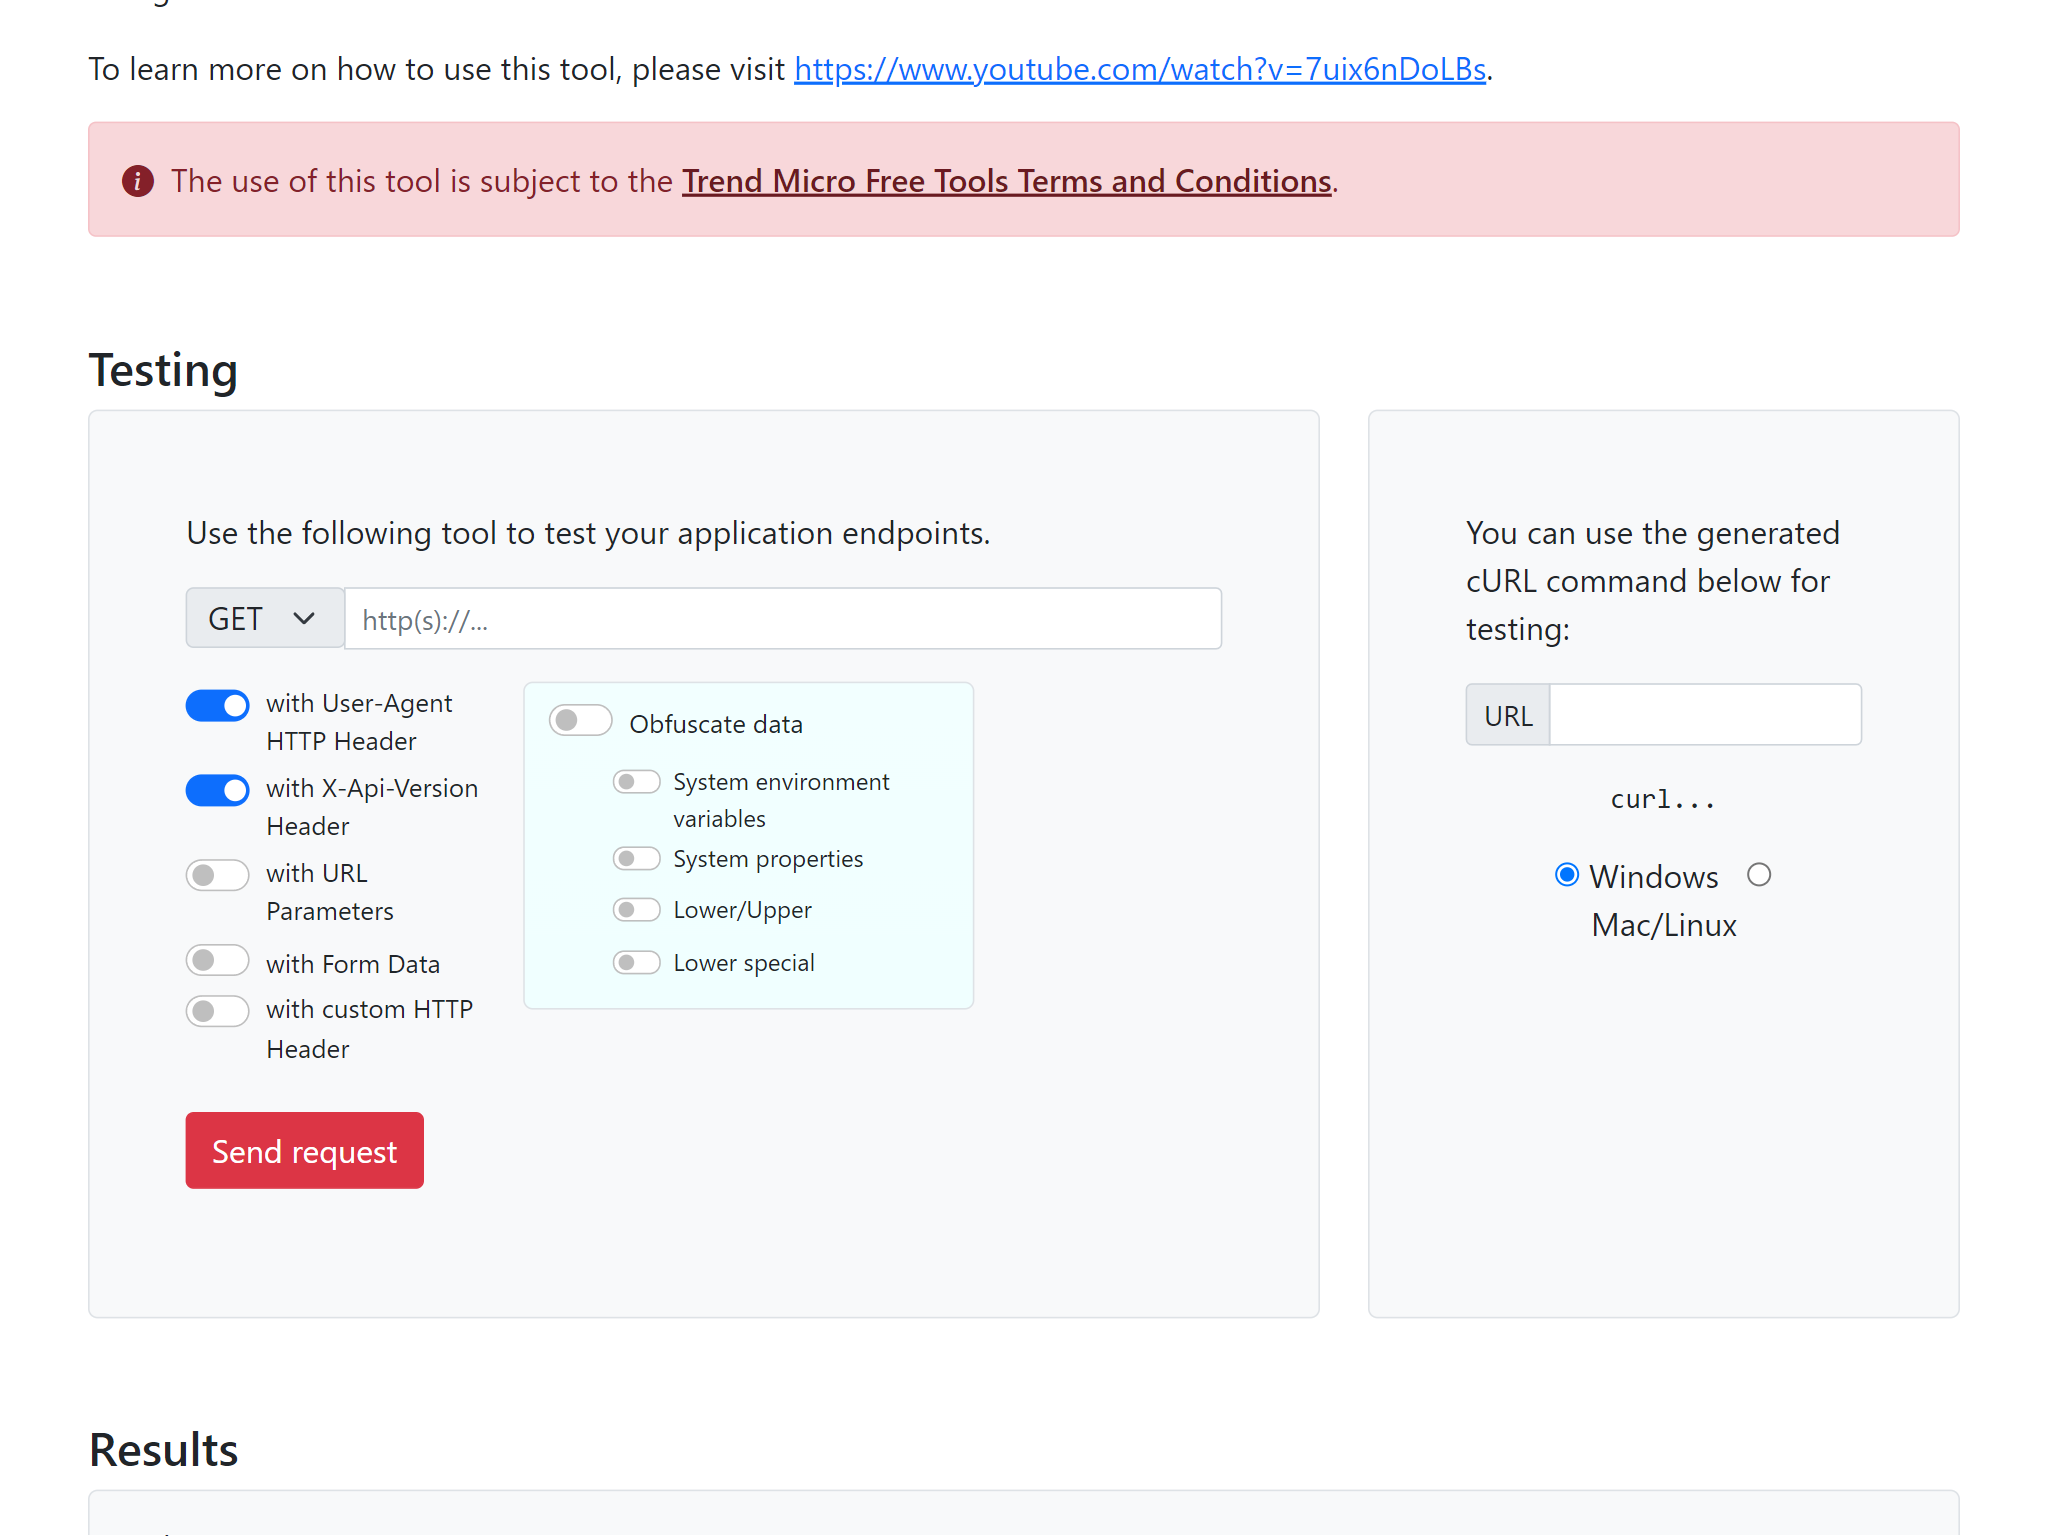
トレンドマイクロさんが、チェックサイトを用意しているのを見つけましたので、これを使って確認してみます。
https://log4j-tester.trendmicro.com/
こんな感じで、サイトから直接リクエストを投げてチェックできます。 今回はlocalhostで起動しているので、右側のcURLスクリプトを生成して、実行します。
結果はこんな感じで表示されます。
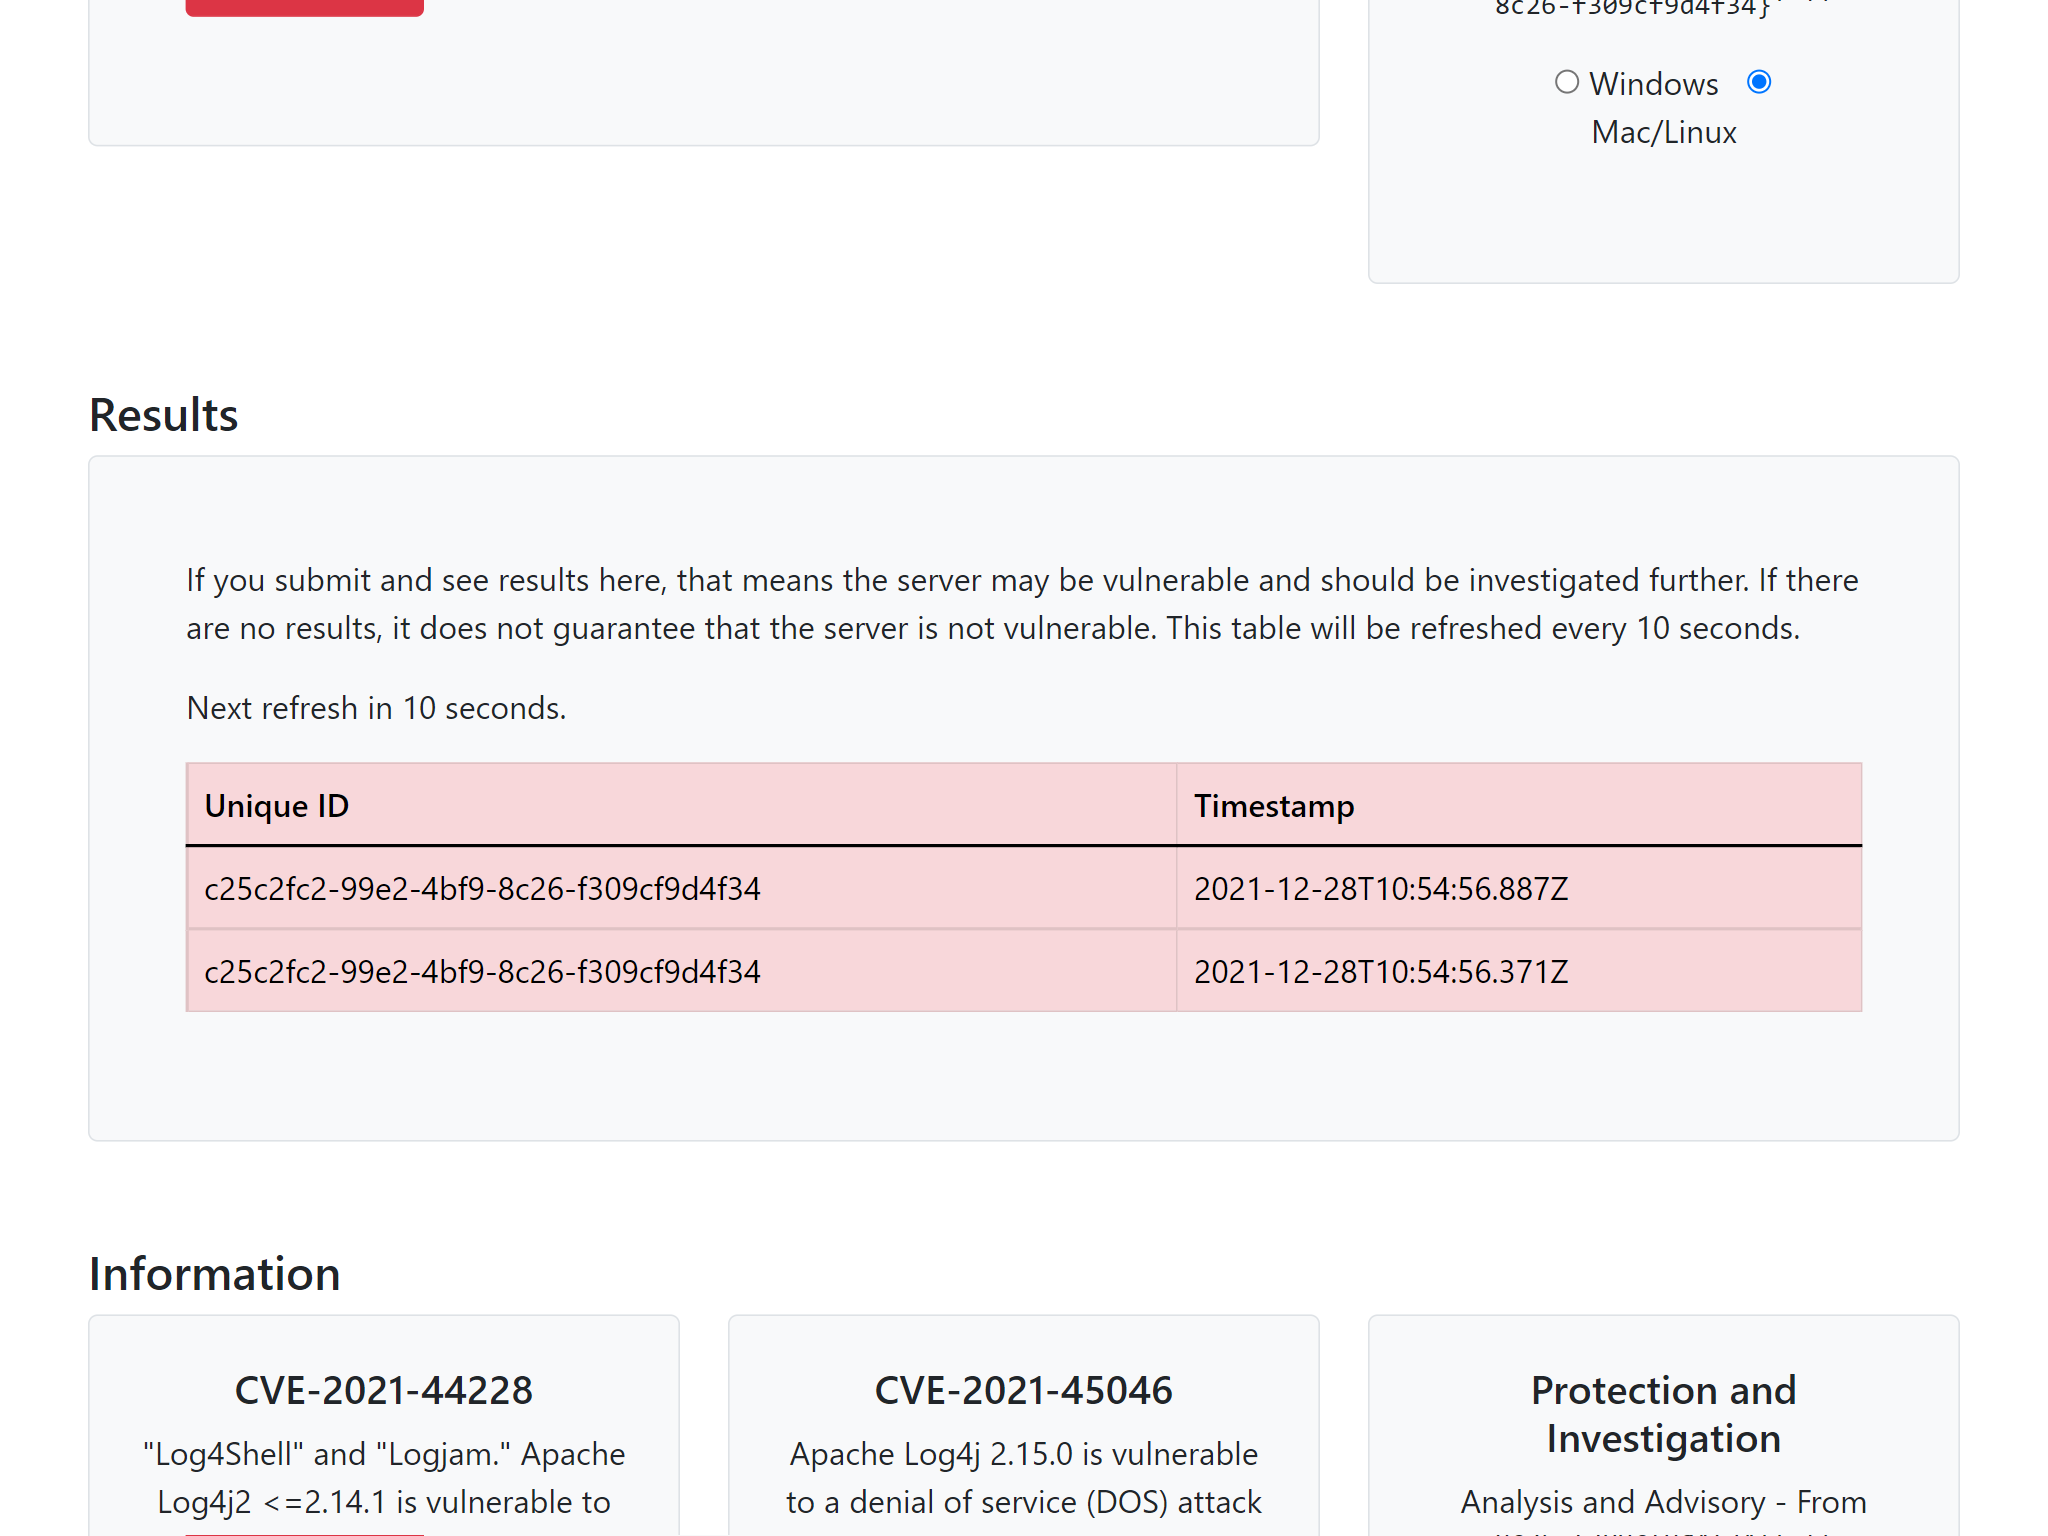
Log4J2の2.14.0を使っていると脆弱であることがわかります。
pom.xmlのバージョンを2.15.0にあげて再実行すると、脆弱性は検出されませんでした。
怖いですね。すぐにバージョンアップしましょう。
Amazon Managed Service for PrometheusとAmazon Managed Grafana使ってみた
過去にQiitaに投稿した内容のアーカイブです。
Amazon Managed Service for PrometheusとAmazon Managed Grafanaを使ってRaspberry Piのメトリクスを可視化してみました。(名前が長い。。そして統一感がない。。)
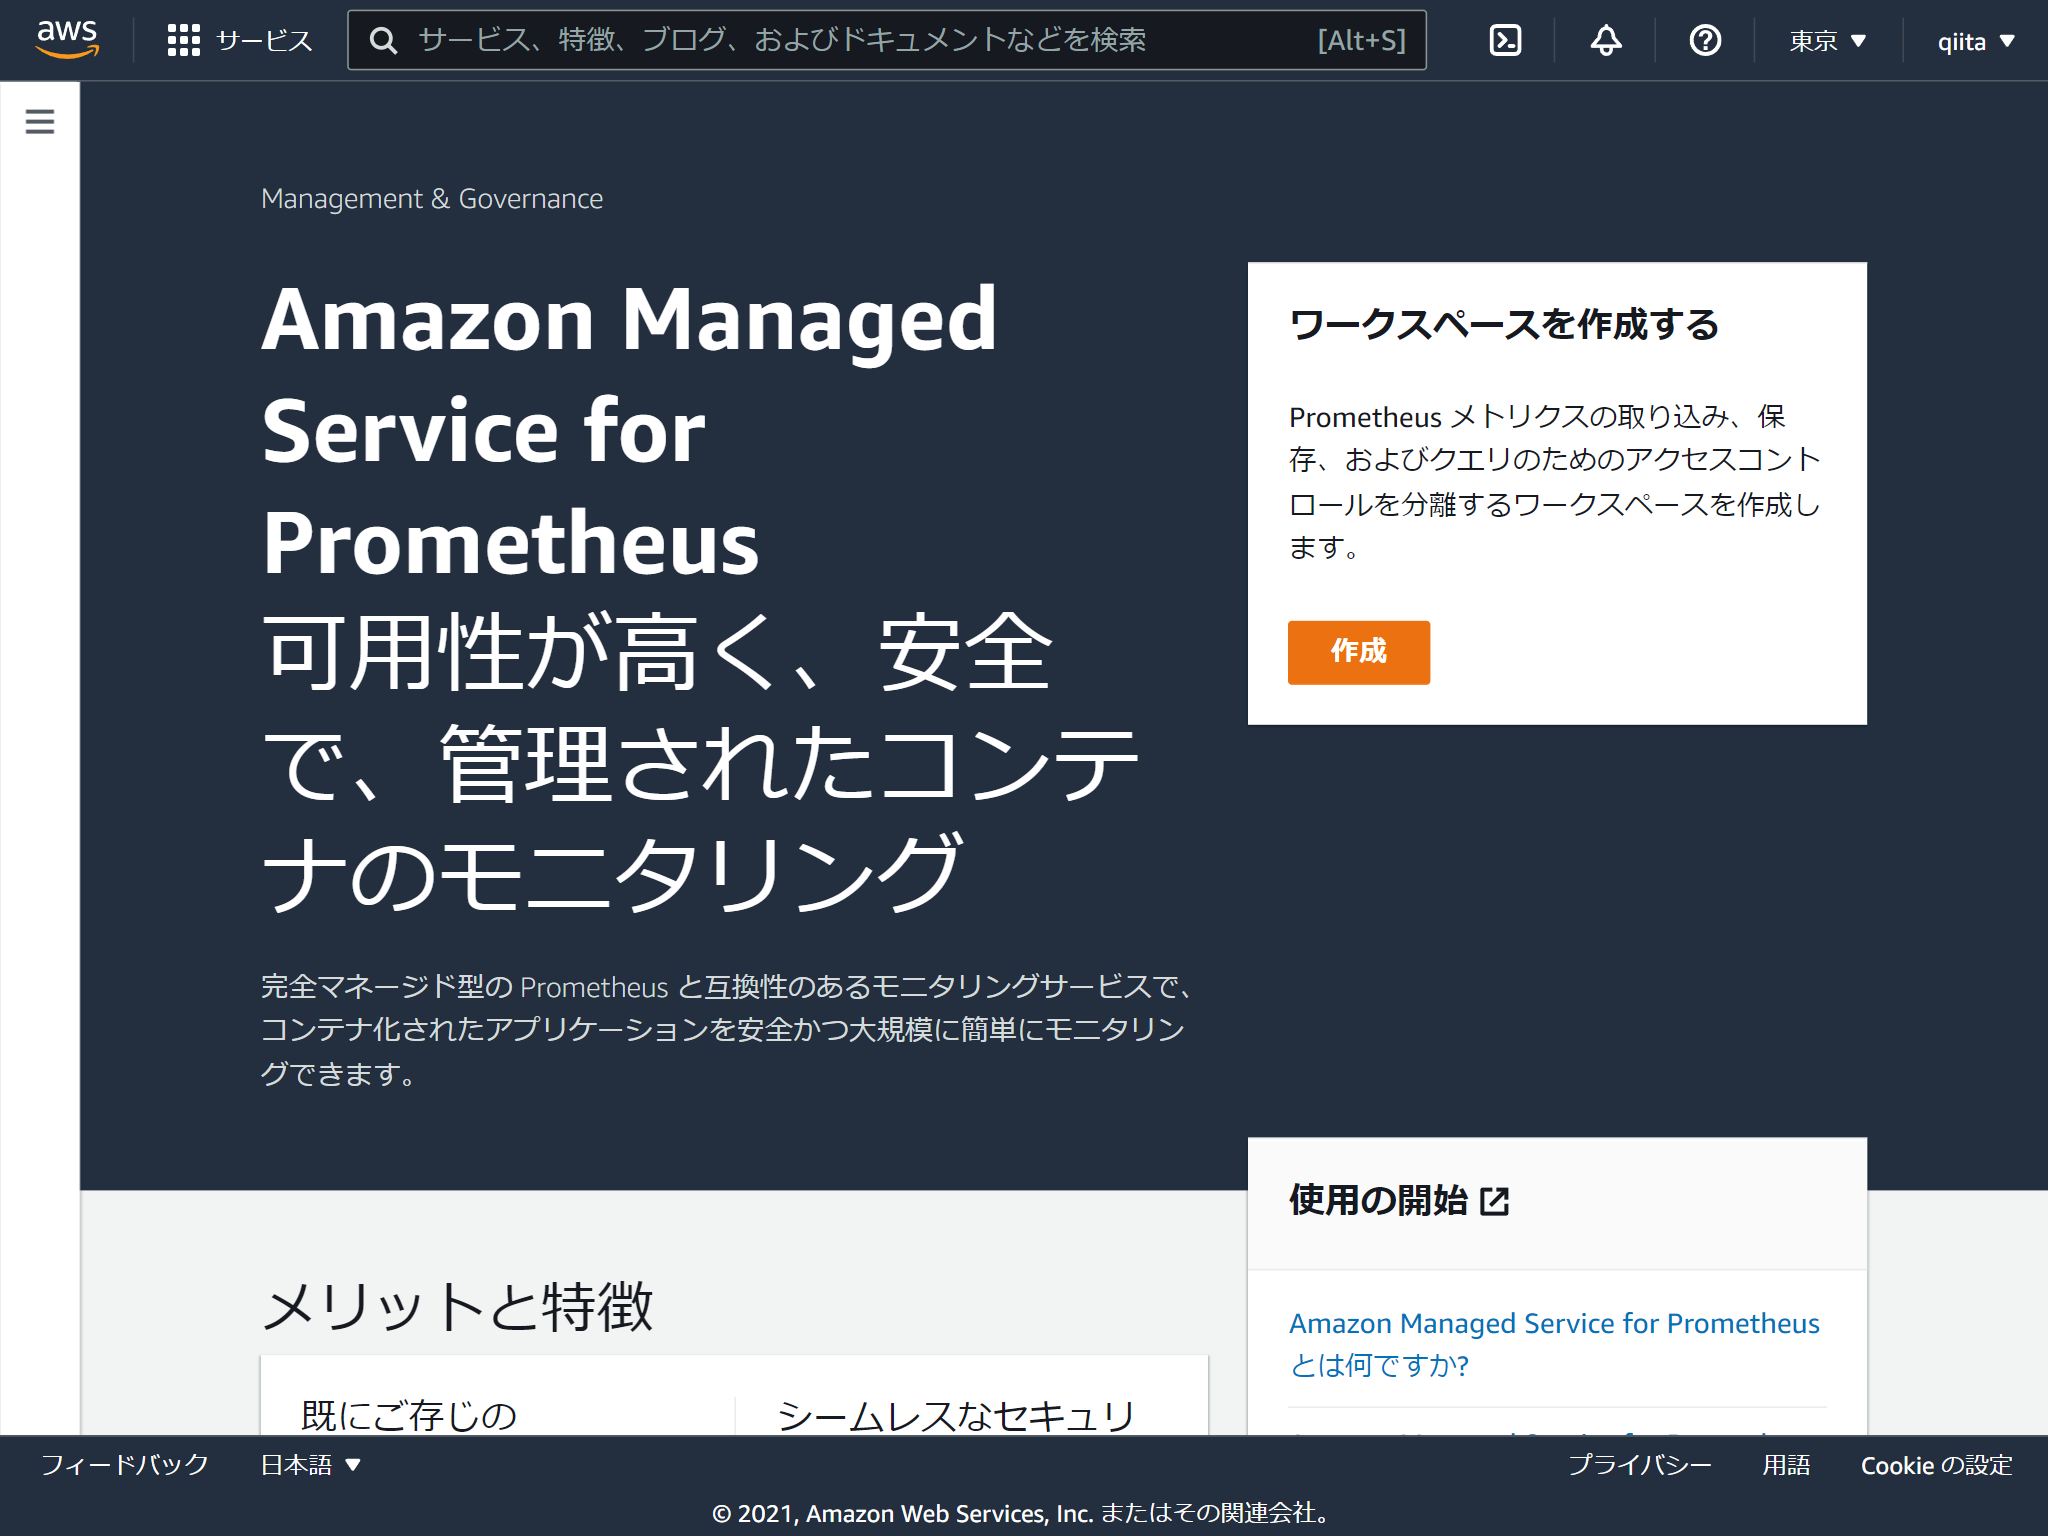
Amazon Managed Service for Prometheusのセットアップ
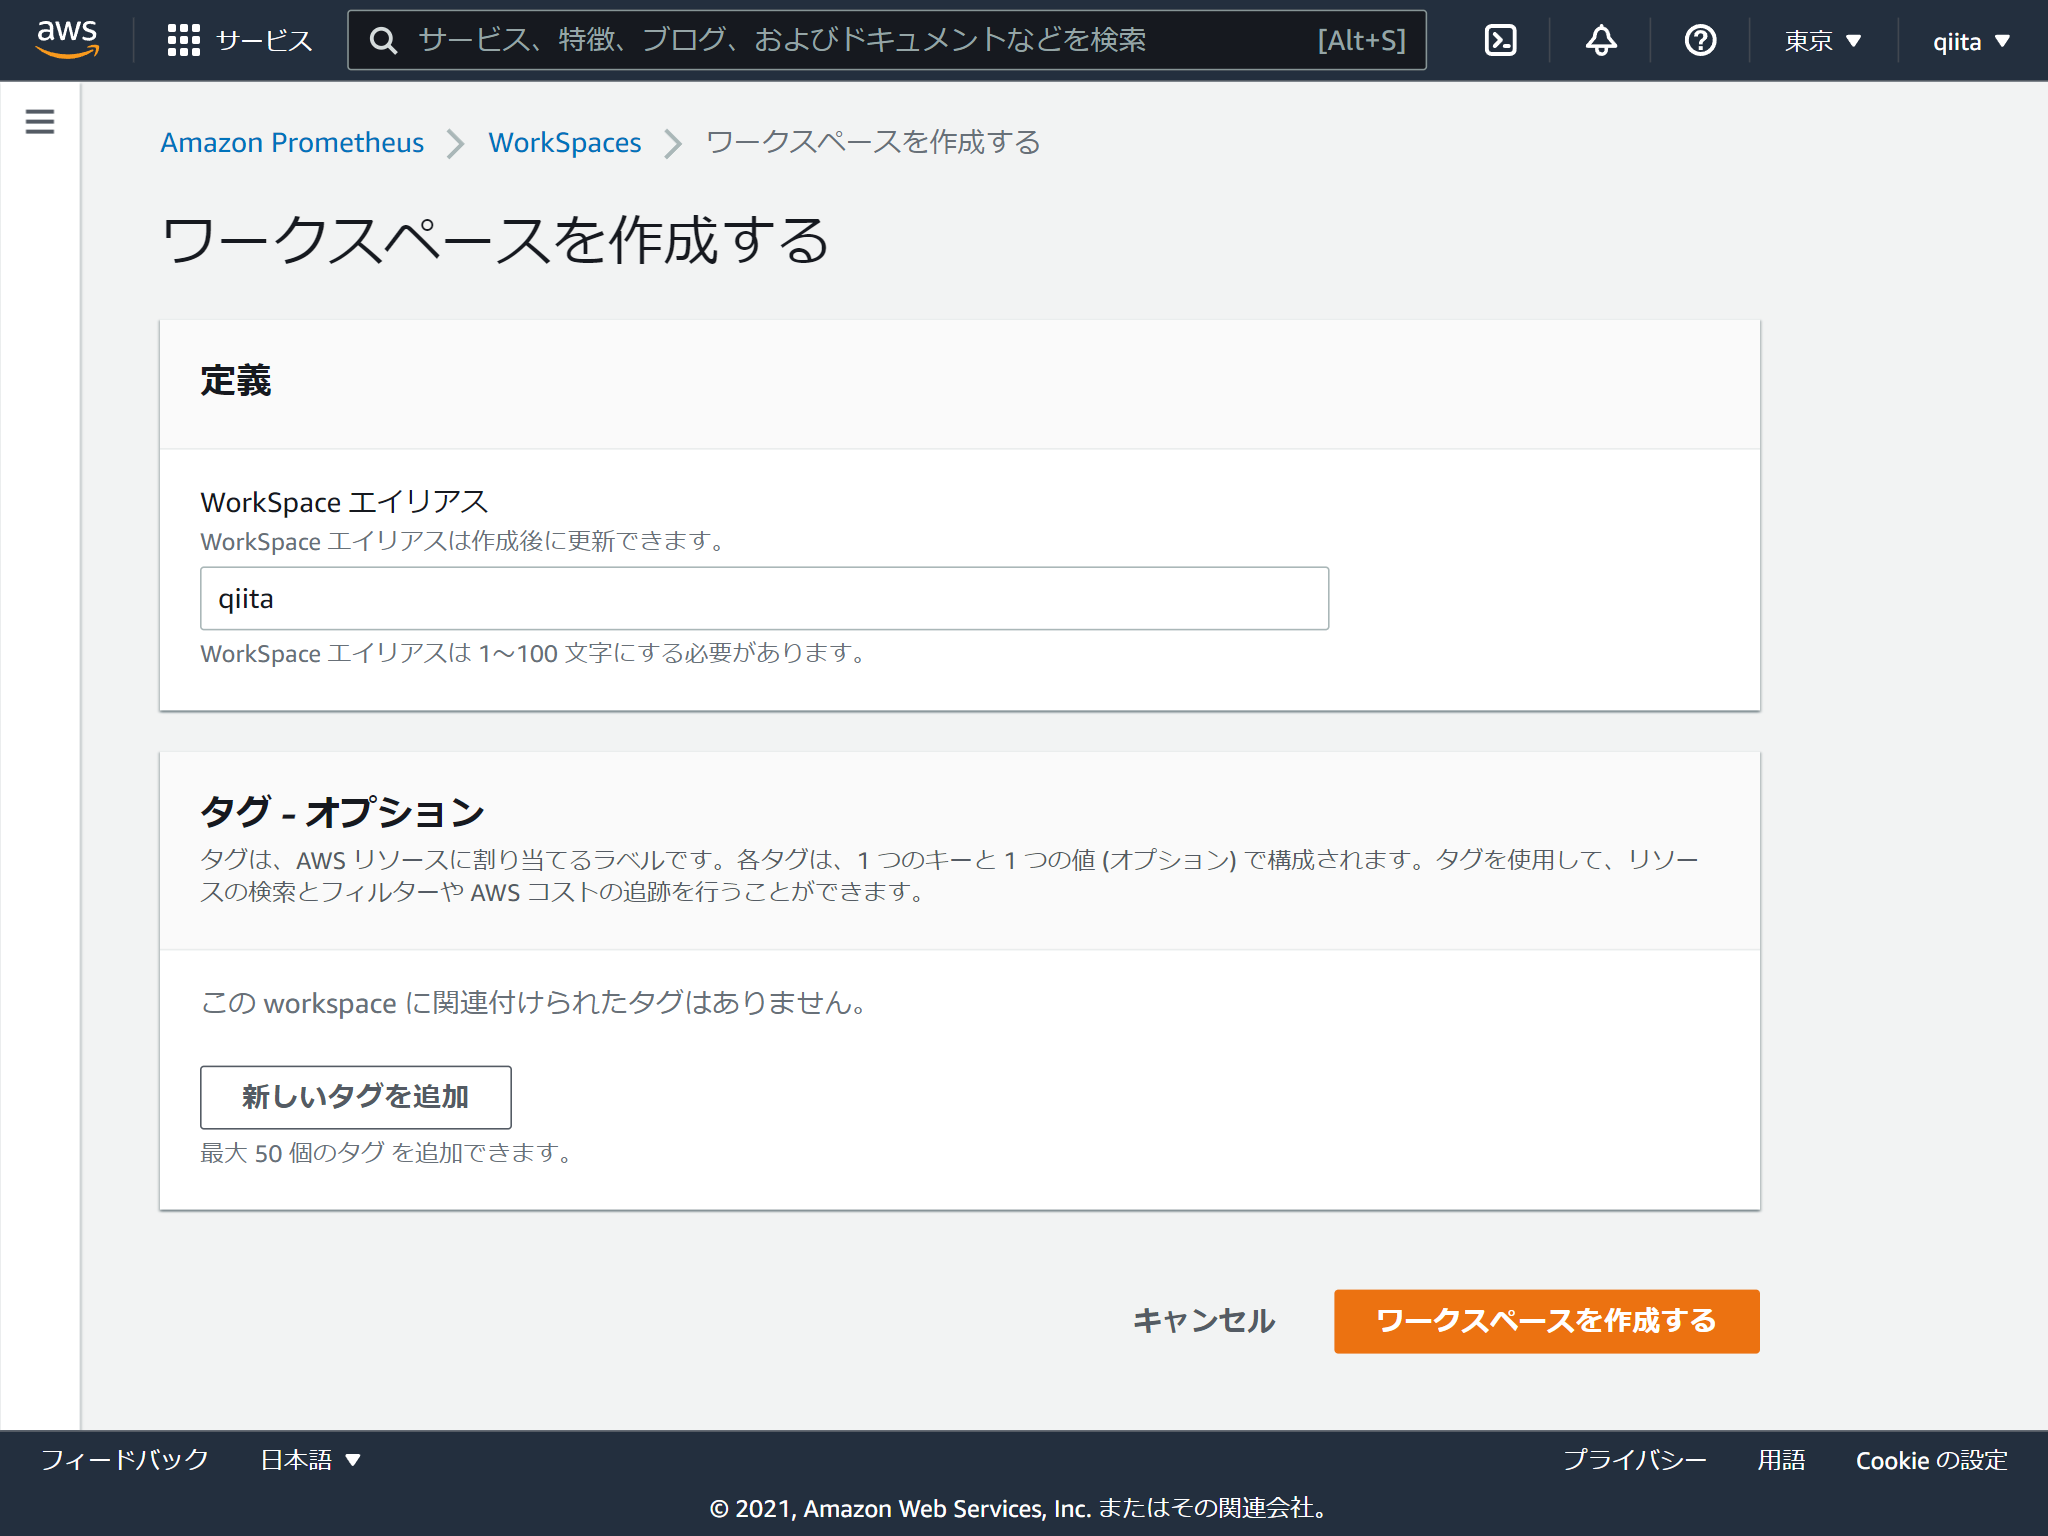
ワークスペースの名称を決めるだけです。
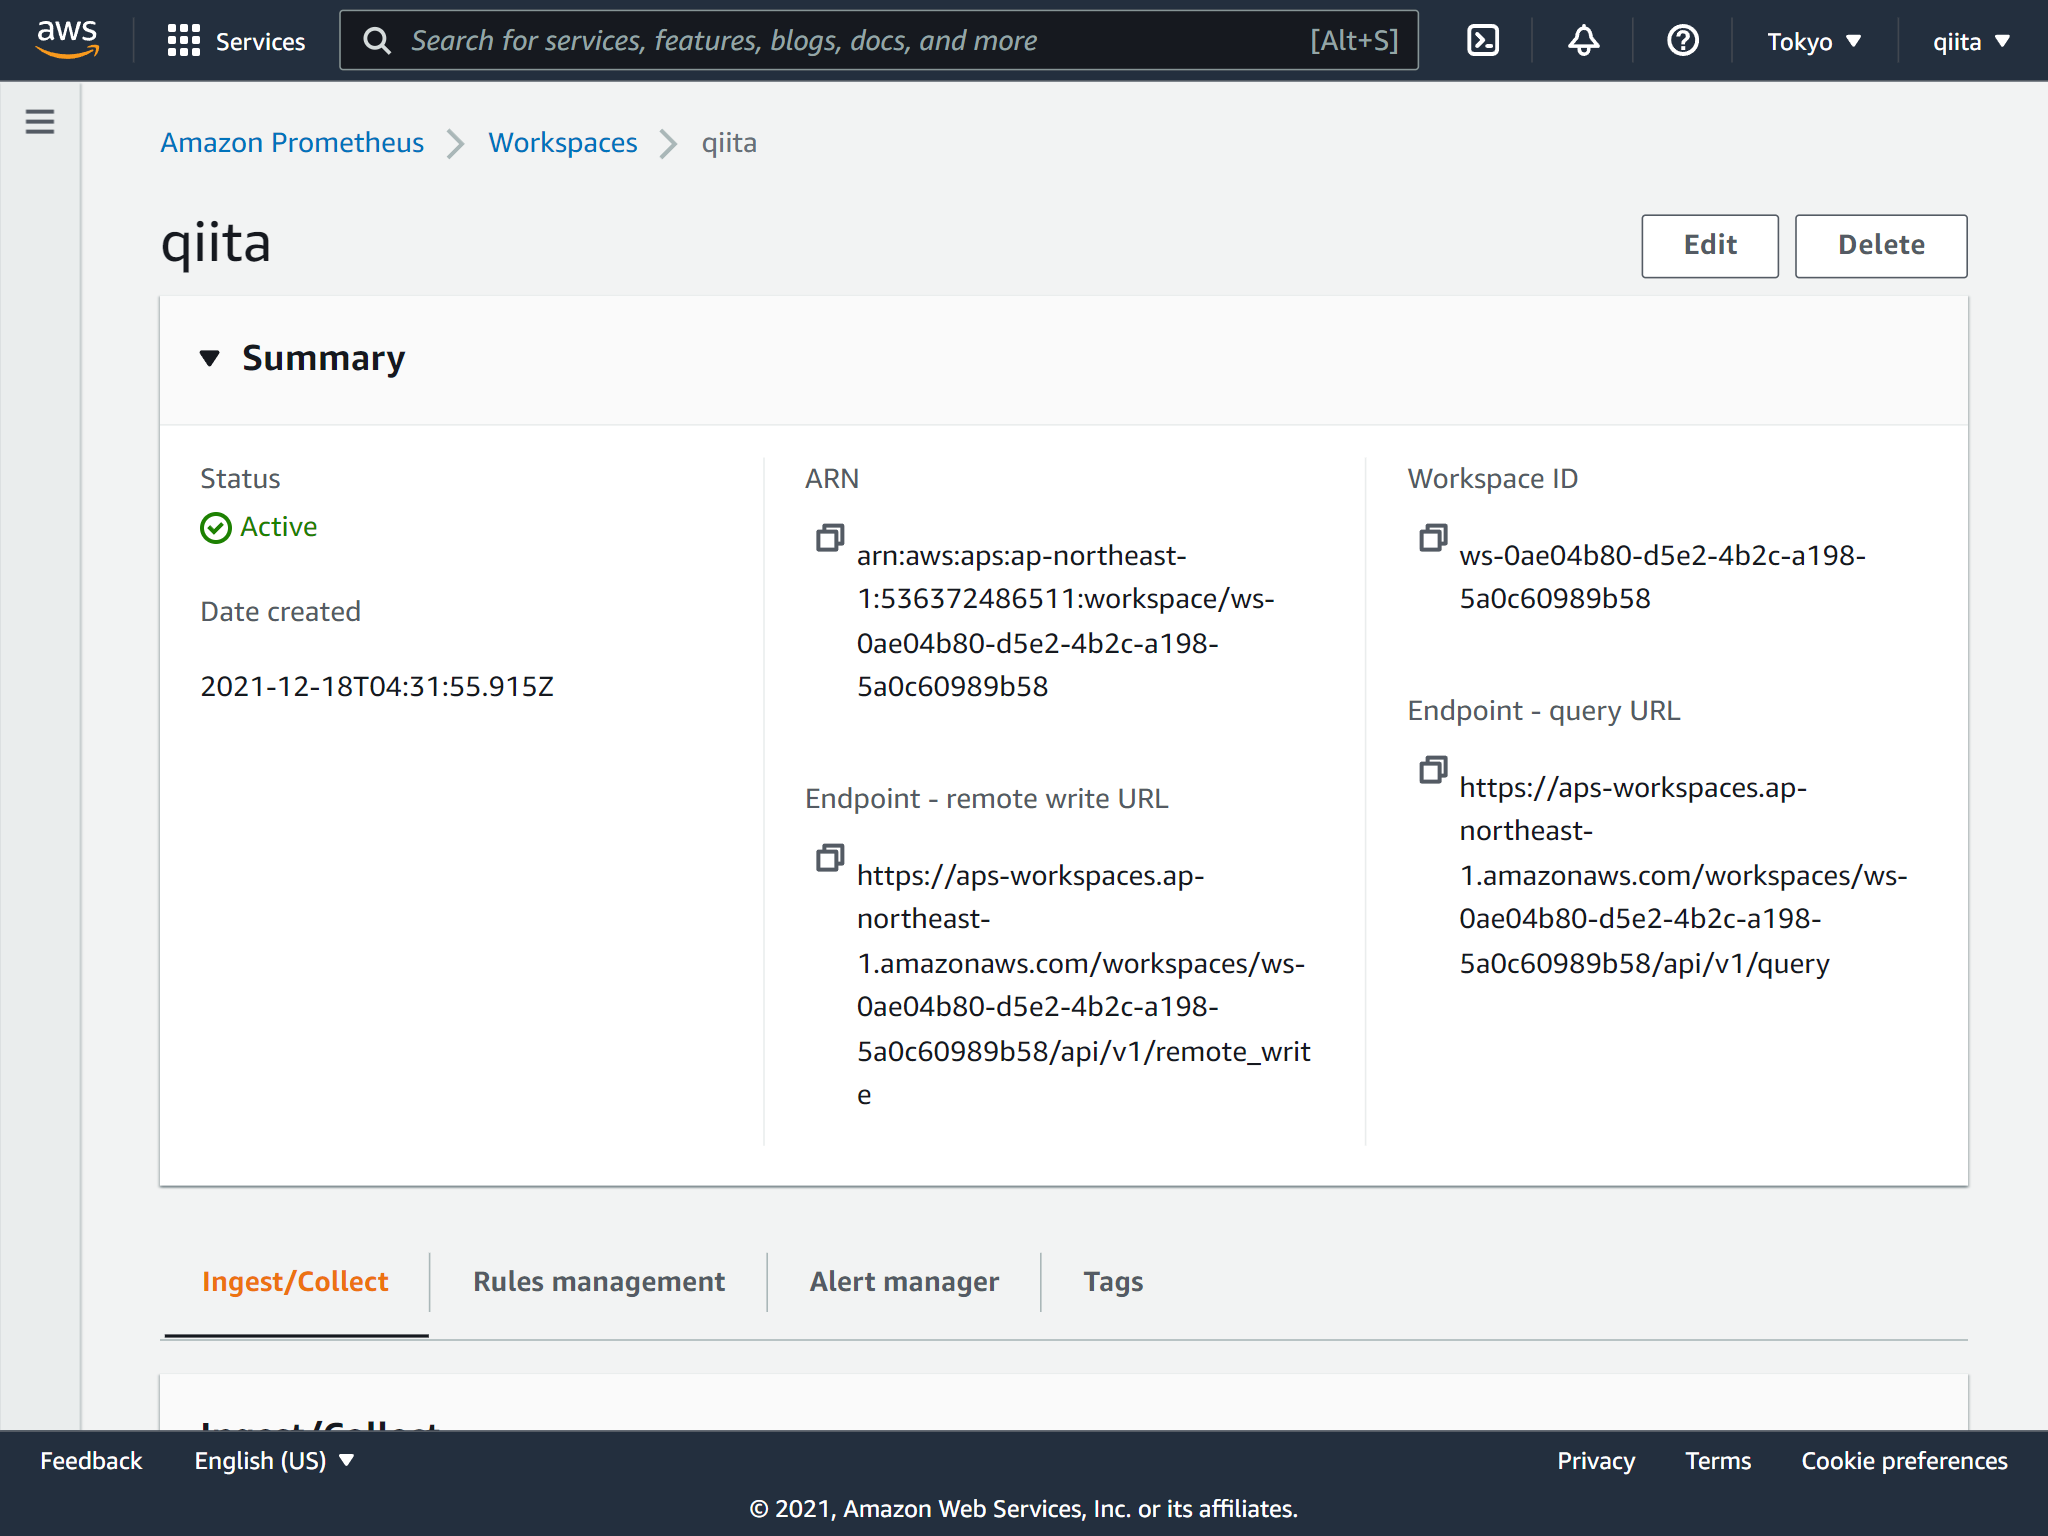
出来上がり。超簡単
Raspberry Pi4からメトリクスを送信
IAMユーザーのアクセスキー情報が必要ですので、IAMユーザーを作成します。
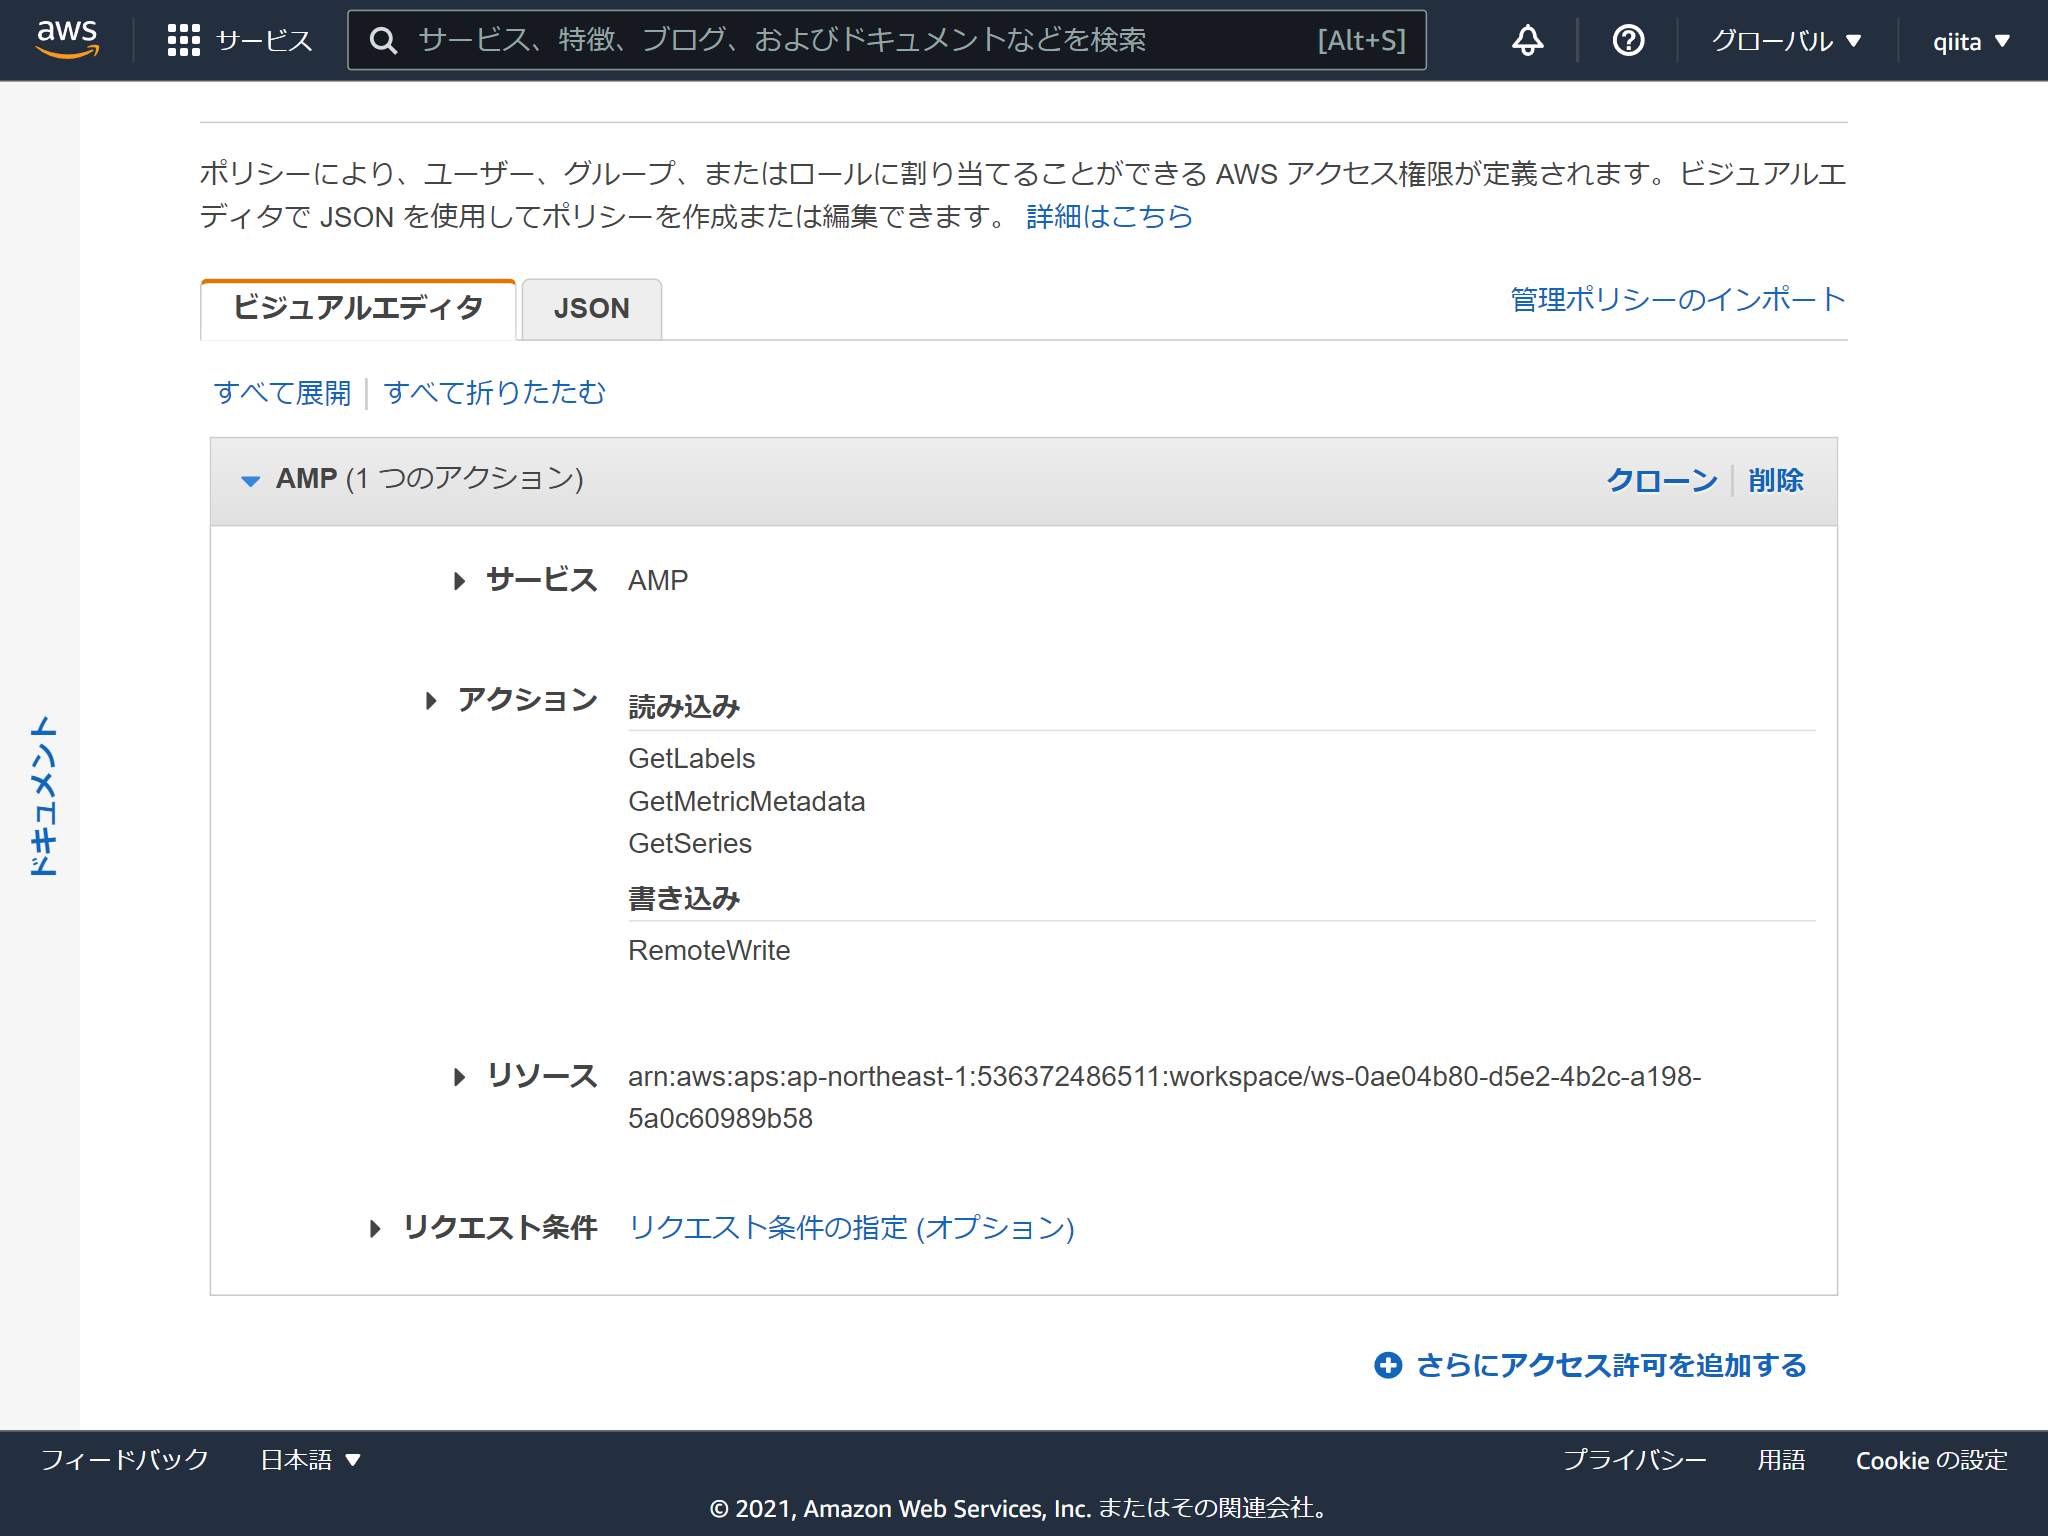
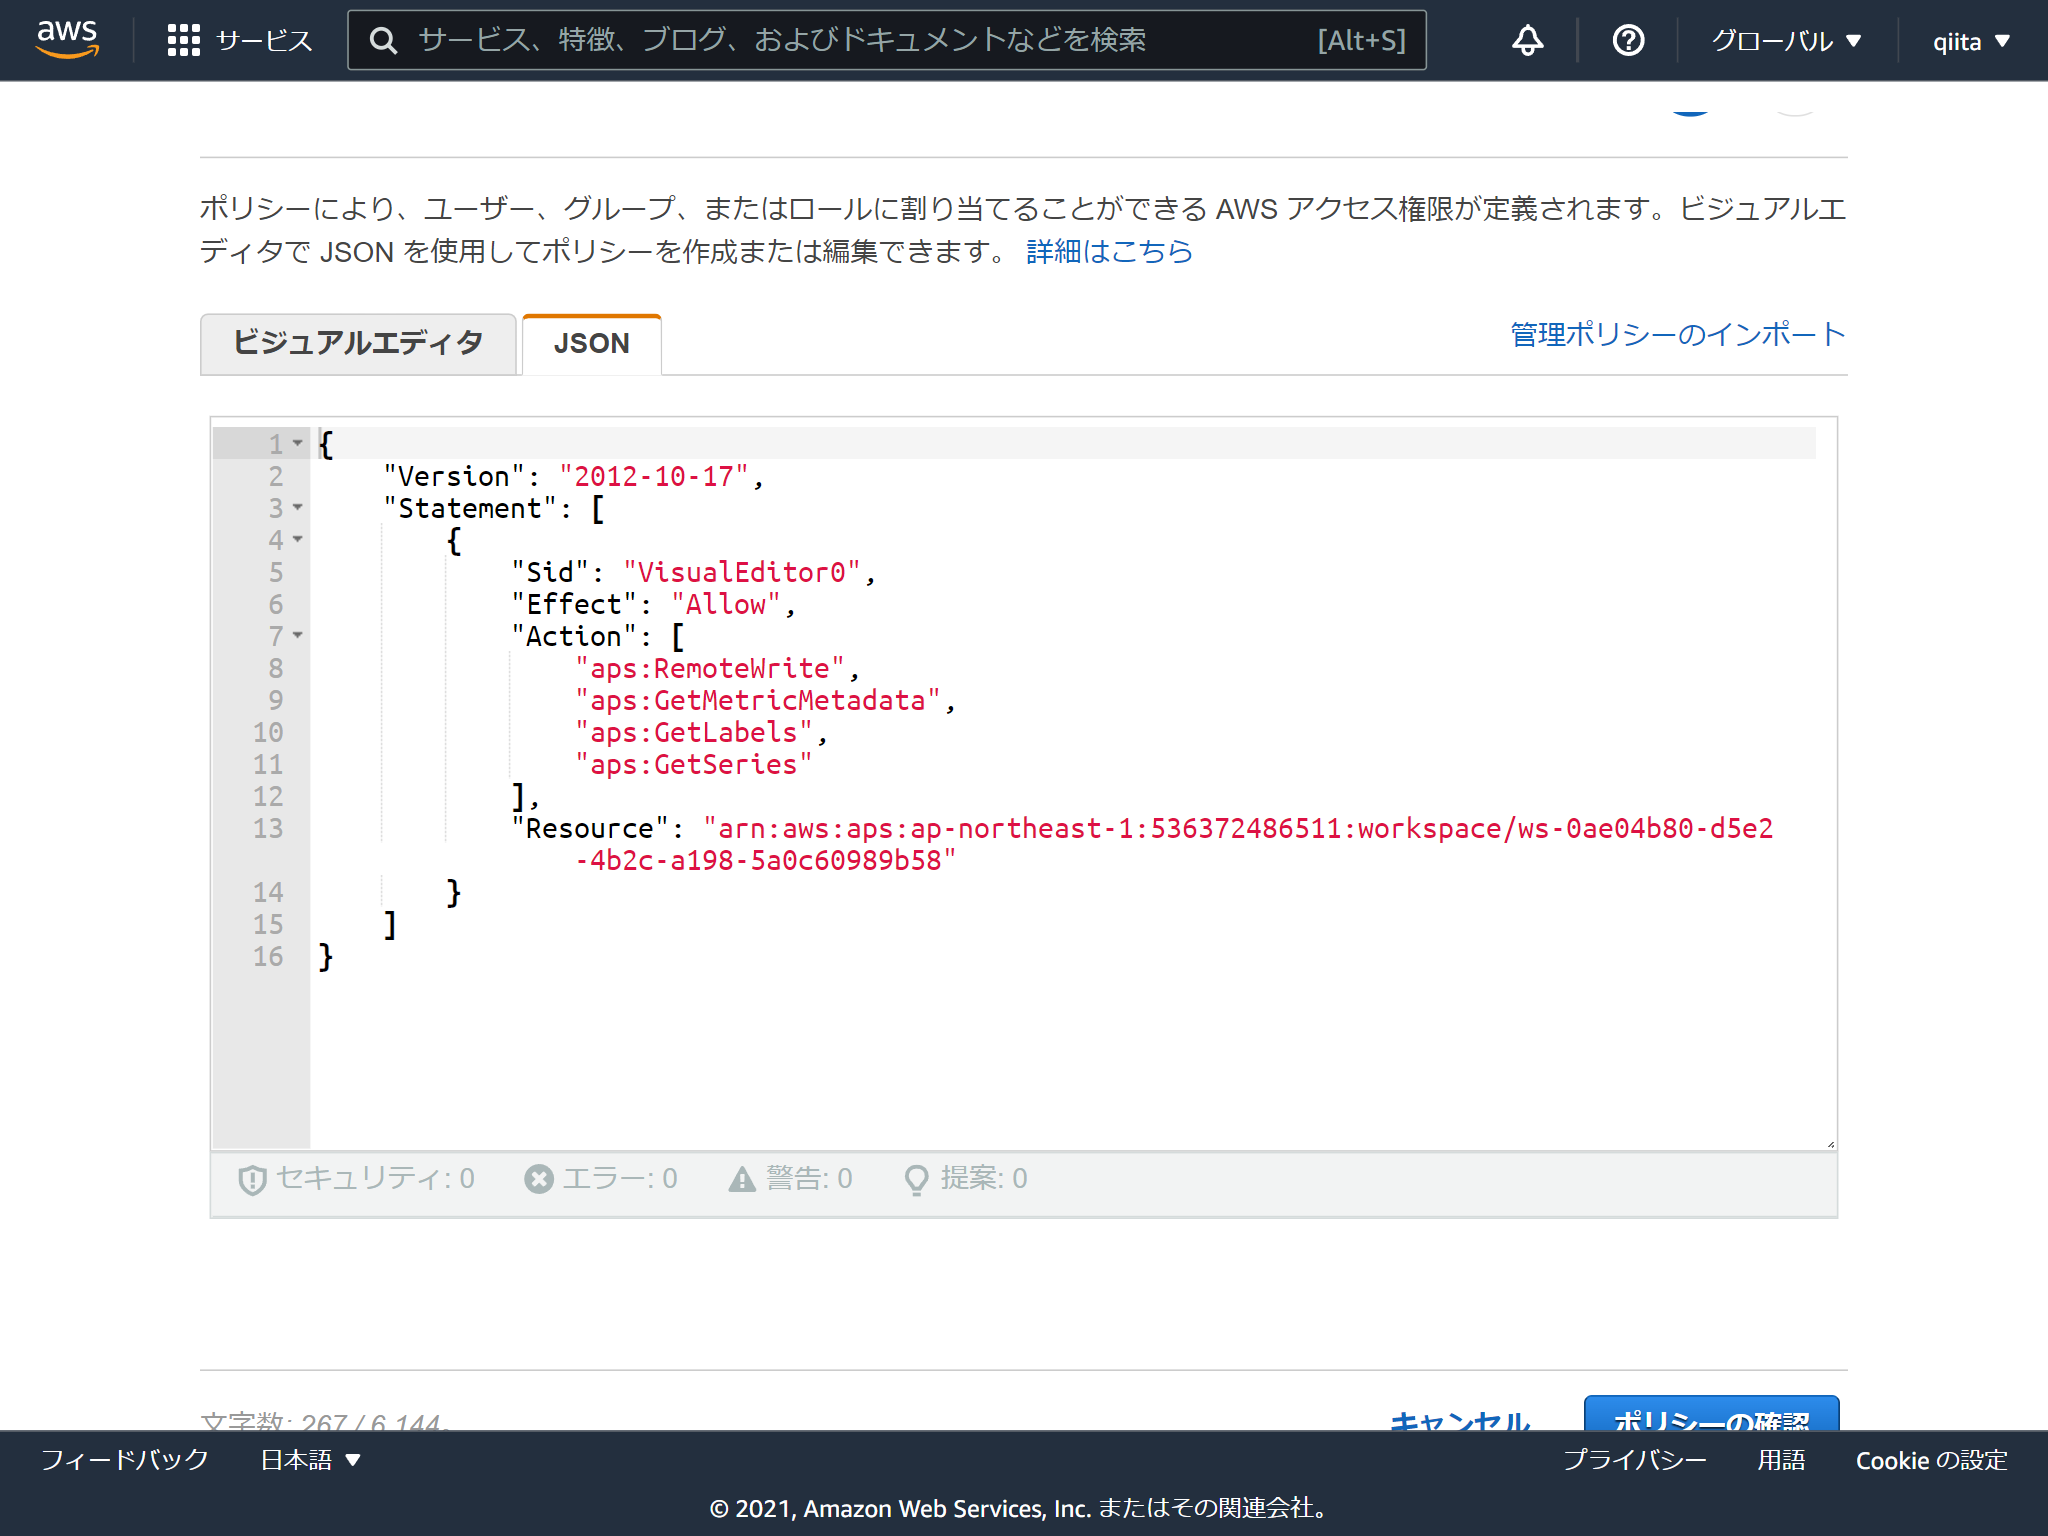
必要なポリシーはこんな感じです。aps:RemoteWriteだけでいいかもしれません。
注意点はなんといってもサービス名が AMP ってところです。さらにActionの接頭辞は aps (笑)
Docker ComposeでPrometheusとNode exporterを起動します。
version: '3.8'

services:
  prometheus:
    image: quay.io/prometheus/prometheus:latest
    network_mode: host
    volumes:
      - ./prometheus.yml:/etc/prometheus/prometheus.yml

  node-exporter:
    image: quay.io/prometheus/node-exporter:latest
    container_name: node_exporter
    command:
      - '--path.rootfs=/host'
    network_mode: host
    pid: host
    restart: unless-stopped
    volumes:
      - '/:/host:ro,rslave'
remote_writeのところに認証情報をセットします。
## my global config
global:
  scrape_interval:     15s # Set the scrape interval to every 15 seconds. Default is every 1 minute.
  evaluation_interval: 15s # Evaluate rules every 15 seconds. The default is every 1 minute.
  # scrape_timeout is set to the global default (10s).

## Alertmanager configuration
alerting:
  alertmanagers:
  - static_configs:
    - targets:
      # - alertmanager:9093

## Load rules once and periodically evaluate them according to the global 'evaluation_interval'.
rule_files:
  # - "first_rules.yml"
  # - "second_rules.yml"

## A scrape configuration containing exactly one endpoint to scrape:
## Here it's Prometheus itself.
scrape_configs:
  # The job name is added as a label `job=<job_name>` to any timeseries scraped from this config.
  - job_name: 'prometheus'

    # metrics_path defaults to '/metrics'
    # scheme defaults to 'http'.

    static_configs:
    - targets: ['localhost:9090']

  - job_name: 'node'

    static_configs:
    - targets: ['localhost:9100']

remote_write:
- url: https://aps-workspaces.ap-northeast-1.amazonaws.com/workspaces/ws-0ae04b80-d5e2-4b2c-a198-5a0c60989b58/api/v1/remote_write

  sigv4:
    # The AWS region. If blank, the region from the default credentials chain
    # is used.
    region: ap-northeast-1

    # The AWS API keys. If blank, the environment variables `AWS_ACCESS_KEY_ID`
    # and `AWS_SECRET_ACCESS_KEY` are used.
    access_key: XXXXXXXXXXXXXXXXXXXX
    secret_key: XXXXXXXXXXXXXXXXXXXX
起動します
## docker-compose up
Amazon Managed Grafanaのセットアップ
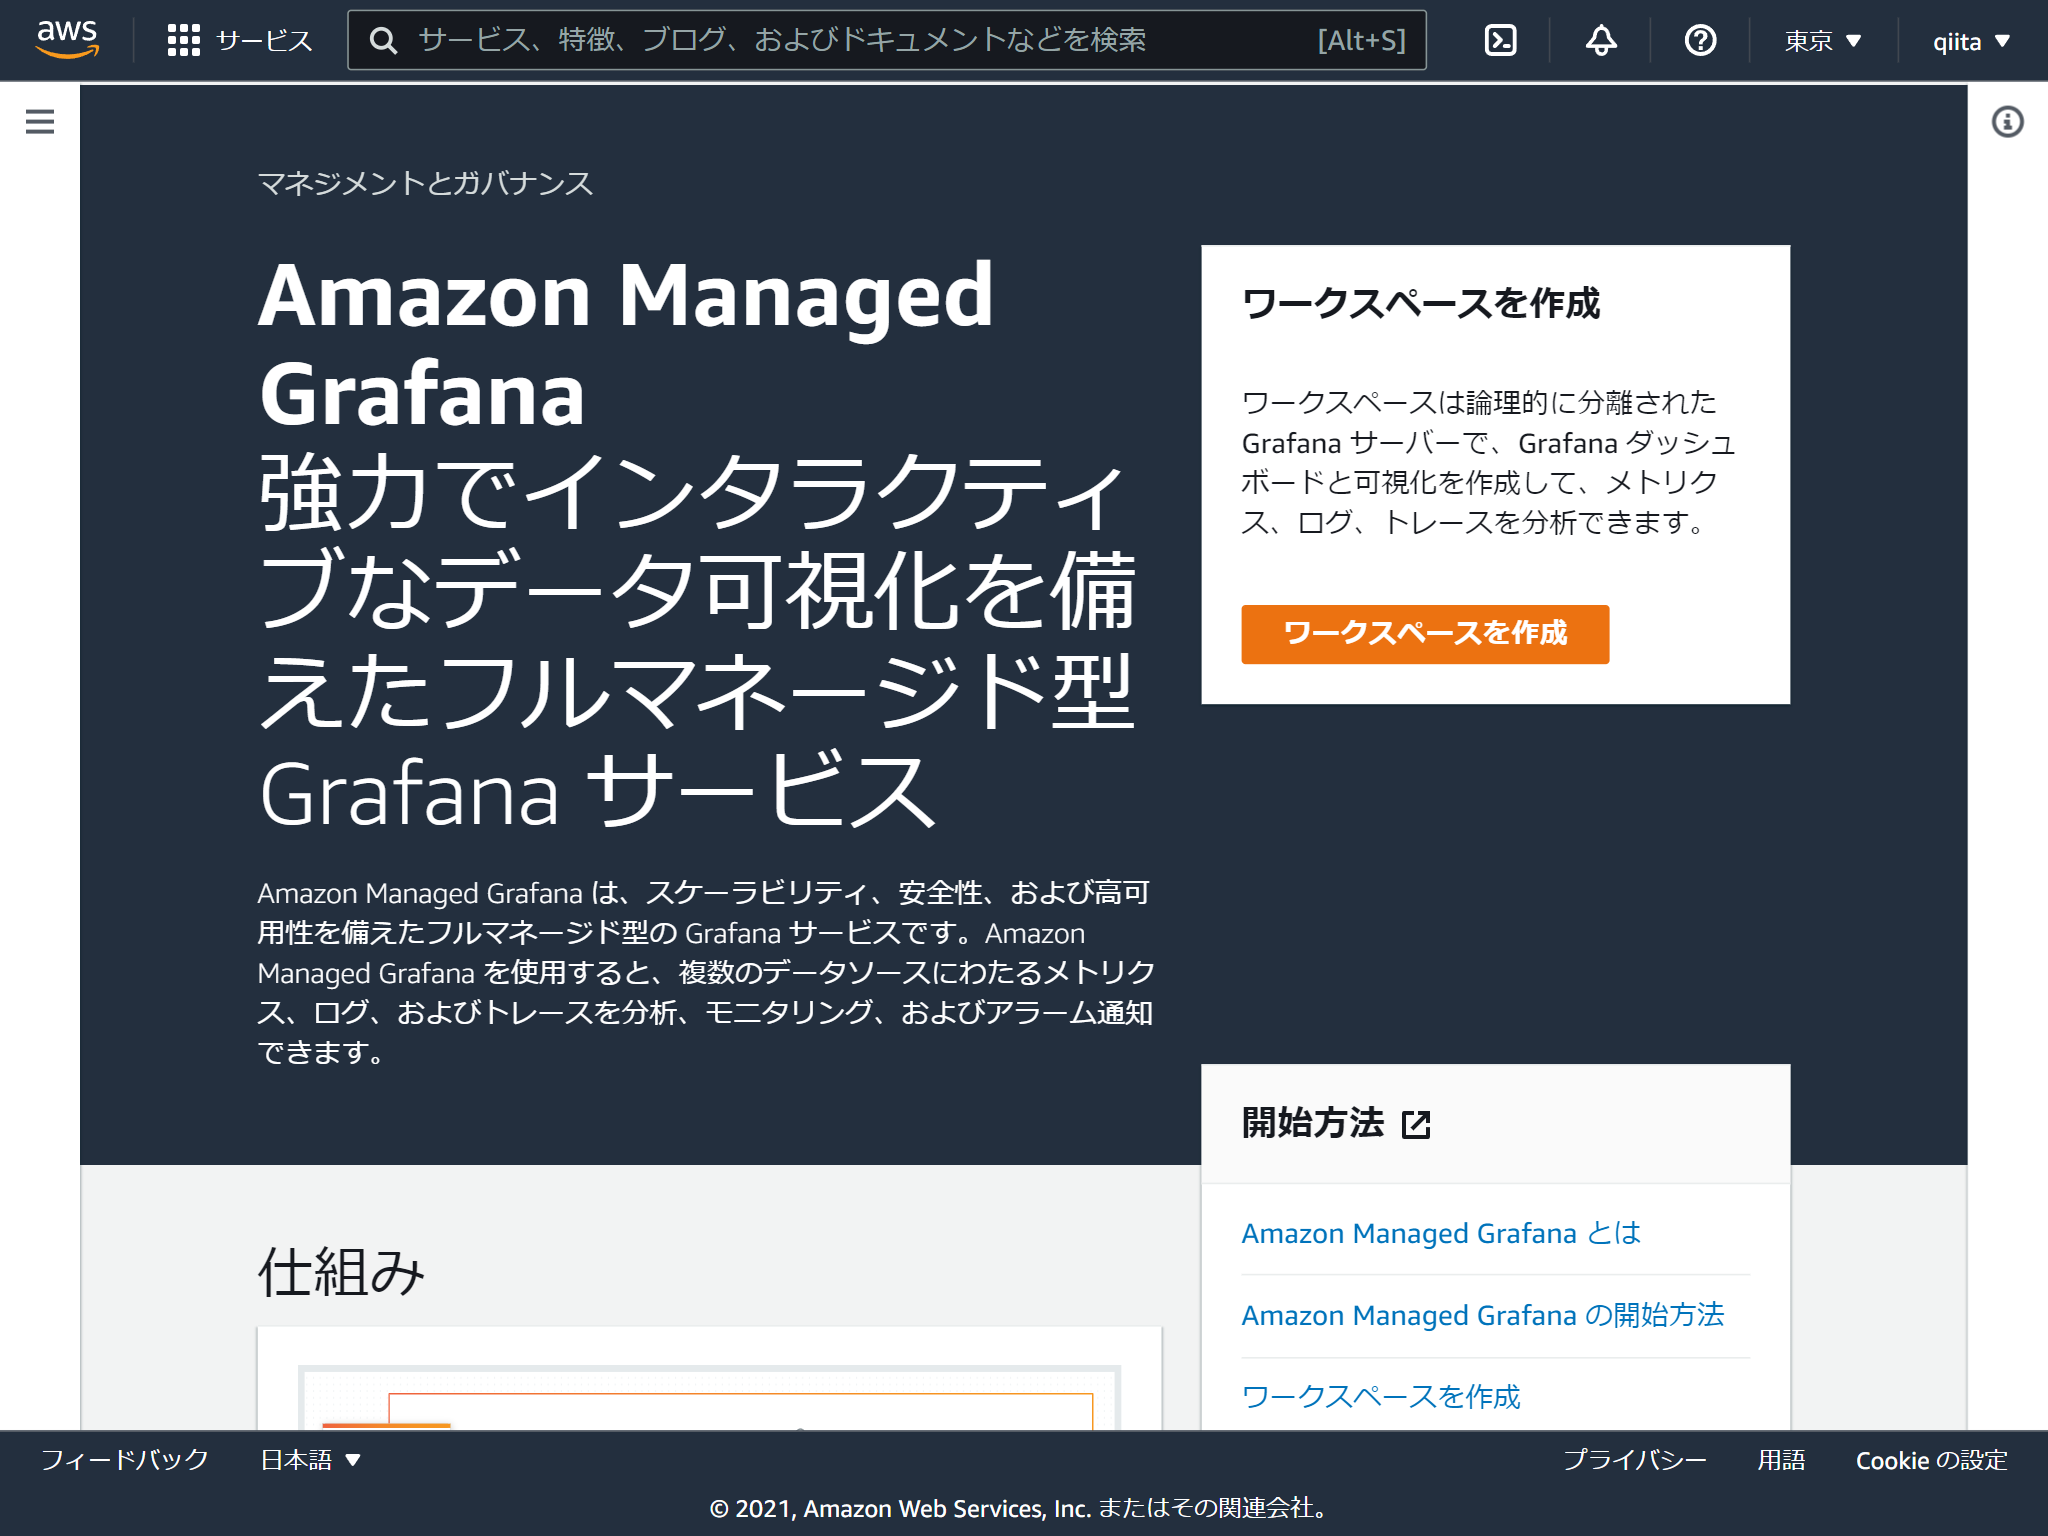
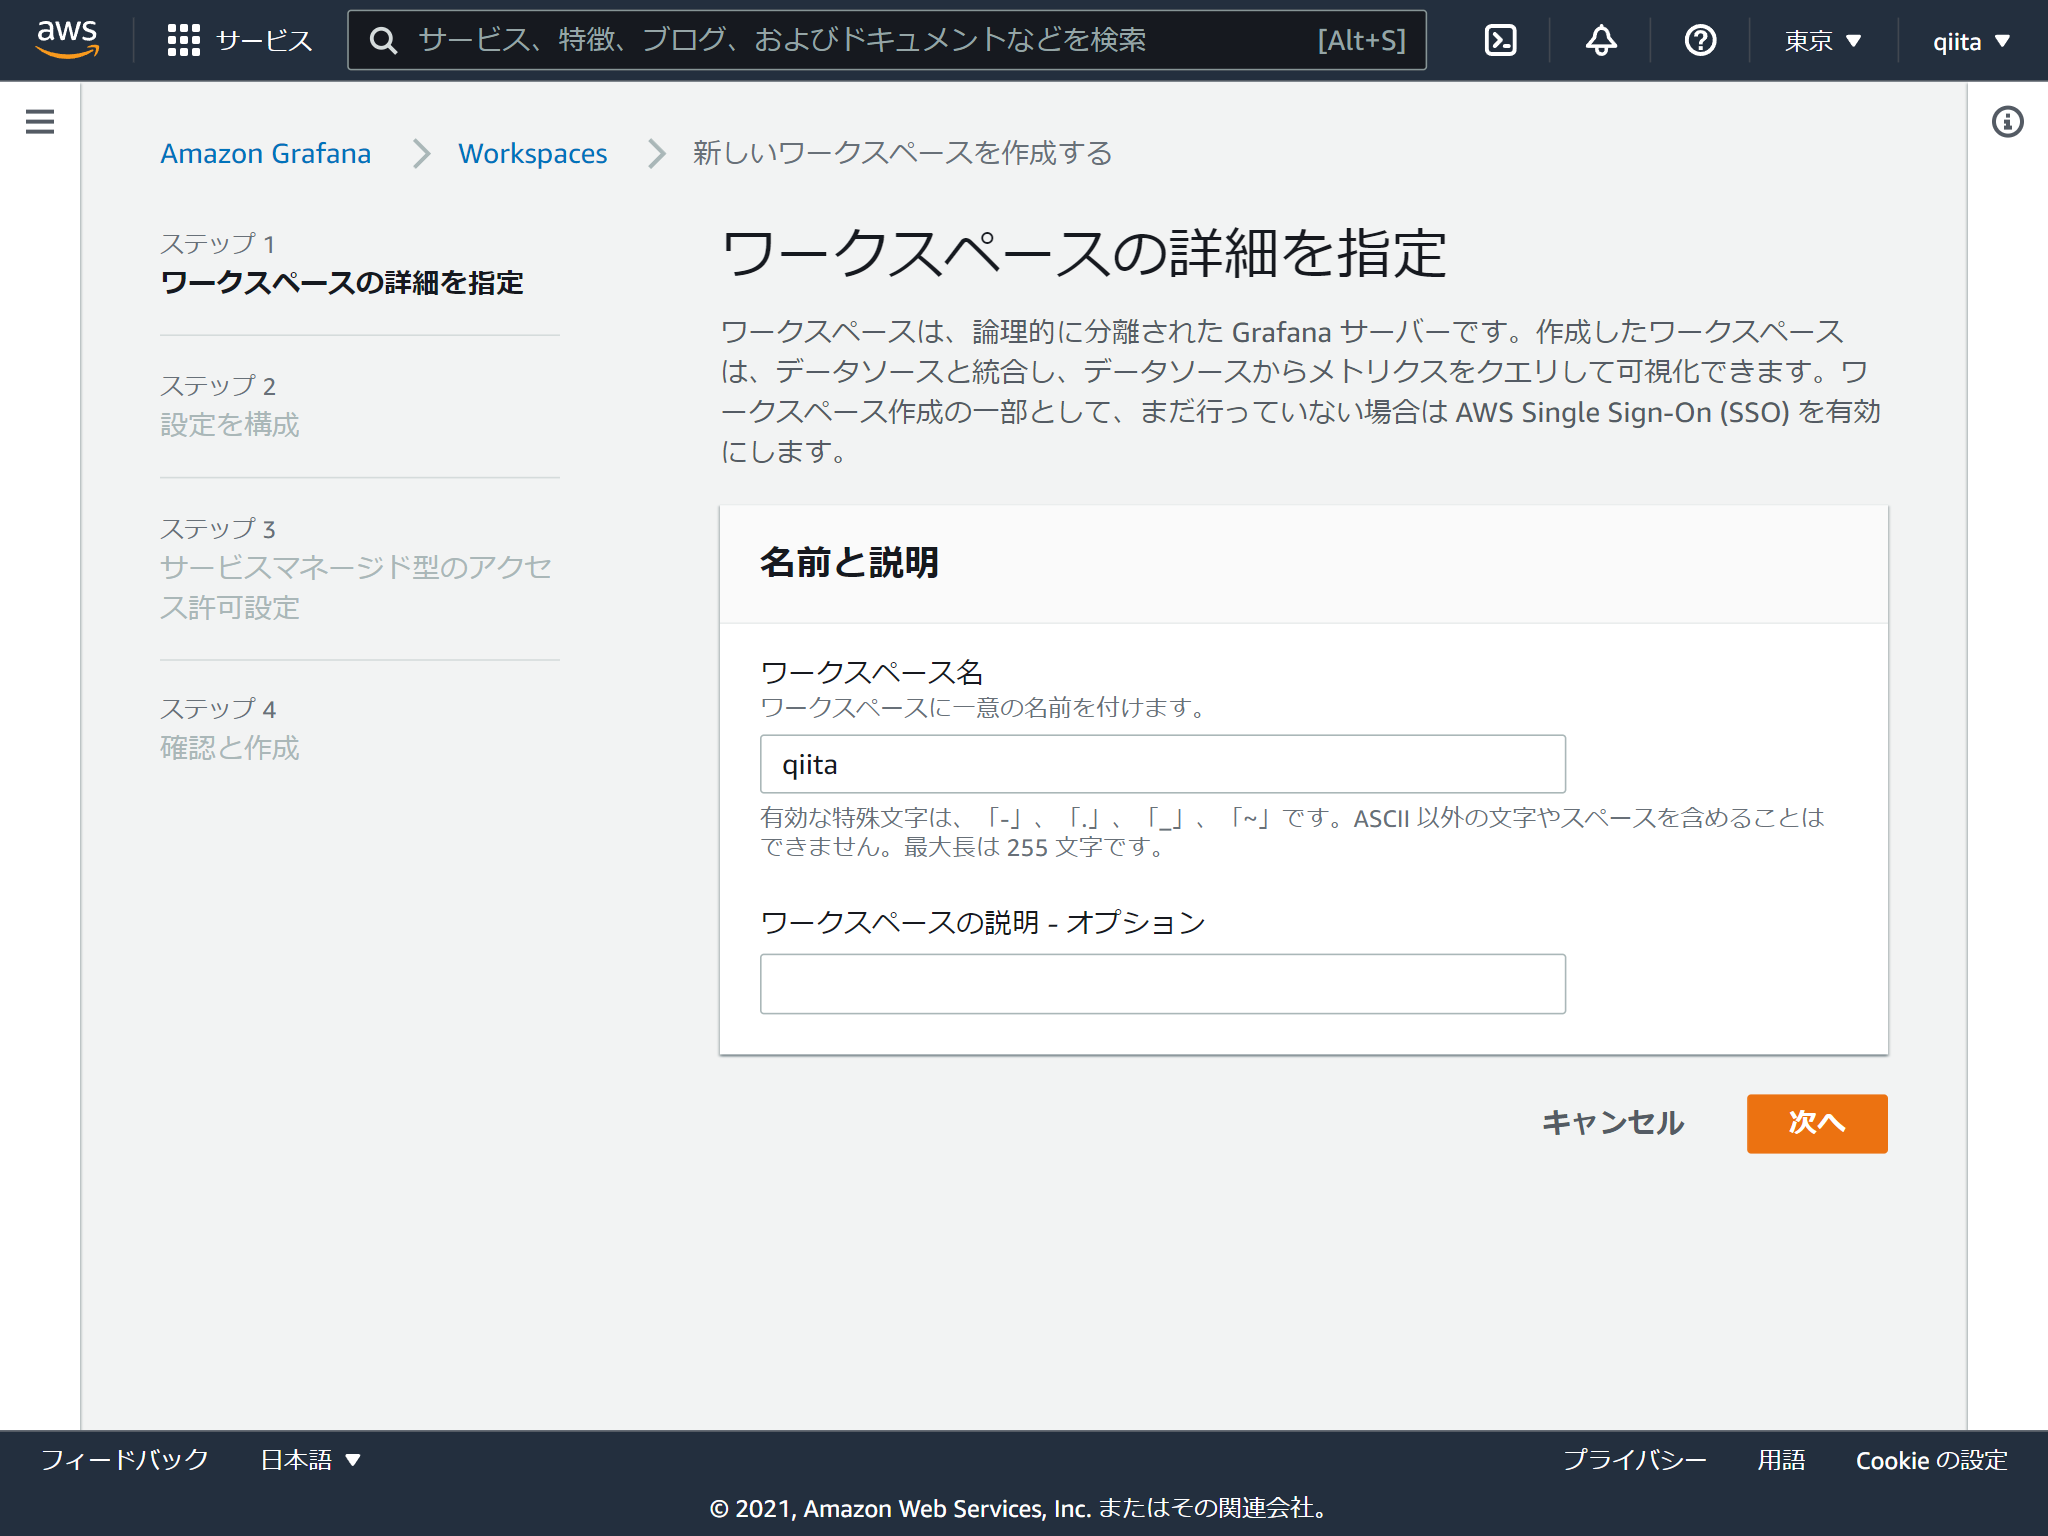
ワークスペース名をつけます
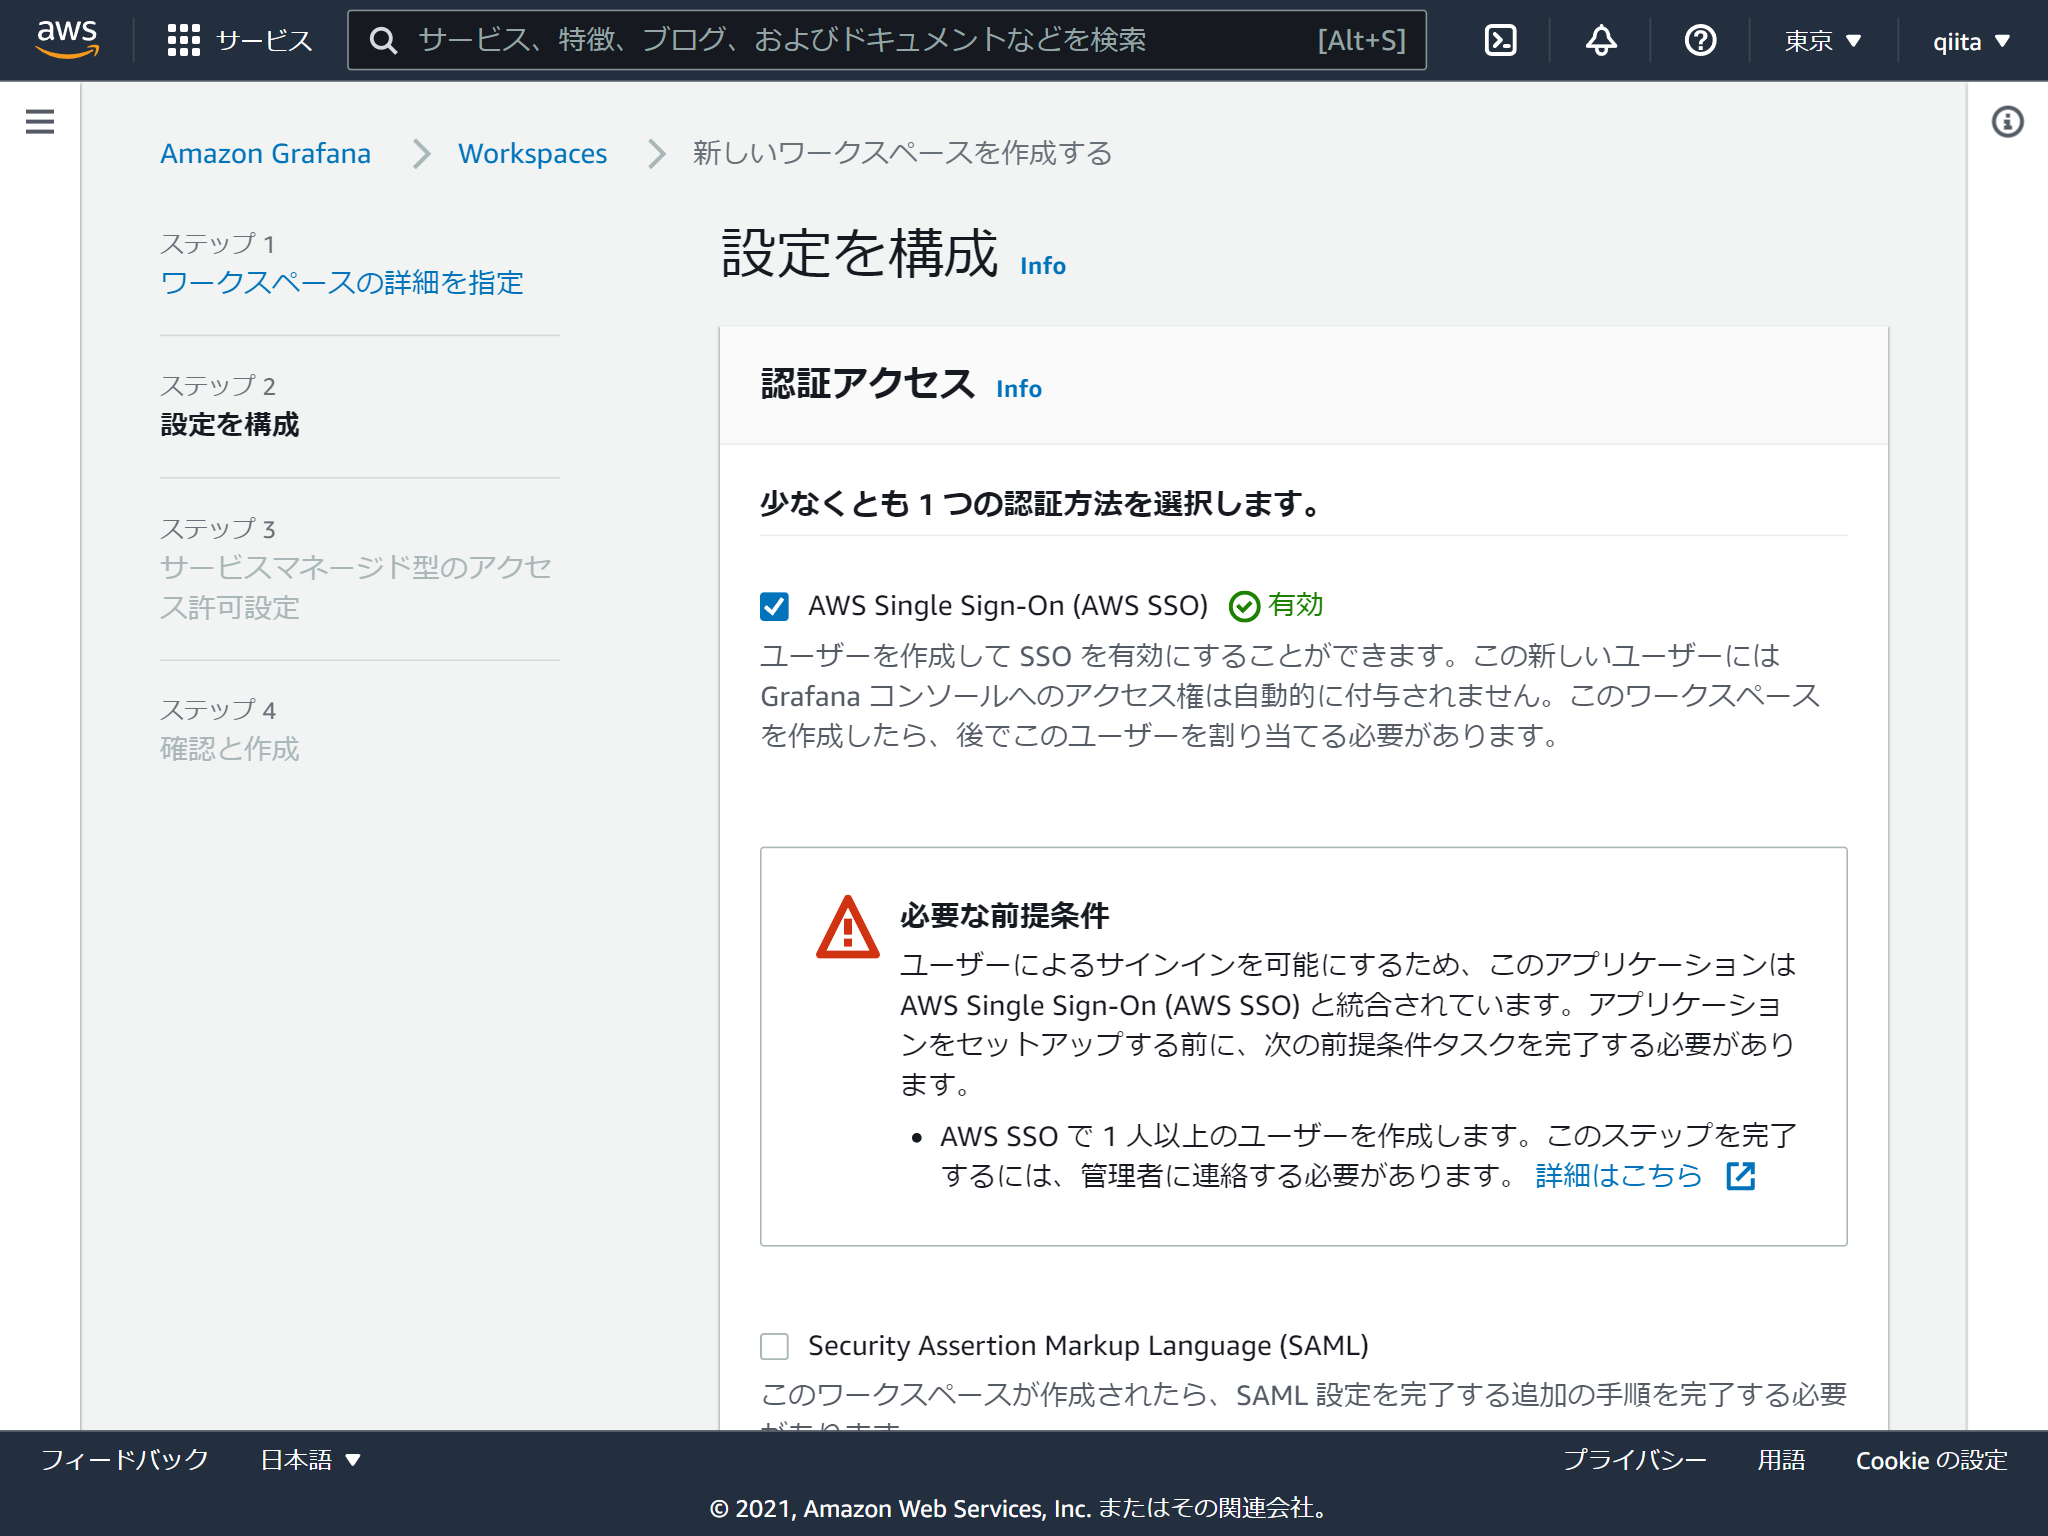
Grafanaの画面にログインする際に使う認証情報を選択します。AWS SSOにしてみました。
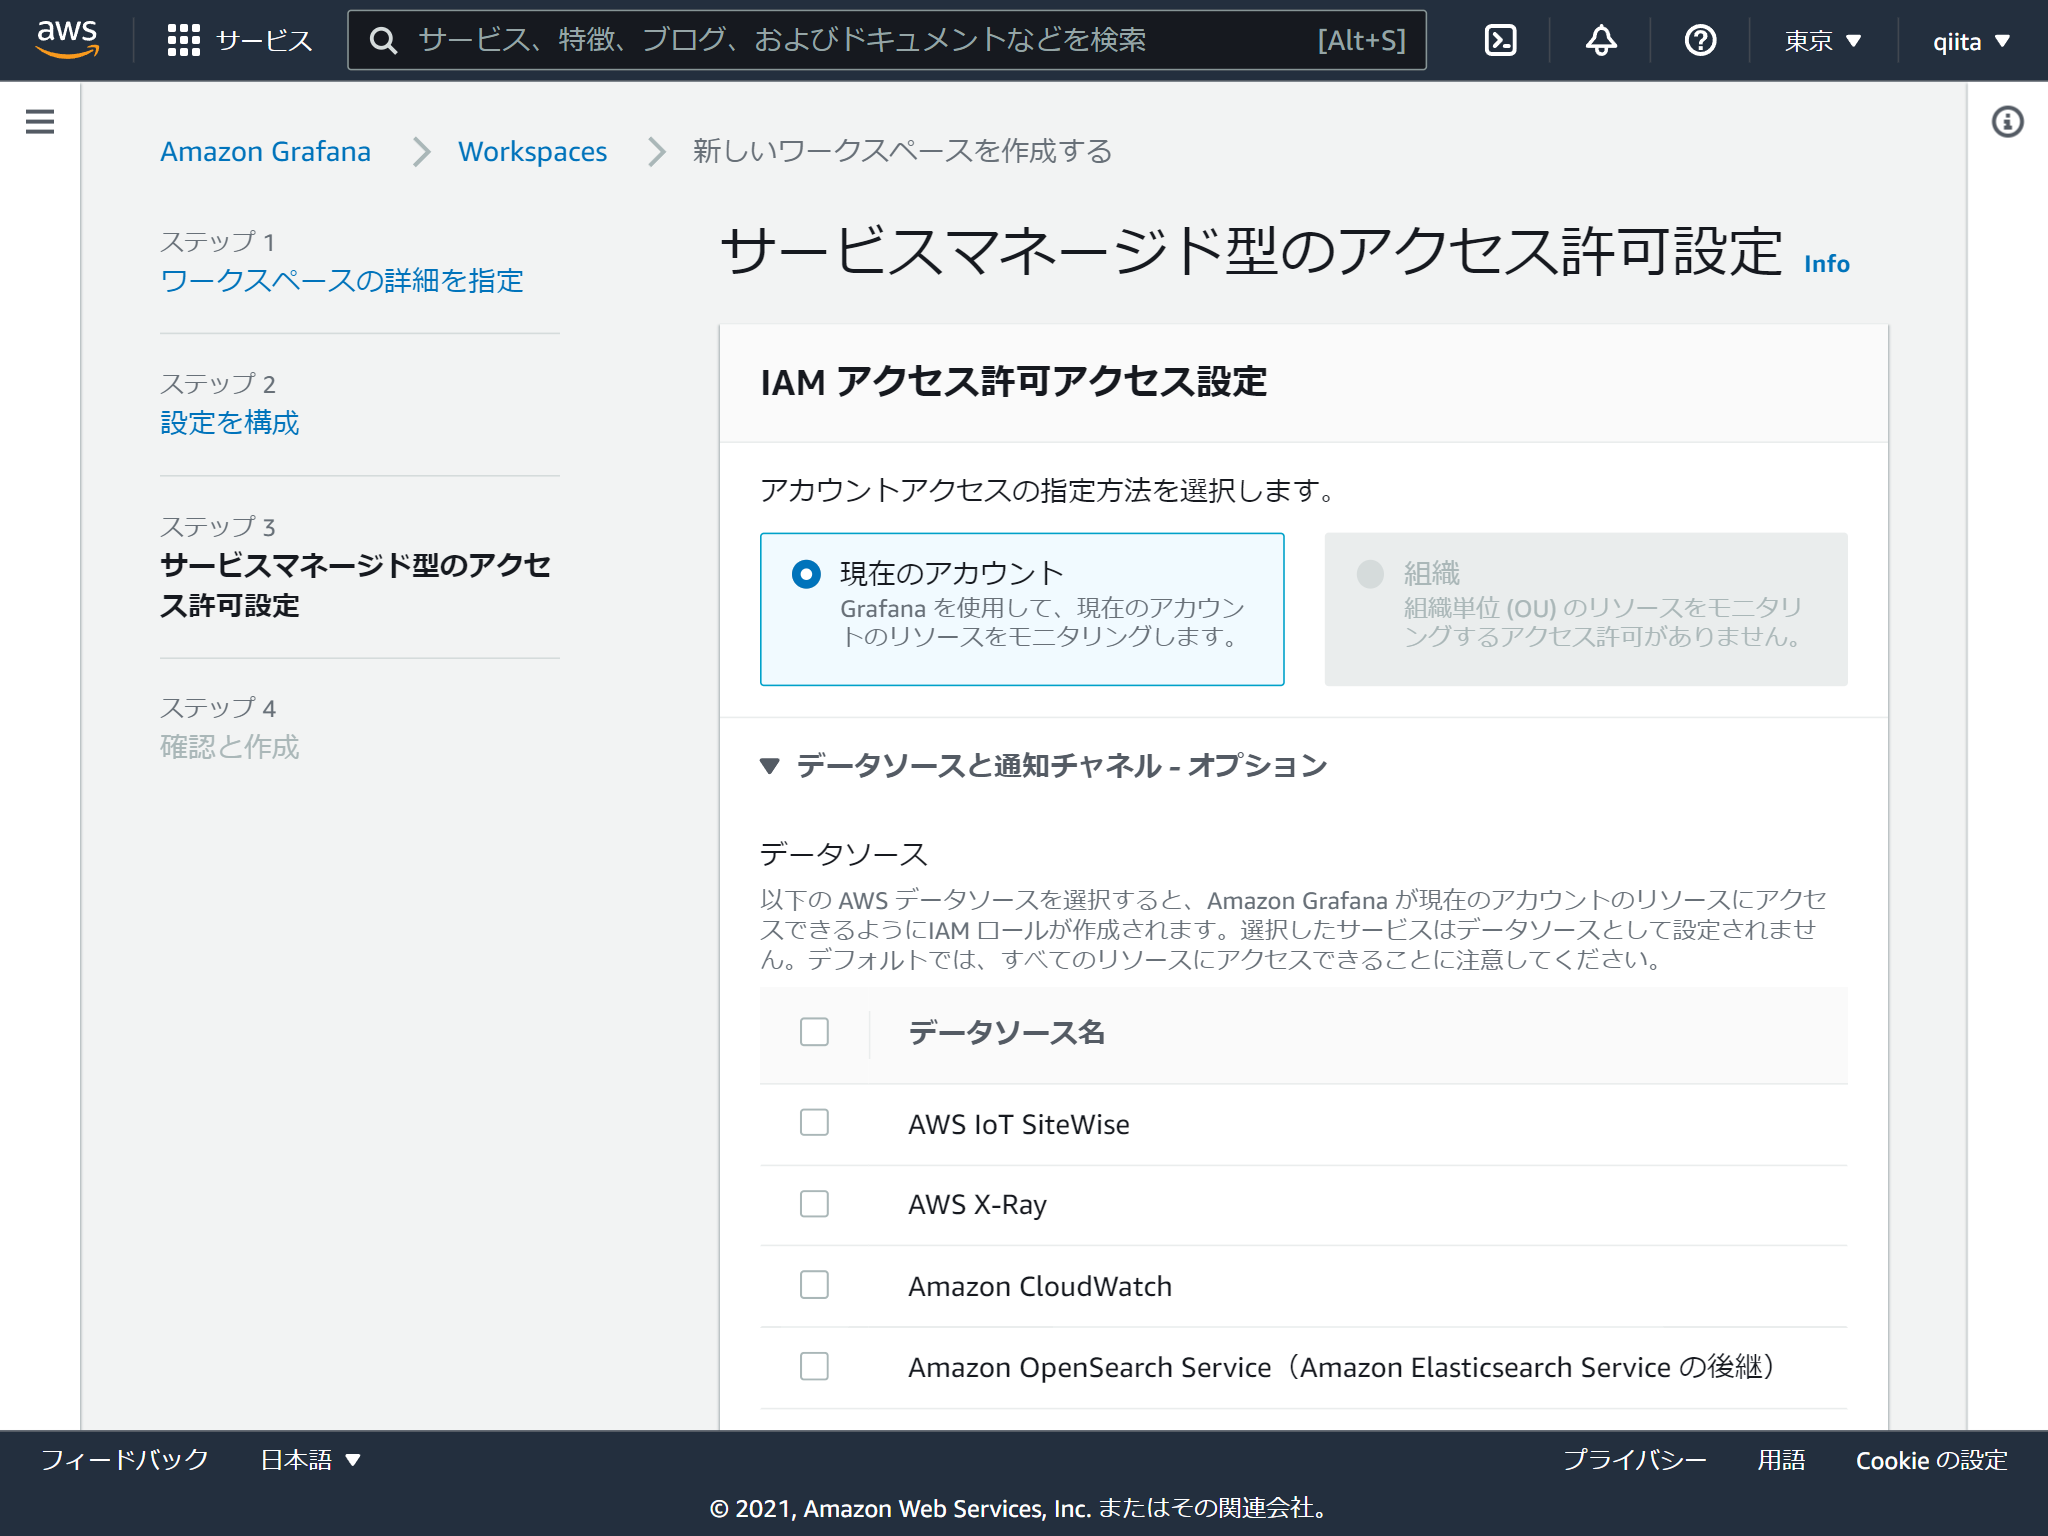
GrafanaがアクセスするAWSのリソースを選択します。 あとからも変更できます。
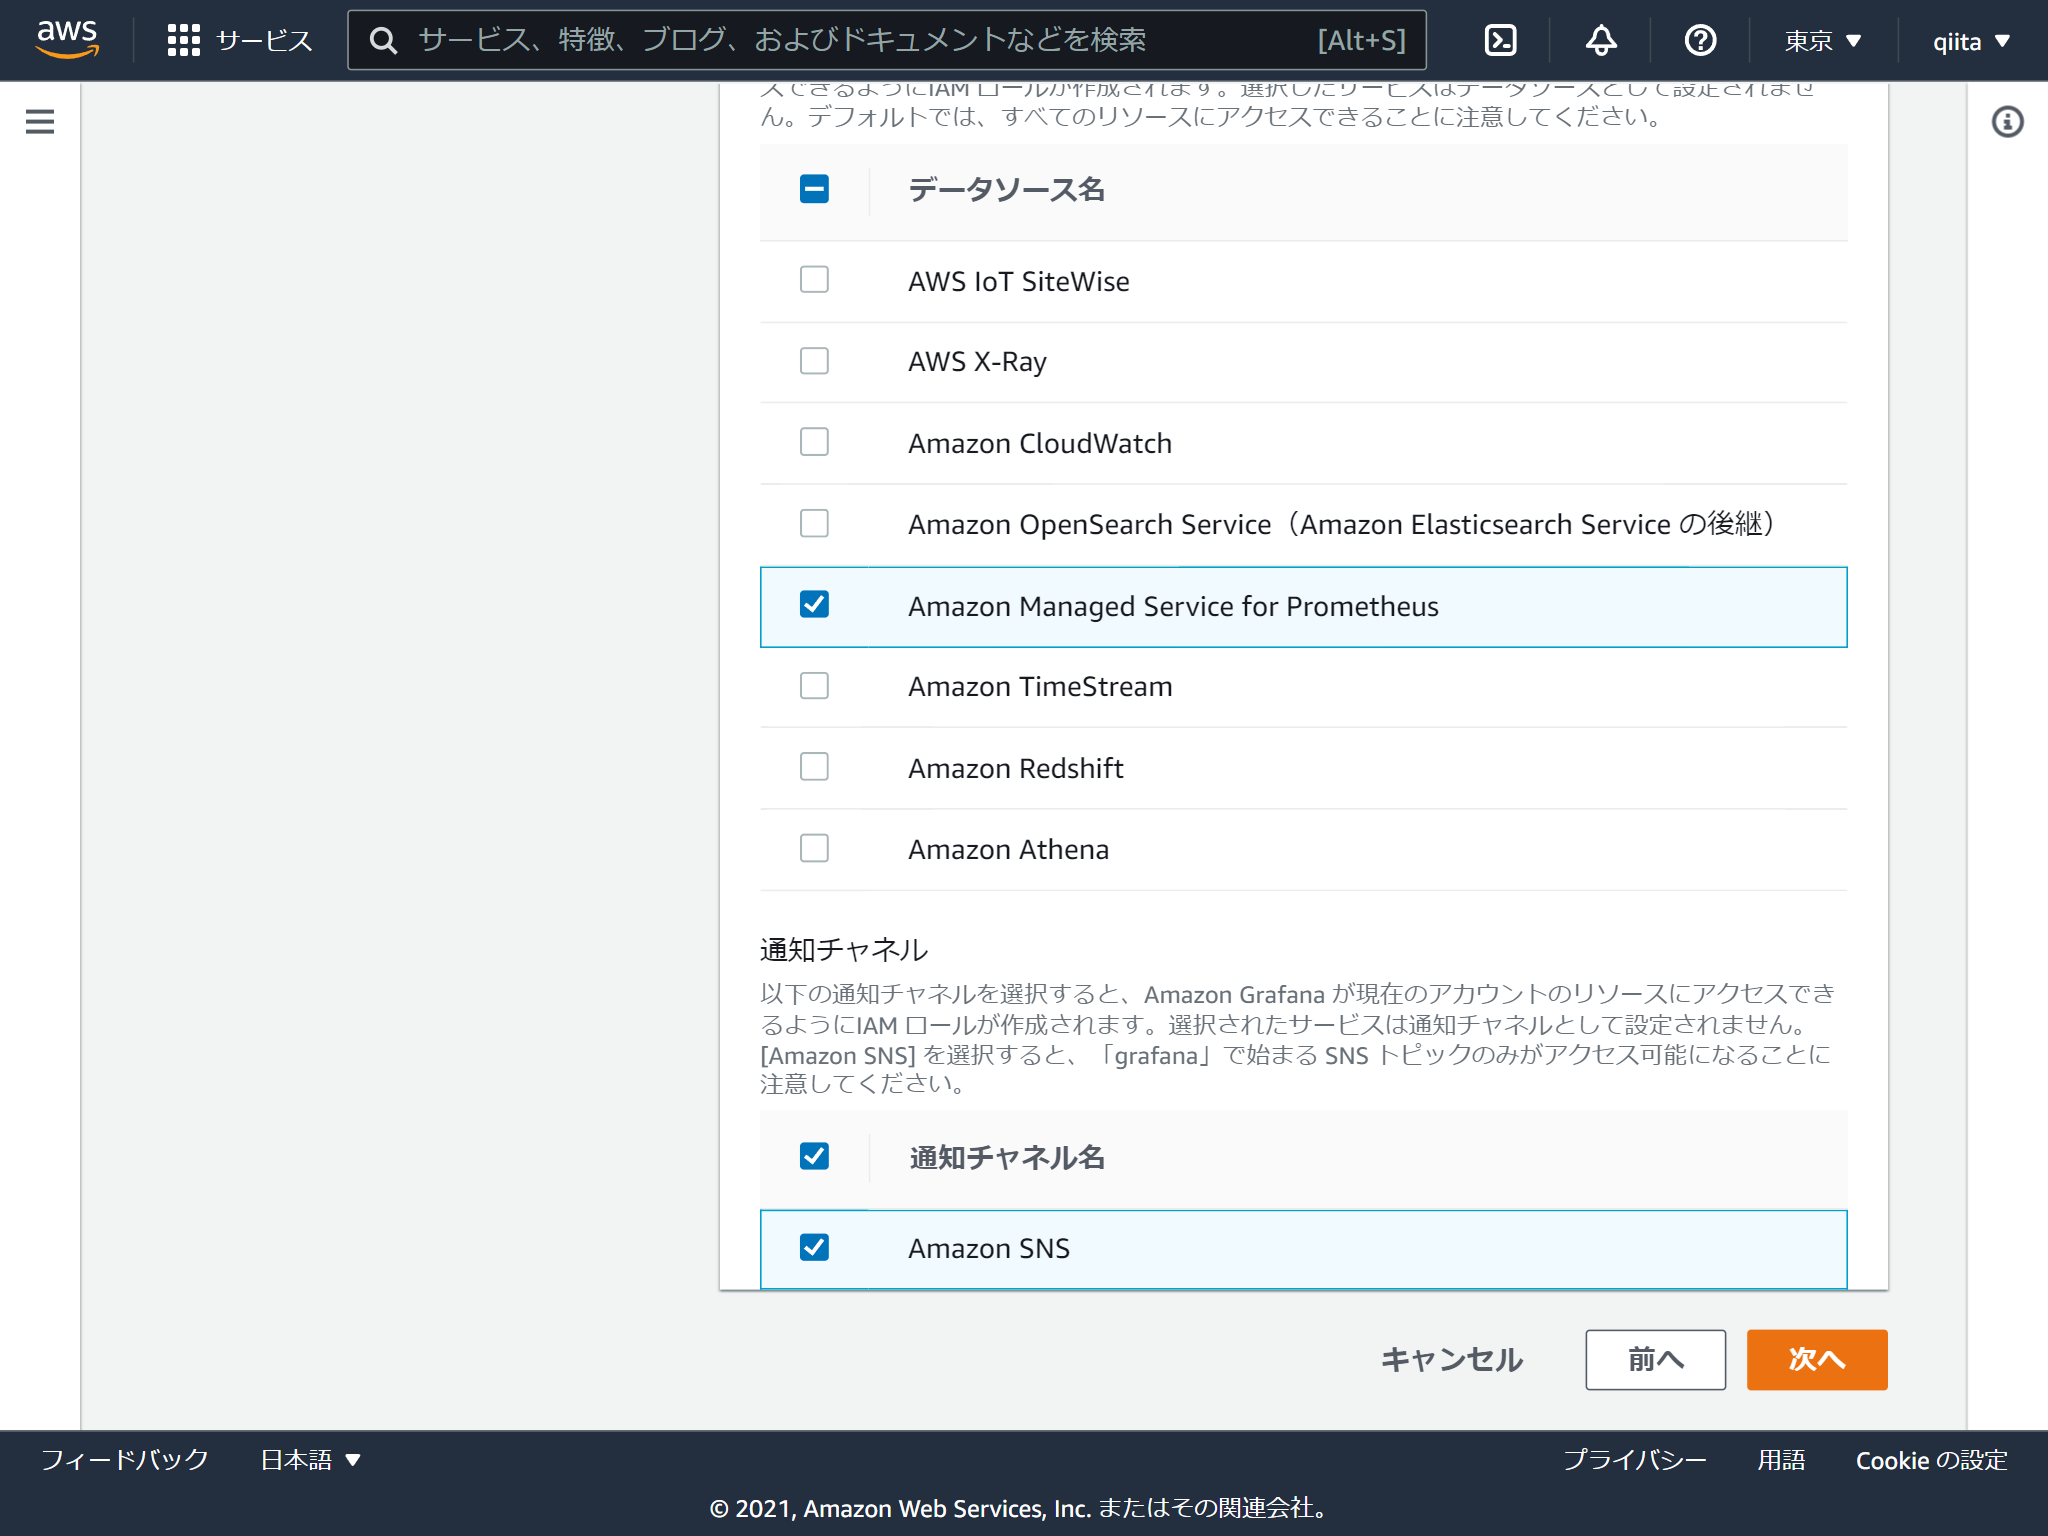
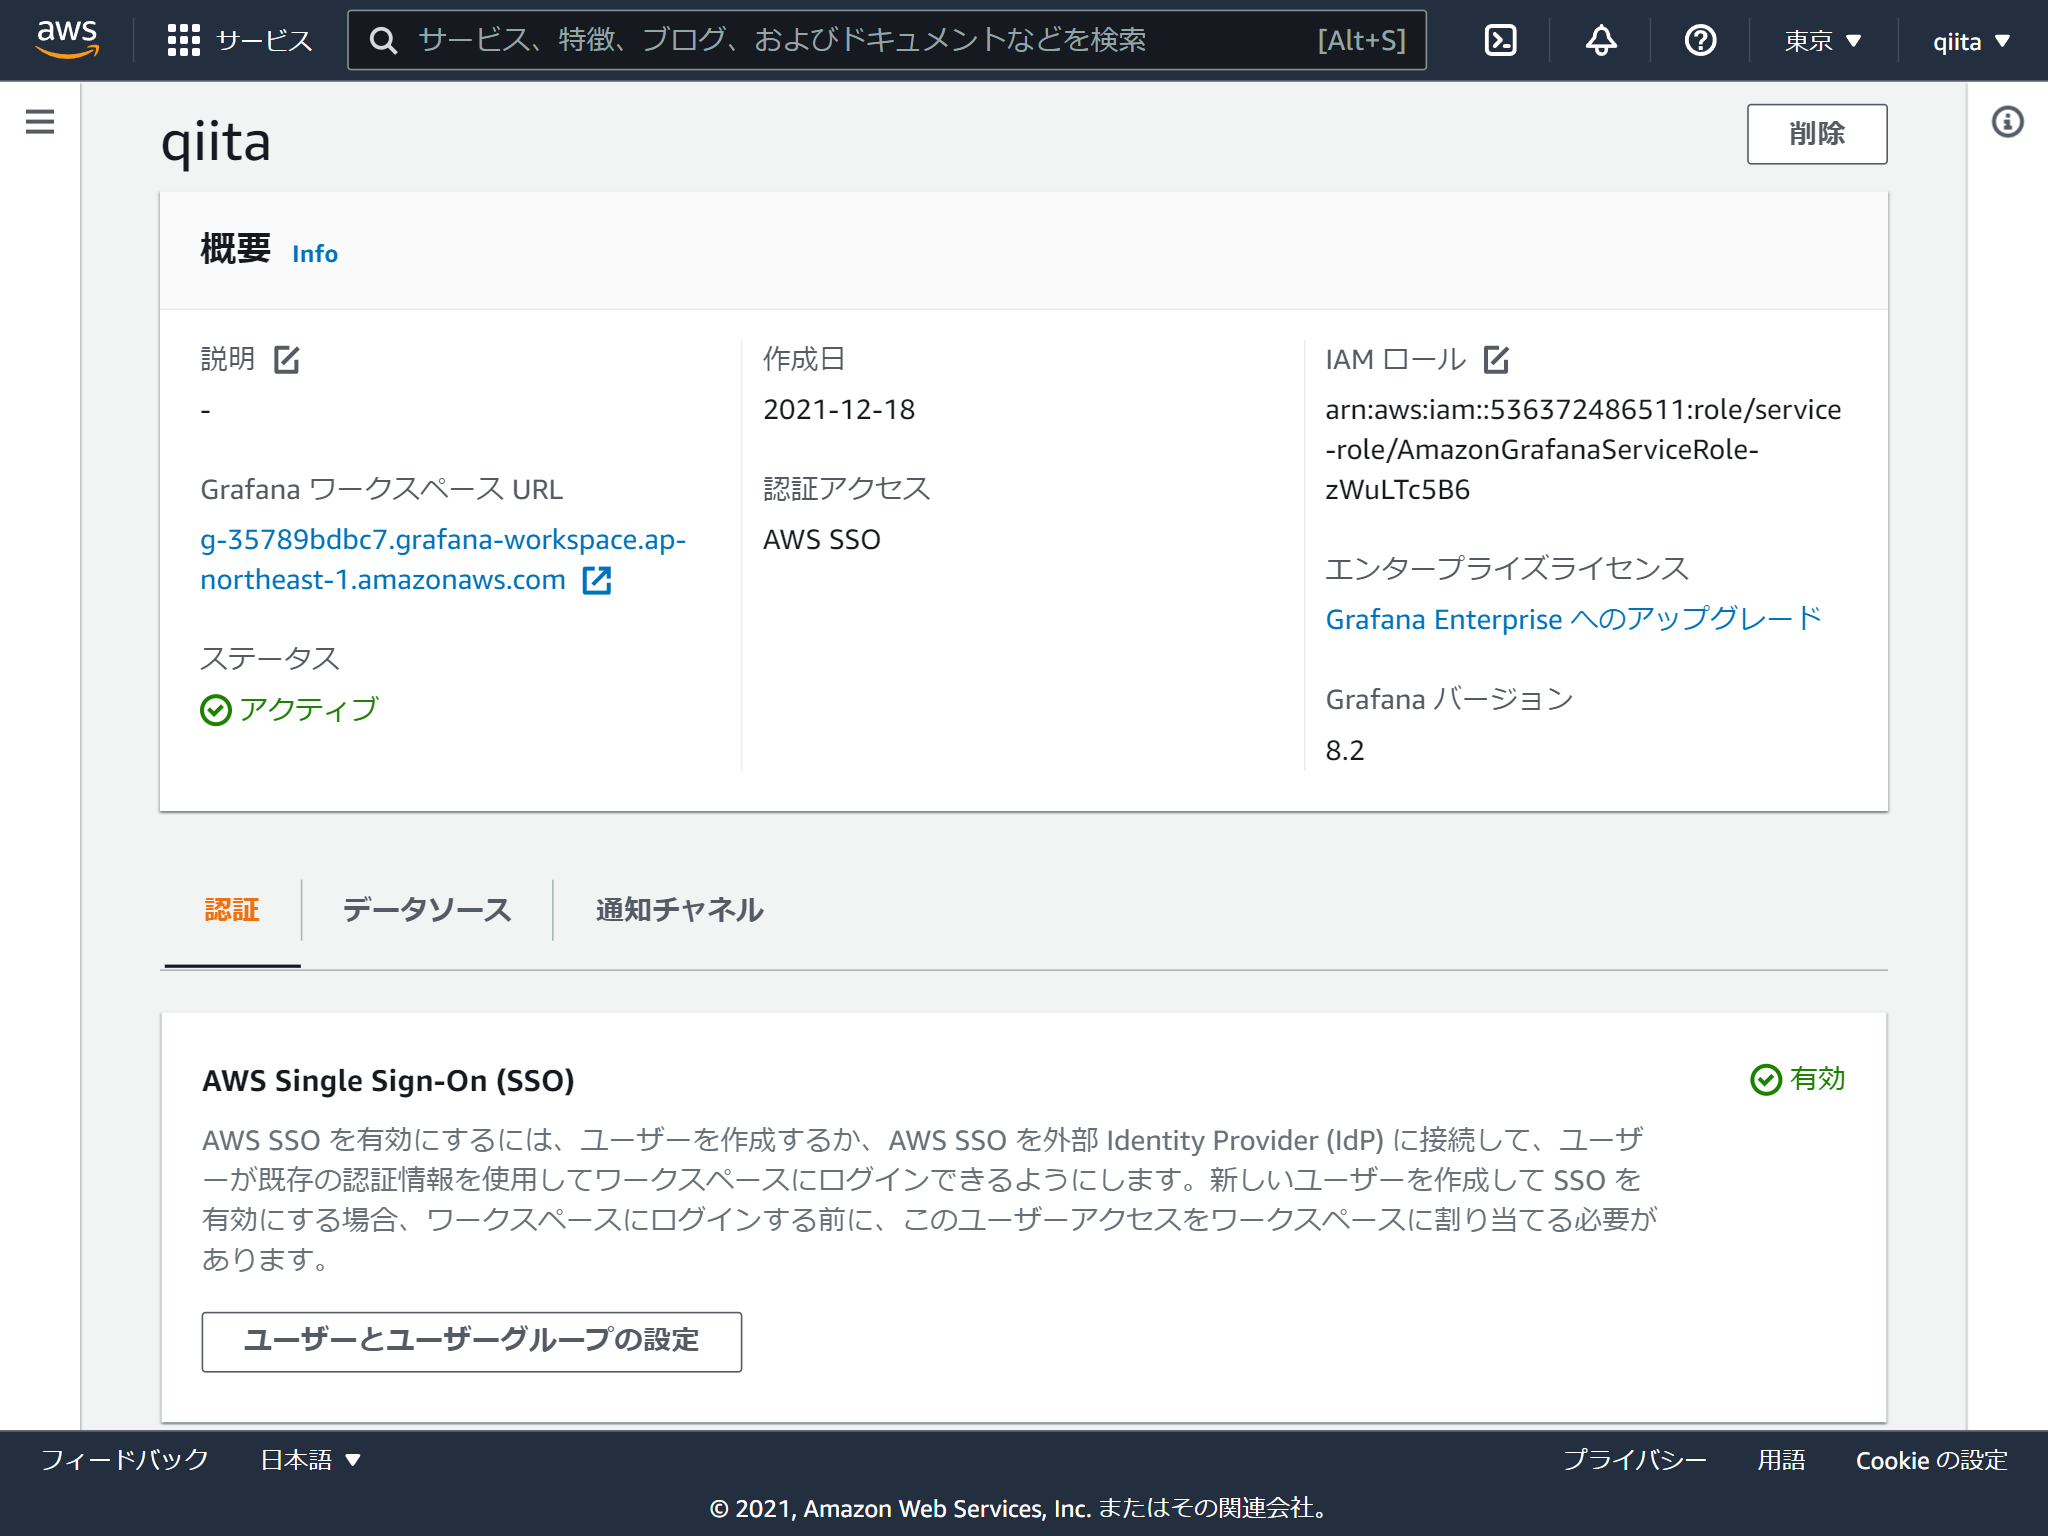
これで作成は完了です。 続いてログインするユーザーを追加します。「ユーザーとユーザーグループの設定」をクリック
今回はAWS SSOで作成したグループを追加します。
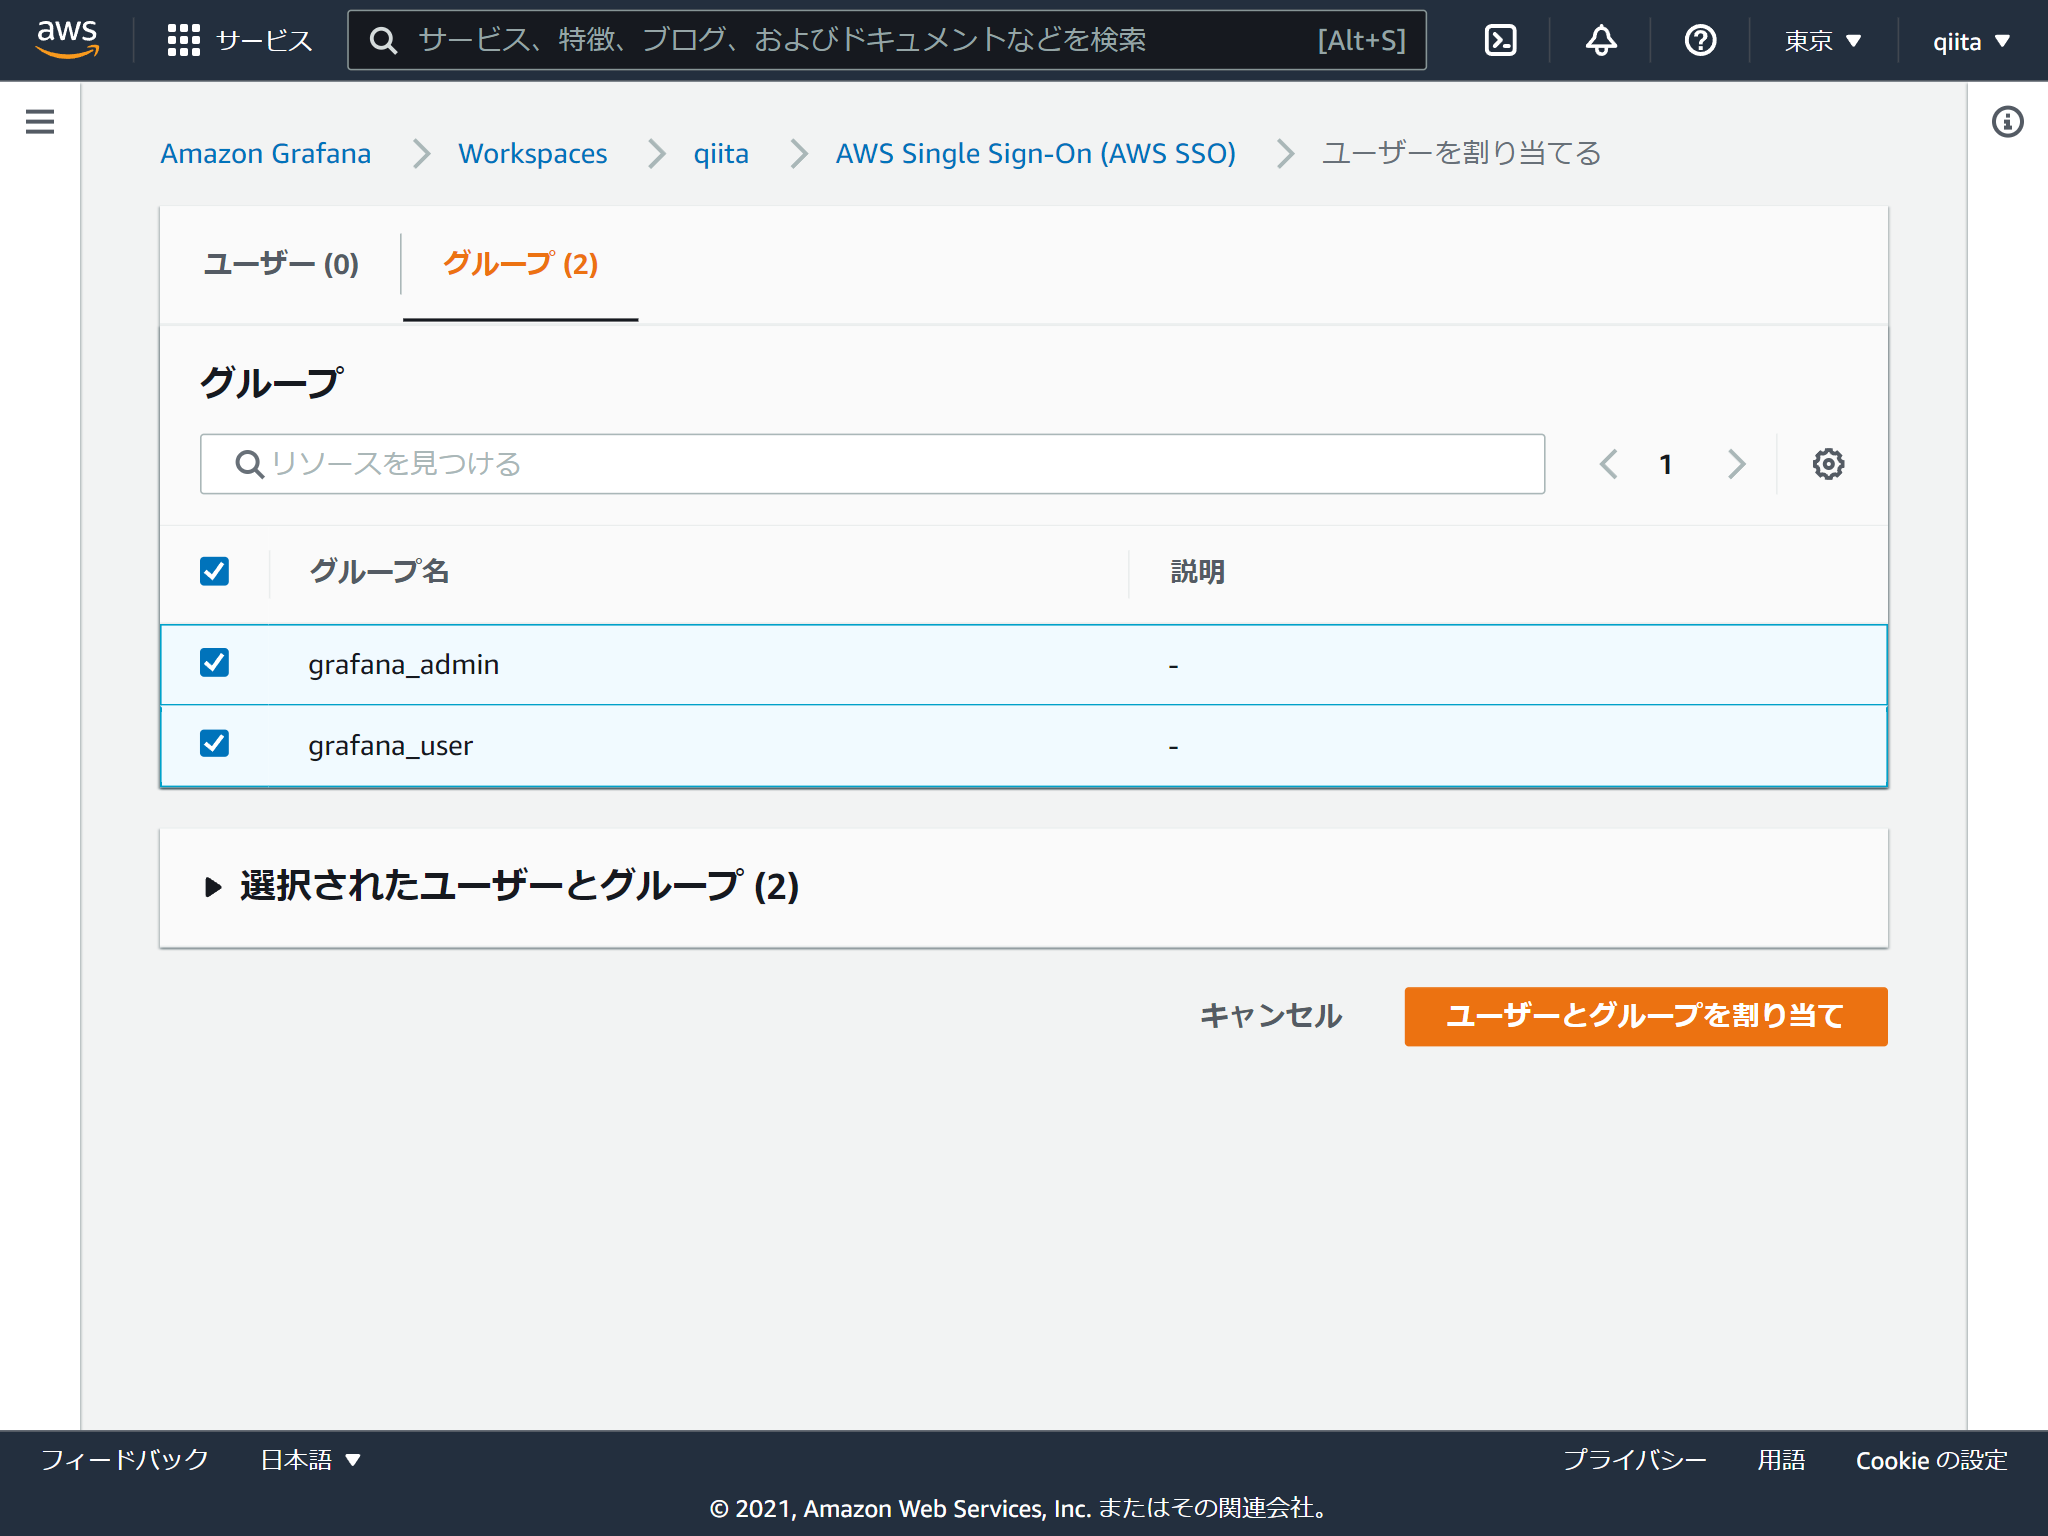
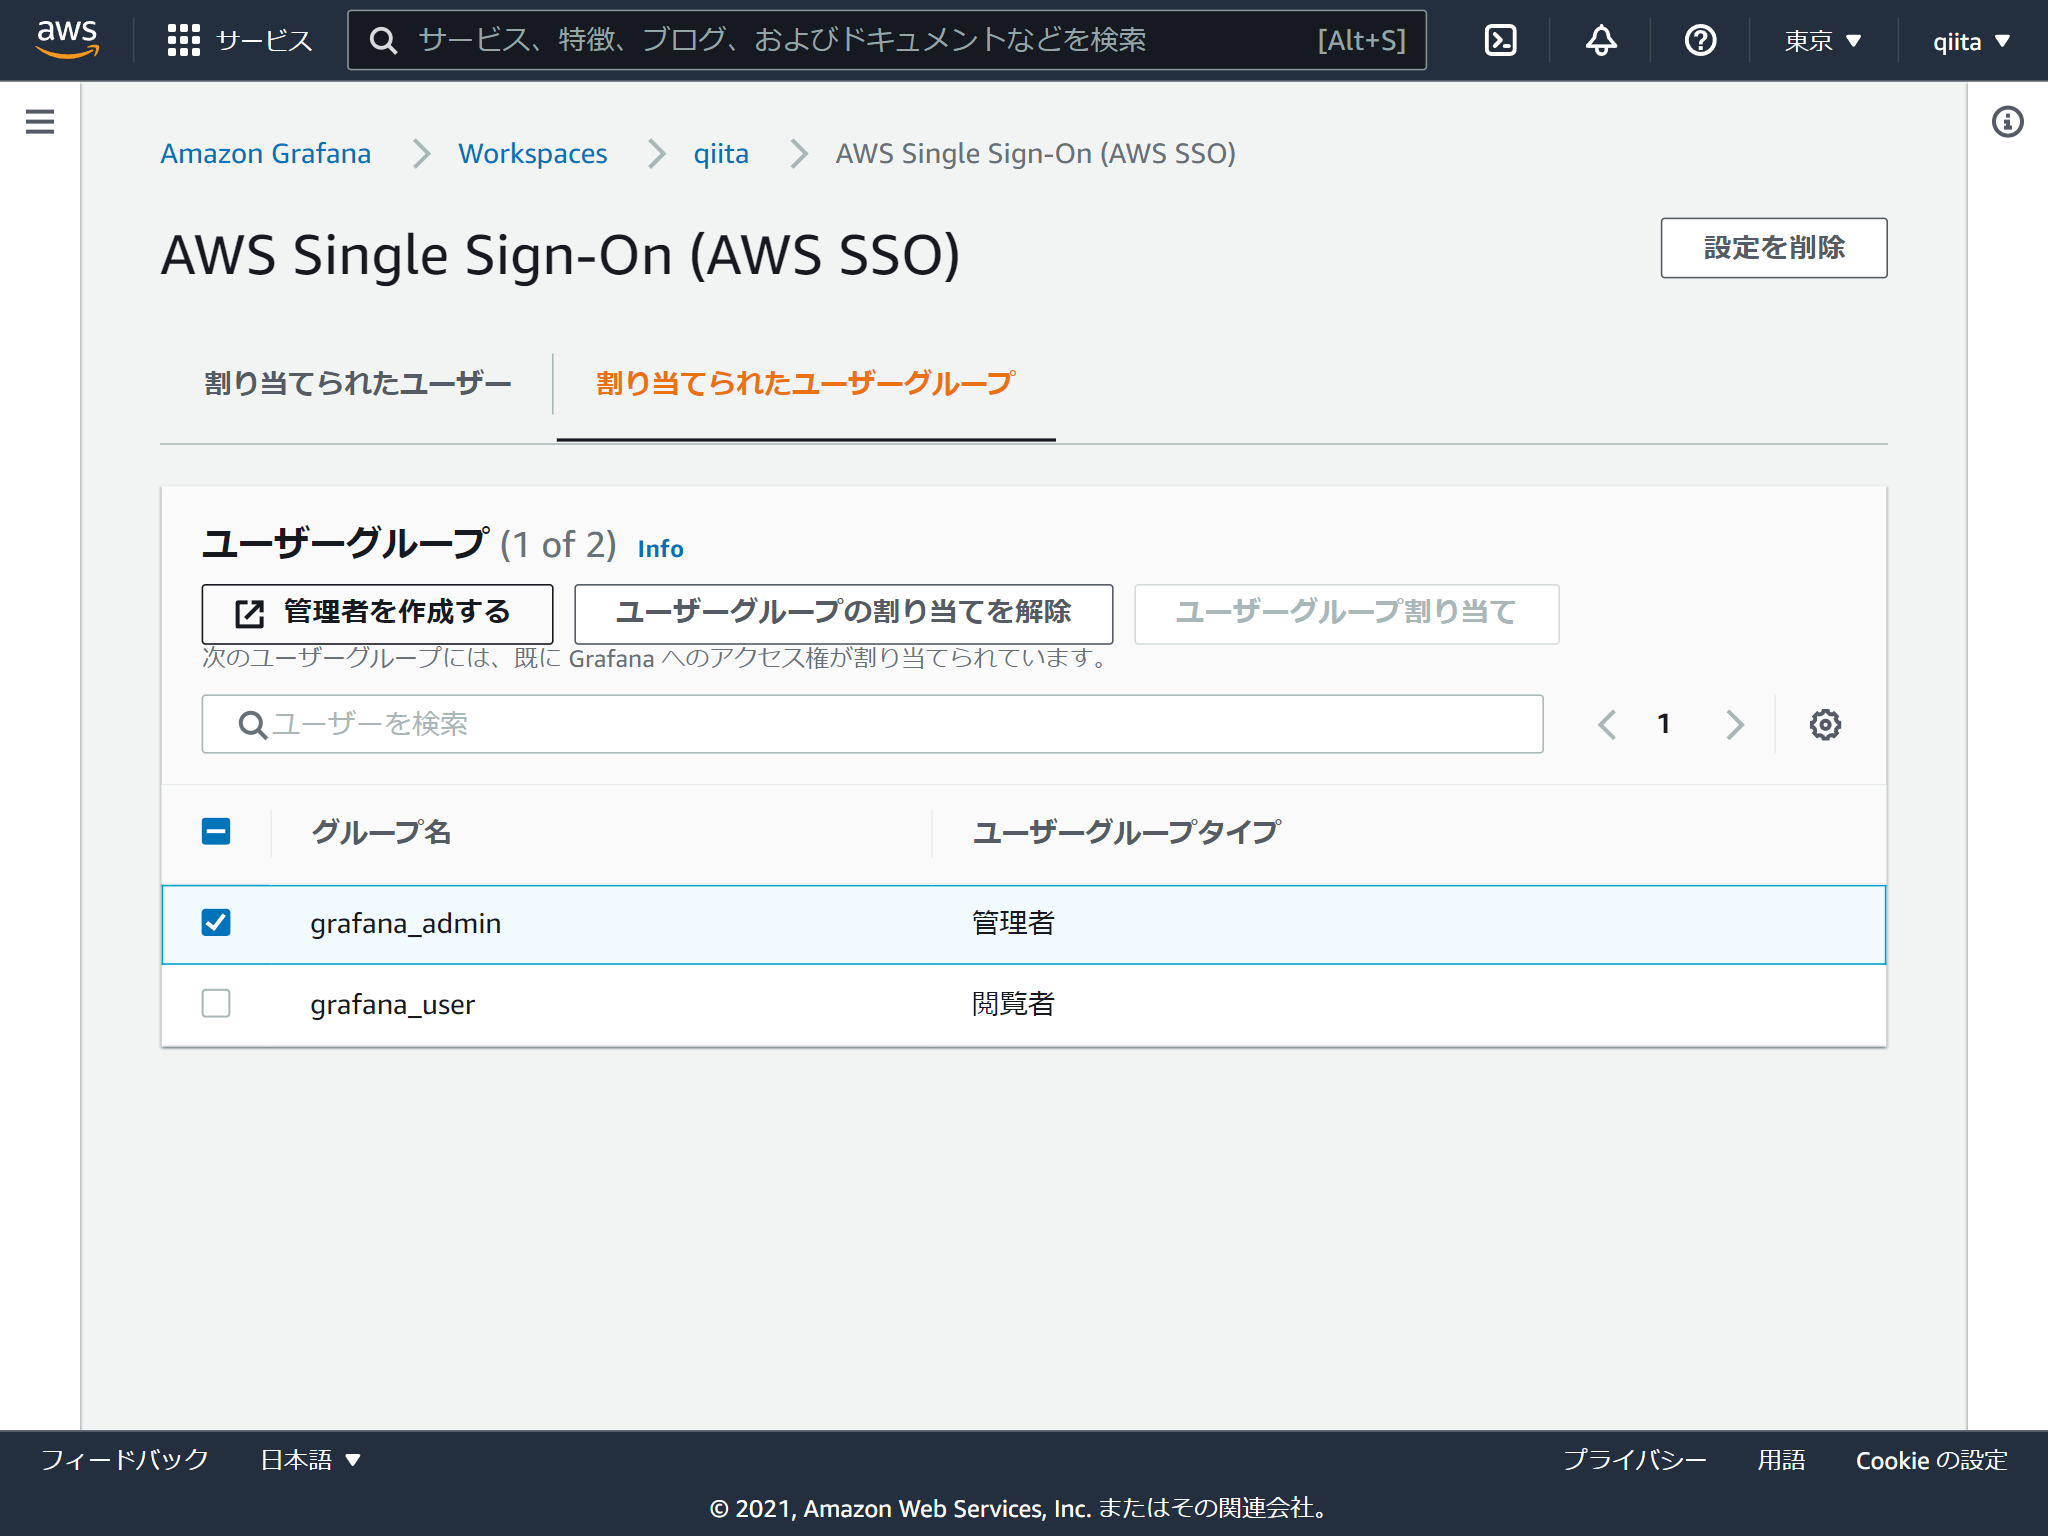
権限は閲覧者と管理者の2つあります。デフォルトが閲覧者で管理者に変更する場合はチェックを入れて「管理者を作成する」をクリックします。(閲覧者に戻す方法はないのかな?)
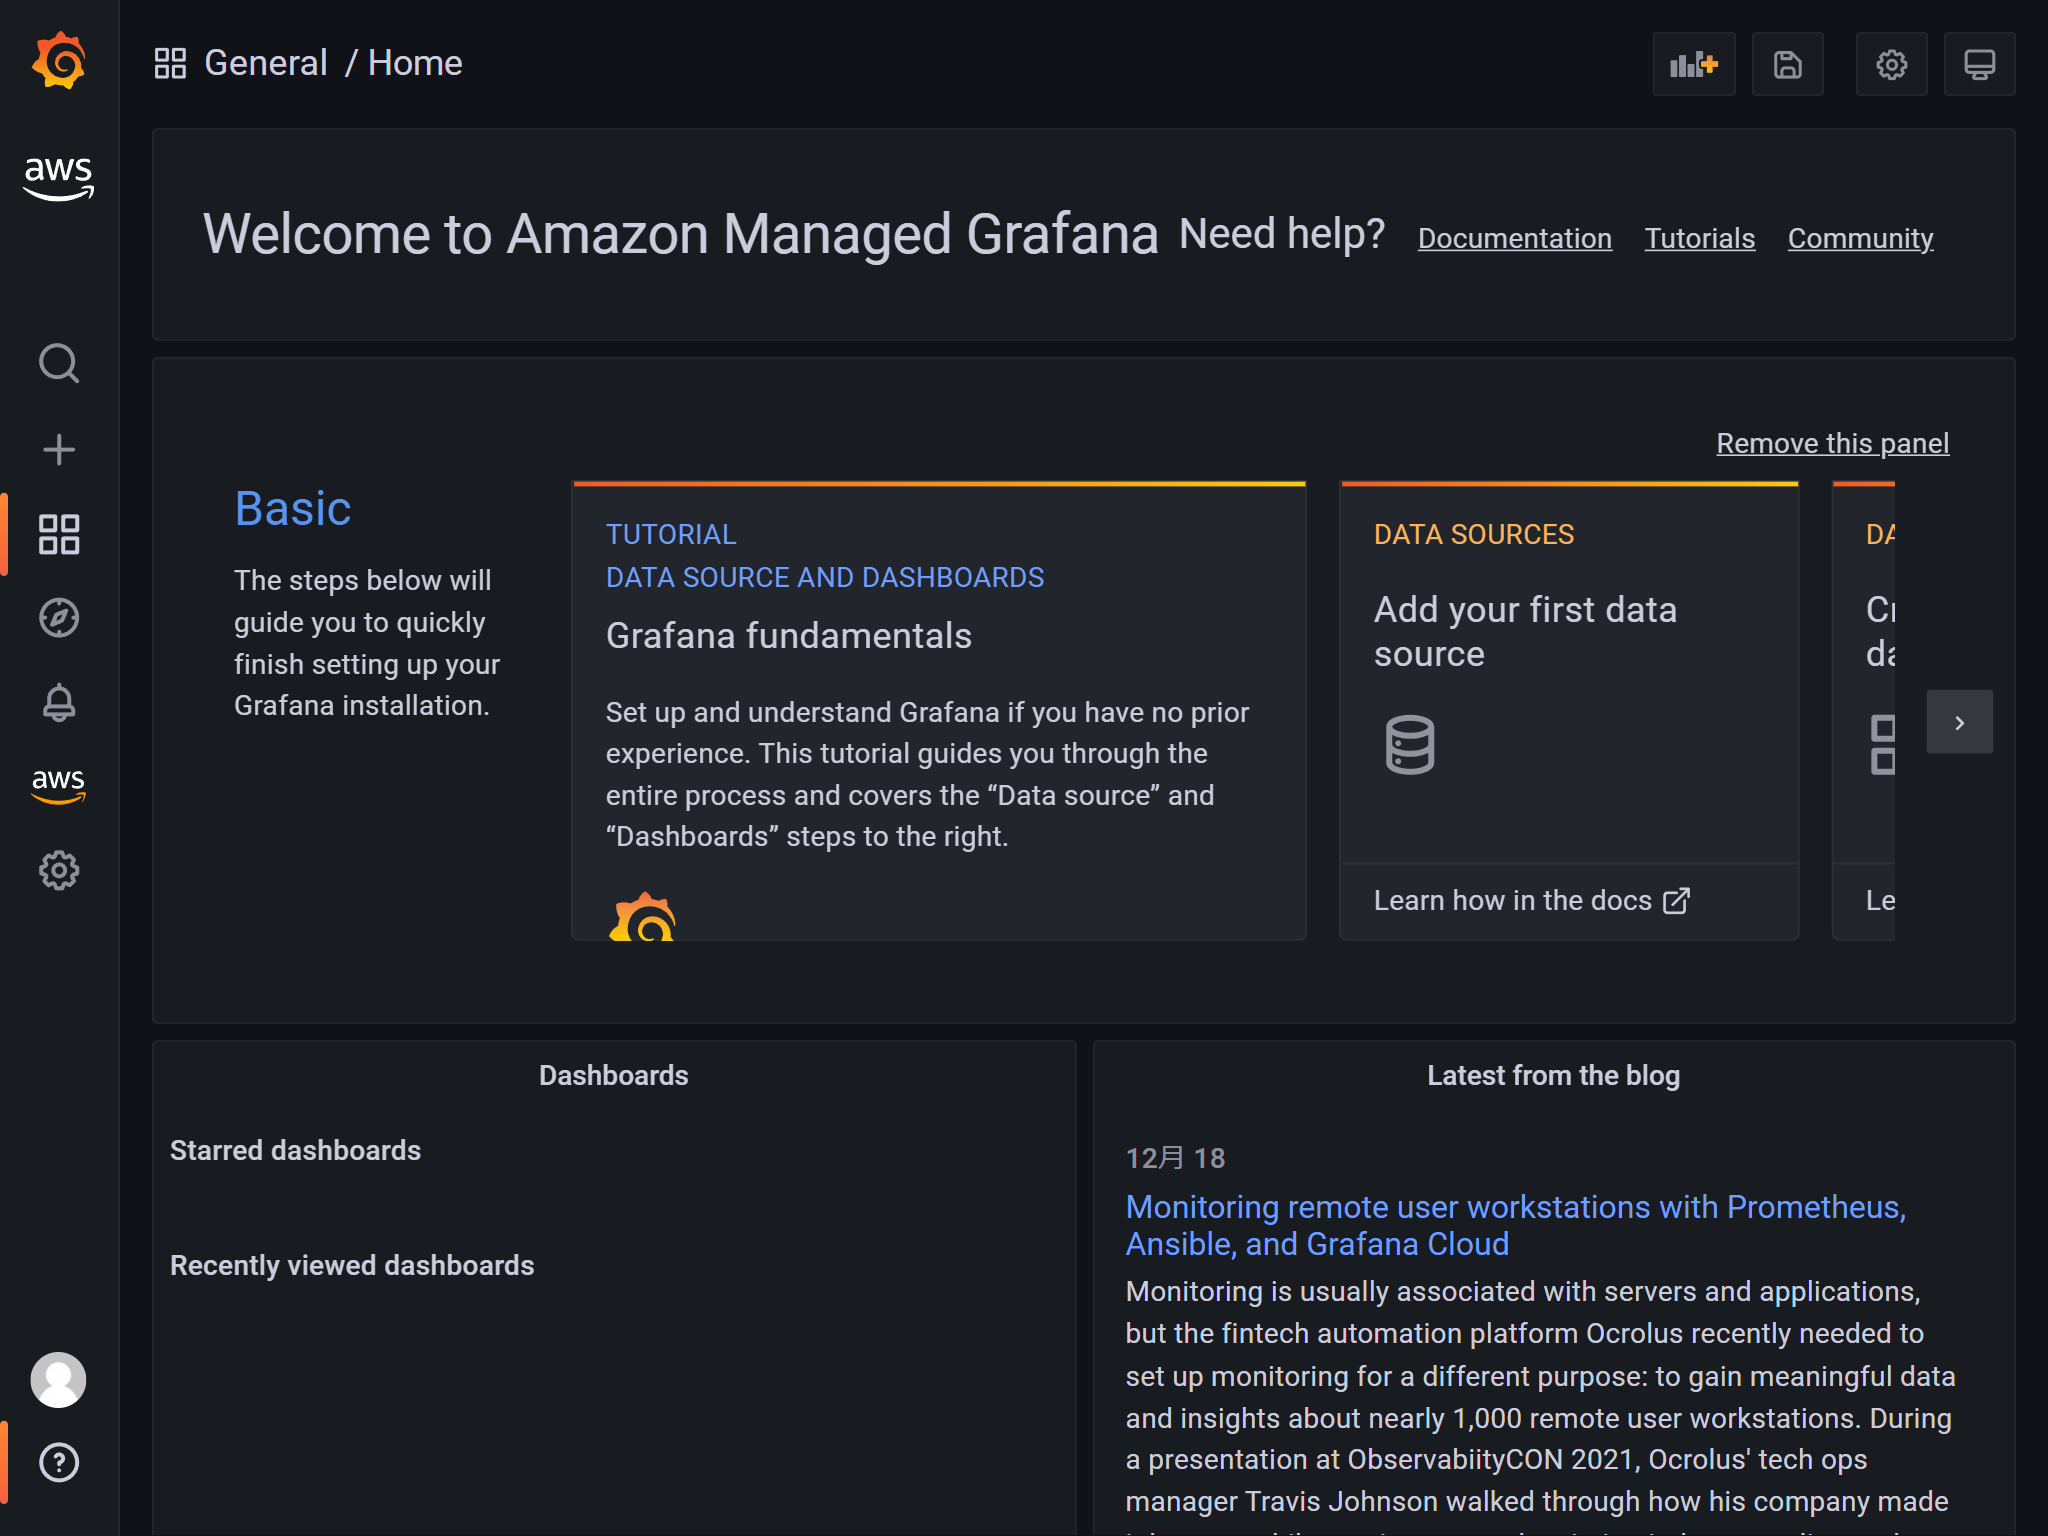
Grafanaログイン
マネジメントコンソールに表示されるワークスペースURLからアクセスします。設定したAWS SSOのユーザーでログインするとGrafanaの画面が表示されます。メニューにAWSのアイコンがありますね。
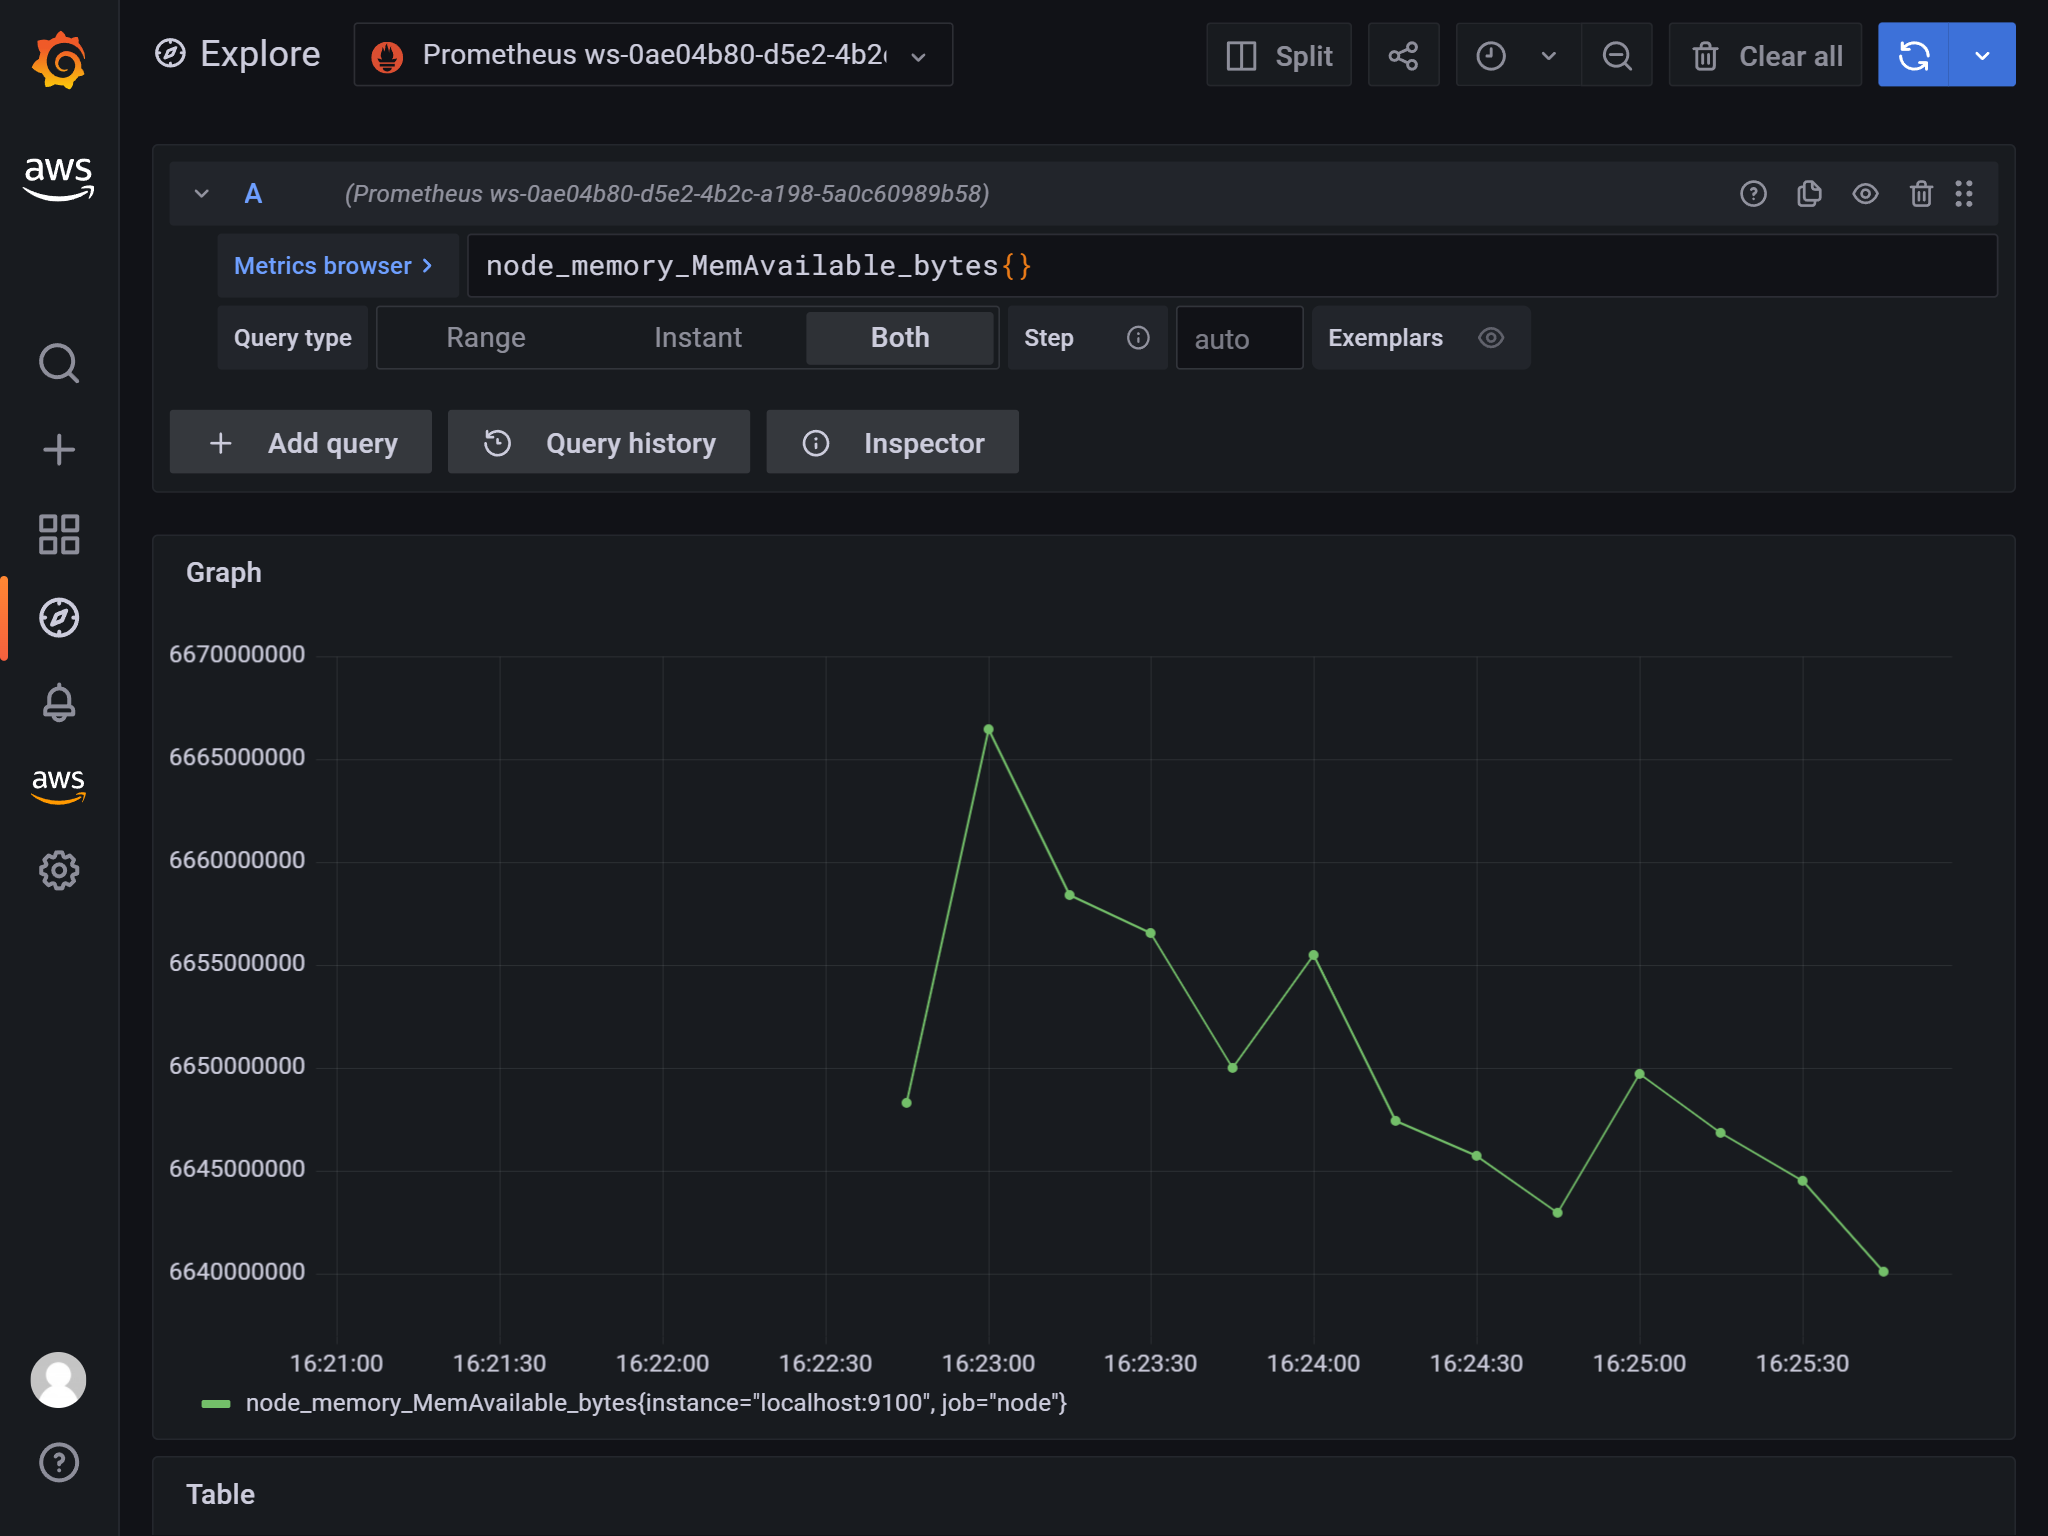
データソースにAmazon Managed Service for Prometheusを追加します。 AWSアイコンからデータソースをたどると追加できます。
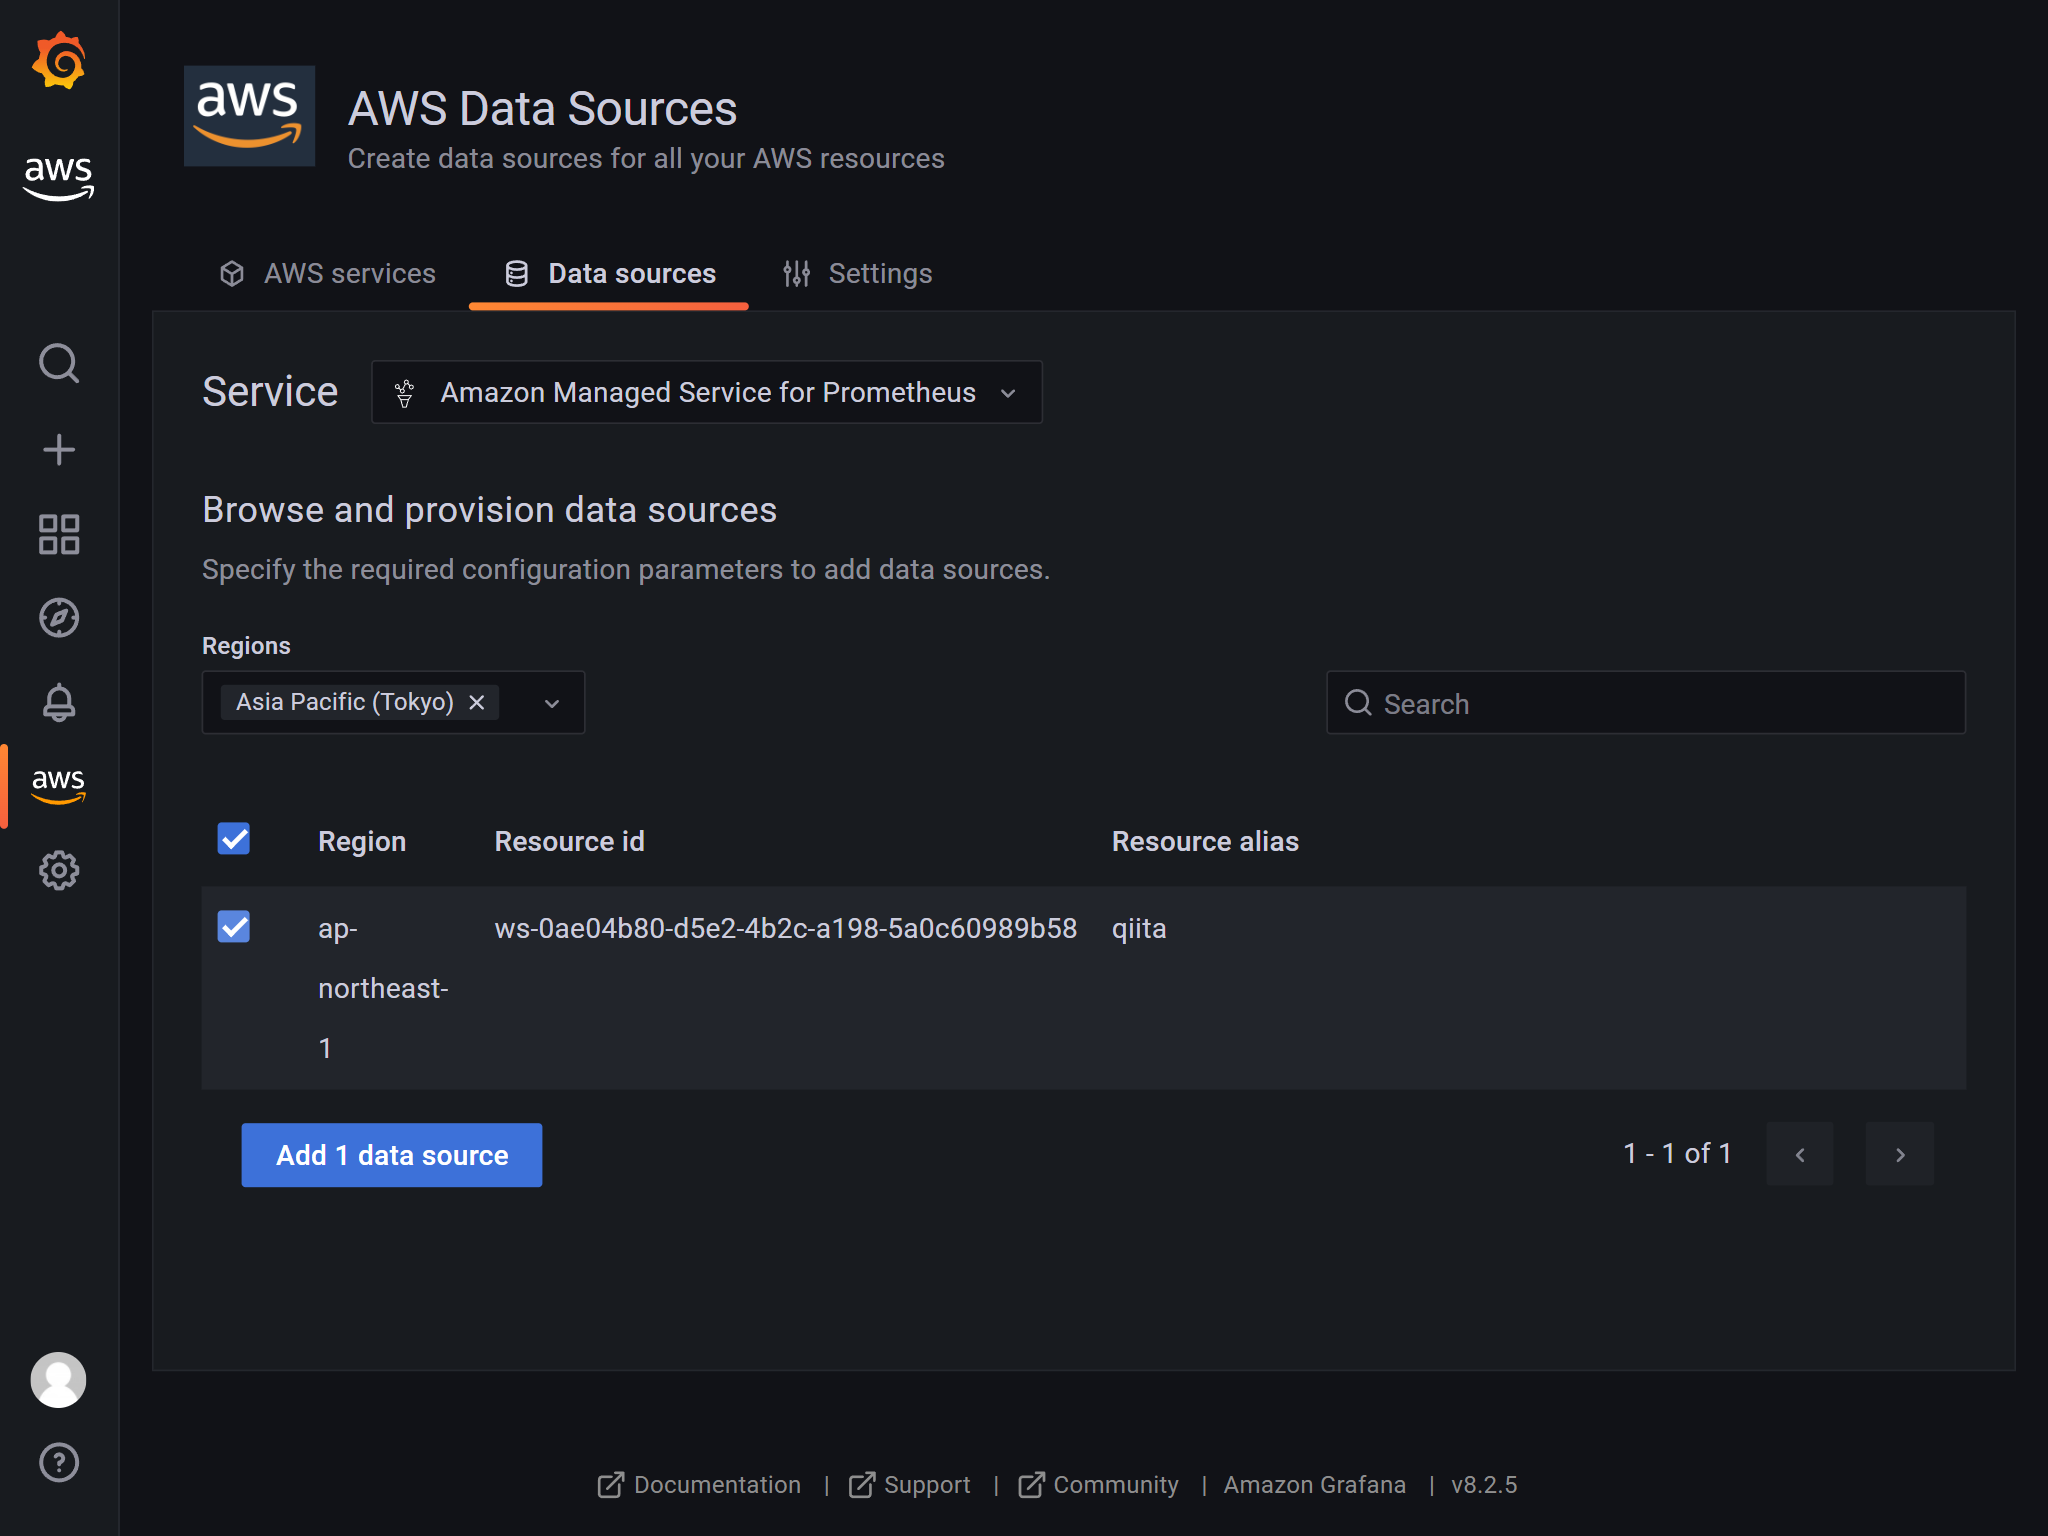
ここまでできれば通常のGrafana同様です。
EKS AnywhereでKubernetes環境を構築してみた
過去にQiitaに投稿した内容のアーカイブです。
テスト環境
| 項目 | 内容 |
|---|---|
| ホスト環境 | Windows 11 |
| 仮想化環境 | Multipass |
仮想環境の作成
| 項目 | 値 |
|---|---|
| CPU | 2コア |
| メモリ | 8GB |
| ストレージ | 20GB |
multipass launch -n eks-anywhere2 -c 2 -m 8G -d 20G
multipass shell eks-anywhere
環境構築
Dockerのインストール
curl -fsSL https://get.docker.com -o get-docker.sh && \
sh ./get-docker.sh && \
sudo usermod -aG docker $USER
一度ログアウトして再ログイン
exit
multipass shell eks-anywhere
kubectlのインストール
curl -LO "https://storage.googleapis.com/kubernetes-release/release/$(curl -s https://storage.googleapis.com/kubernetes-release/release/stable.txt)/bin/linux/amd64/kubectl" && \
chmod +x ./kubectl && \
sudo mv ./kubectl /usr/local/bin/kubectl
EKS Anywhere CLIツールのインストール
curl "https://github.com/weaveworks/eksctl/releases/latest/download/eksctl_$(uname -s)_amd64.tar.gz" \
    --silent --location \
    | tar xz -C /tmp && \
sudo mv /tmp/eksctl /usr/local/bin/
export EKSA_RELEASE="0.6.0" OS="$(uname -s | tr A-Z a-z)" RELEASE_NUMBER=2 && \
curl "https://anywhere-assets.eks.amazonaws.com/releases/eks-a/${RELEASE_NUMBER}/artifacts/eks-a/v${EKSA_RELEASE}/${OS}/eksctl-anywhere-v${EKSA_RELEASE}-${OS}-amd64.tar.gz" \
    --silent --location \
    | tar xz ./eksctl-anywhere && \
sudo mv ./eksctl-anywhere /usr/local/bin/
インストール確認
eksctl anywhere version
EKSクラスターの作成
configファイルの生成
CLUSTER_NAME=dev-cluster
eksctl anywhere generate clusterconfig $CLUSTER_NAME \
   --provider docker > $CLUSTER_NAME.yaml
クラスターの作成
eksctl anywhere create cluster -f $CLUSTER_NAME.yaml
できた。超簡単。
export KUBECONFIG=${PWD}/${CLUSTER_NAME}/${CLUSTER_NAME}-eks-a-cluster.kubeconfig
kubectl get ns
ubuntu@eks-anywhere:~$ kubectl get ns
NAME                                STATUS   AGE
capd-system                         Active   110s
capi-kubeadm-bootstrap-system       Active   2m8s
capi-kubeadm-control-plane-system   Active   114s
capi-system                         Active   2m16s
capi-webhook-system                 Active   2m19s
cert-manager                        Active   3m40s
default                             Active   4m33s
eksa-system                         Active   61s
etcdadm-bootstrap-provider-system   Active   2m4s
etcdadm-controller-system           Active   2m1s
kube-node-lease                     Active   4m35s
kube-public                         Active   4m35s
kube-system                         Active   4m35s
ubuntu@eks-anywhere:~$
テストアプリケーションのデプロイ
kubectl apply -f "https://anywhere.eks.amazonaws.com/manifests/hello-eks-a.yaml"
ubuntu@eks-anywhere:~$ kubectl get pods -l app=hello-eks-a
NAME                          READY   STATUS    RESTARTS   AGE
hello-eks-a-9644dd8dc-f2czp   1/1     Running   0          27s
ubuntu@eks-anywhere:~$
ポートフォワーディング
kubectl port-forward deploy/hello-eks-a 8000:80
この状態でもう一つターミナルを立ち上げて(コマンドプロンプトをもう一つ立ち上げてmultipass shell eks-anywhere)、アクセス
ubuntu@eks-anywhere:~$ curl localhost:8000
Handling connection for 8000
⬡⬢⬡⬢⬡⬢⬡⬢⬡⬢⬡⬢⬡⬢⬡⬢⬡⬢⬡⬢⬡⬢⬡⬢⬡⬢⬡⬢⬡⬢⬡⬢⬡⬢⬡⬢⬡⬢⬡⬢⬡⬢⬡⬢⬡⬢⬡⬢⬡⬢⬡⬢⬡⬢⬡⬢⬡⬢⬡⬢⬡⬢⬡⬢⬡⬢⬡⬢

Thank you for using

███████╗██╗  ██╗███████╗
██╔════╝██║ ██╔╝██╔════╝
█████╗  █████╔╝ ███████╗
██╔══╝  ██╔═██╗ ╚════██║
███████╗██║  ██╗███████║
╚══════╝╚═╝  ╚═╝╚══════╝

 █████╗ ███╗   ██╗██╗   ██╗██╗    ██╗██╗  ██╗███████╗██████╗ ███████╗
██╔══██╗████╗  ██║╚██╗ ██╔╝██║    ██║██║  ██║██╔════╝██╔══██╗██╔════╝
███████║██╔██╗ ██║ ╚████╔╝ ██║ █╗ ██║███████║█████╗  ██████╔╝█████╗
██╔══██║██║╚██╗██║  ╚██╔╝  ██║███╗██║██╔══██║██╔══╝  ██╔══██╗██╔══╝
██║  ██║██║ ╚████║   ██║   ╚███╔███╔╝██║  ██║███████╗██║  ██║███████╗
╚═╝  ╚═╝╚═╝  ╚═══╝   ╚═╝    ╚══╝╚══╝ ╚═╝  ╚═╝╚══════╝╚═╝  ╚═╝╚══════╝

You have successfully deployed the hello-eks-a pod hello-eks-a-9644dd8dc-f2czp

For more information check out
https://anywhere.eks.amazonaws.com

⬡⬢⬡⬢⬡⬢⬡⬢⬡⬢⬡⬢⬡⬢⬡⬢⬡⬢⬡⬢⬡⬢⬡⬢⬡⬢⬡⬢⬡⬢⬡⬢⬡⬢⬡⬢⬡⬢⬡⬢⬡⬢⬡⬢⬡⬢⬡⬢⬡⬢⬡⬢⬡⬢⬡⬢⬡⬢⬡⬢⬡⬢⬡⬢⬡⬢⬡⬢
ubuntu@eks-anywhere:~$
かっちょいい。
Jenkinsを起動するDocker Composeがこちらです
過去にQiitaに投稿した内容のアーカイブです。
今日わかったこと
- Docker Hubの
Official ImageのJenkinsはDEPRECATED。代わりにjenkins/jenkins:ltsを使ってねとのこと - 公式サイトには以下の記載あり。
The recommended Docker image to use is the Official jenkins/jenkins image (from the Docker Hub repository). This image contains the current Long-Term Support (LTS) release of Jenkins (which is production-ready). However this image doesn’t have docker CLI inside it and is not bundled with frequently used Blue Ocean plugins and features. This means that if you want to use the full power of Jenkins and Docker you may want to go through described below installation process.
DeepL翻訳
使用する推奨Dockerイメージは、Official jenkins/jenkinsイメージ(Docker Hubリポジトリより)です。このイメージには、Jenkinsの現在のLong-Term Support(LTS)リリースが含まれています(これは本番環境に対応しています)。しかし、このイメージにはdocker CLIが内蔵されておらず、頻繁に使用されるブルーオーシャンのプラグインや機能がバンドルされていません。つまり、JenkinsとDockerのパワーをフルに使いたい場合は、以下のようなインストール手順を踏むことになるでしょう。
JenkinsとDockerのパワーをフルに使う方法をDocker Composeで試したので、その時のログを残します。
作業ログ
mkdir ~/jenkins-docker
cd ~/jenkins-docker/
FROM jenkins/jenkins:2.303.2-jdk11
USER root
RUN apt-get update && apt-get install -y apt-transport-https \
       ca-certificates curl gnupg2 \
       software-properties-common
RUN curl -fsSL https://download.docker.com/linux/debian/gpg | apt-key add -
RUN apt-key fingerprint 0EBFCD88
RUN add-apt-repository \
       "deb [arch=arm64] https://download.docker.com/linux/debian \
       $(lsb_release -cs) stable"
RUN apt-get update && apt-get install -y docker-ce-cli
USER jenkins
RUN jenkins-plugin-cli --plugins "blueocean:1.25.0 docker-workflow:1.26"
※注:Raspberry Pi 4で試したので[arch=arm64]になってますが、多くの場合は[arch=amd4]だと思います。
version: '3.9'

services:
  docker:
    image: docker:dind
    privileged: true
    networks:
      - jenkins-network
    environment:
      DOCKER_TLS_CERTDIR: /certs
    volumes:
      - ./jenkins-docker-certs:/certs/client
      - ./jenkins-data:/var/jenkins_home
    expose:
      - "2376"

  jenkins-blueocean:
    build: .
    depends_on:
      - docker
    networks:
      - jenkins-network
    environment:
      DOCKER_HOST: "tcp://docker:2376"
      DOCKER_CERT_PATH: /certs/client
      DOCKER_TLS_VERIFY: 1
    expose:
      - "8080"
      - "50000"
    ports:
      - "8080:8080"
      - "50000:50000"
    volumes:
      - ./jenkins-docker-certs:/certs/client:ro
      - ./jenkins-data:/var/jenkins_home

networks:
  jenkins-network:
    driver: bridge
mkdir jenkins-data
mkdir jenkins-docker-certs
docker compose up -d
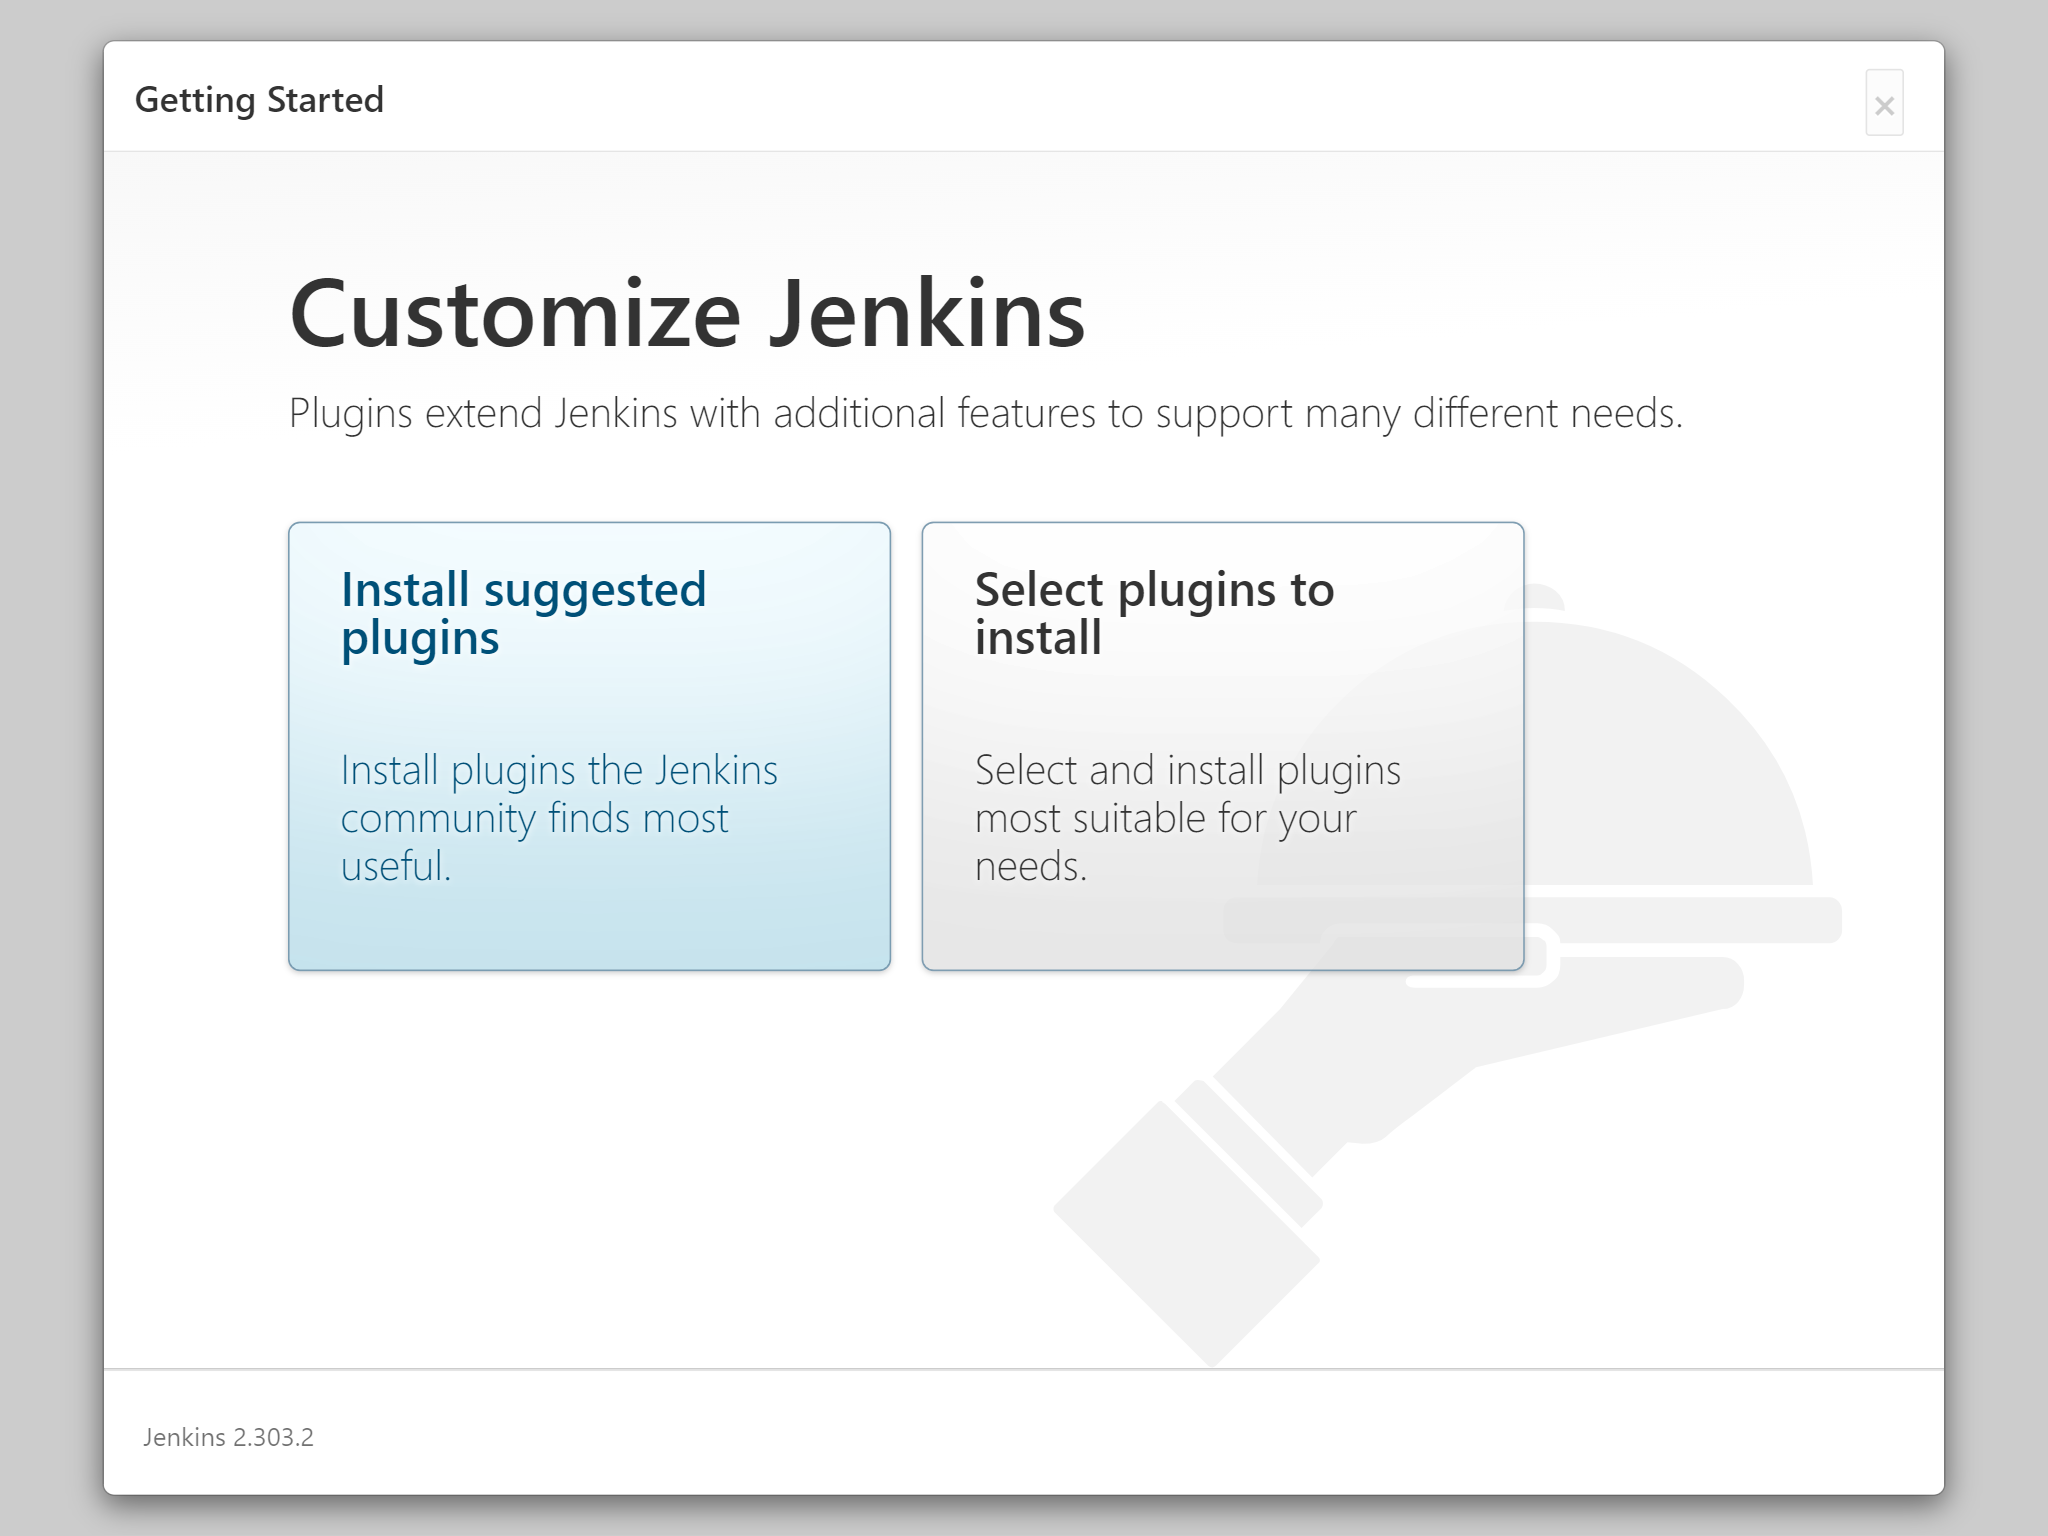
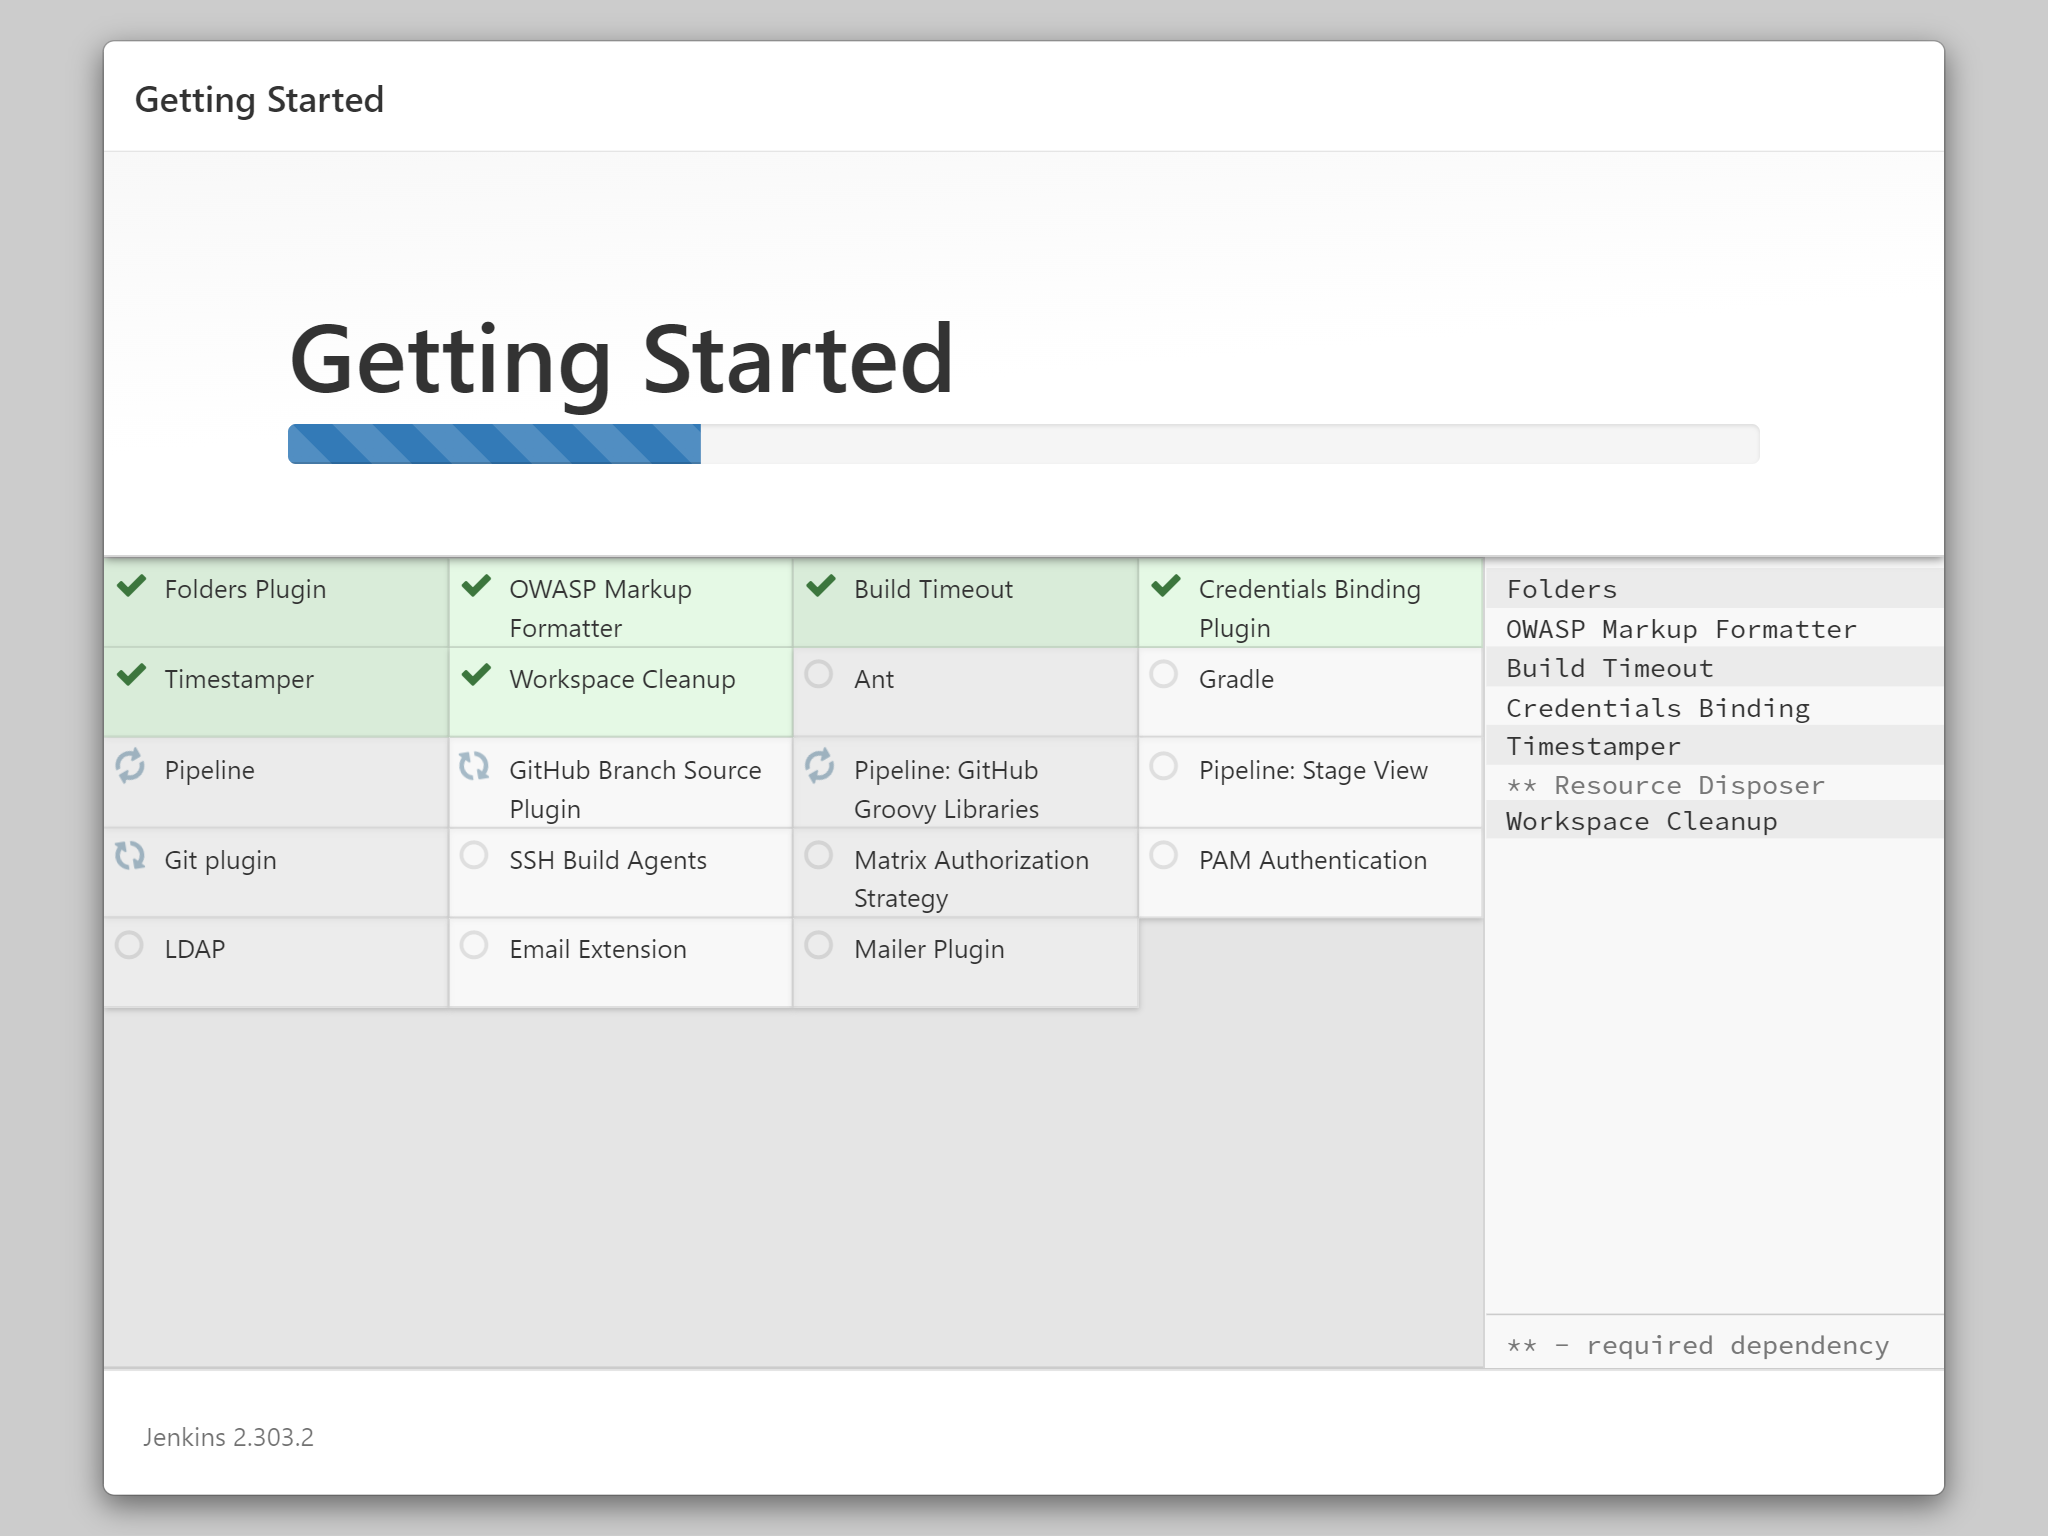
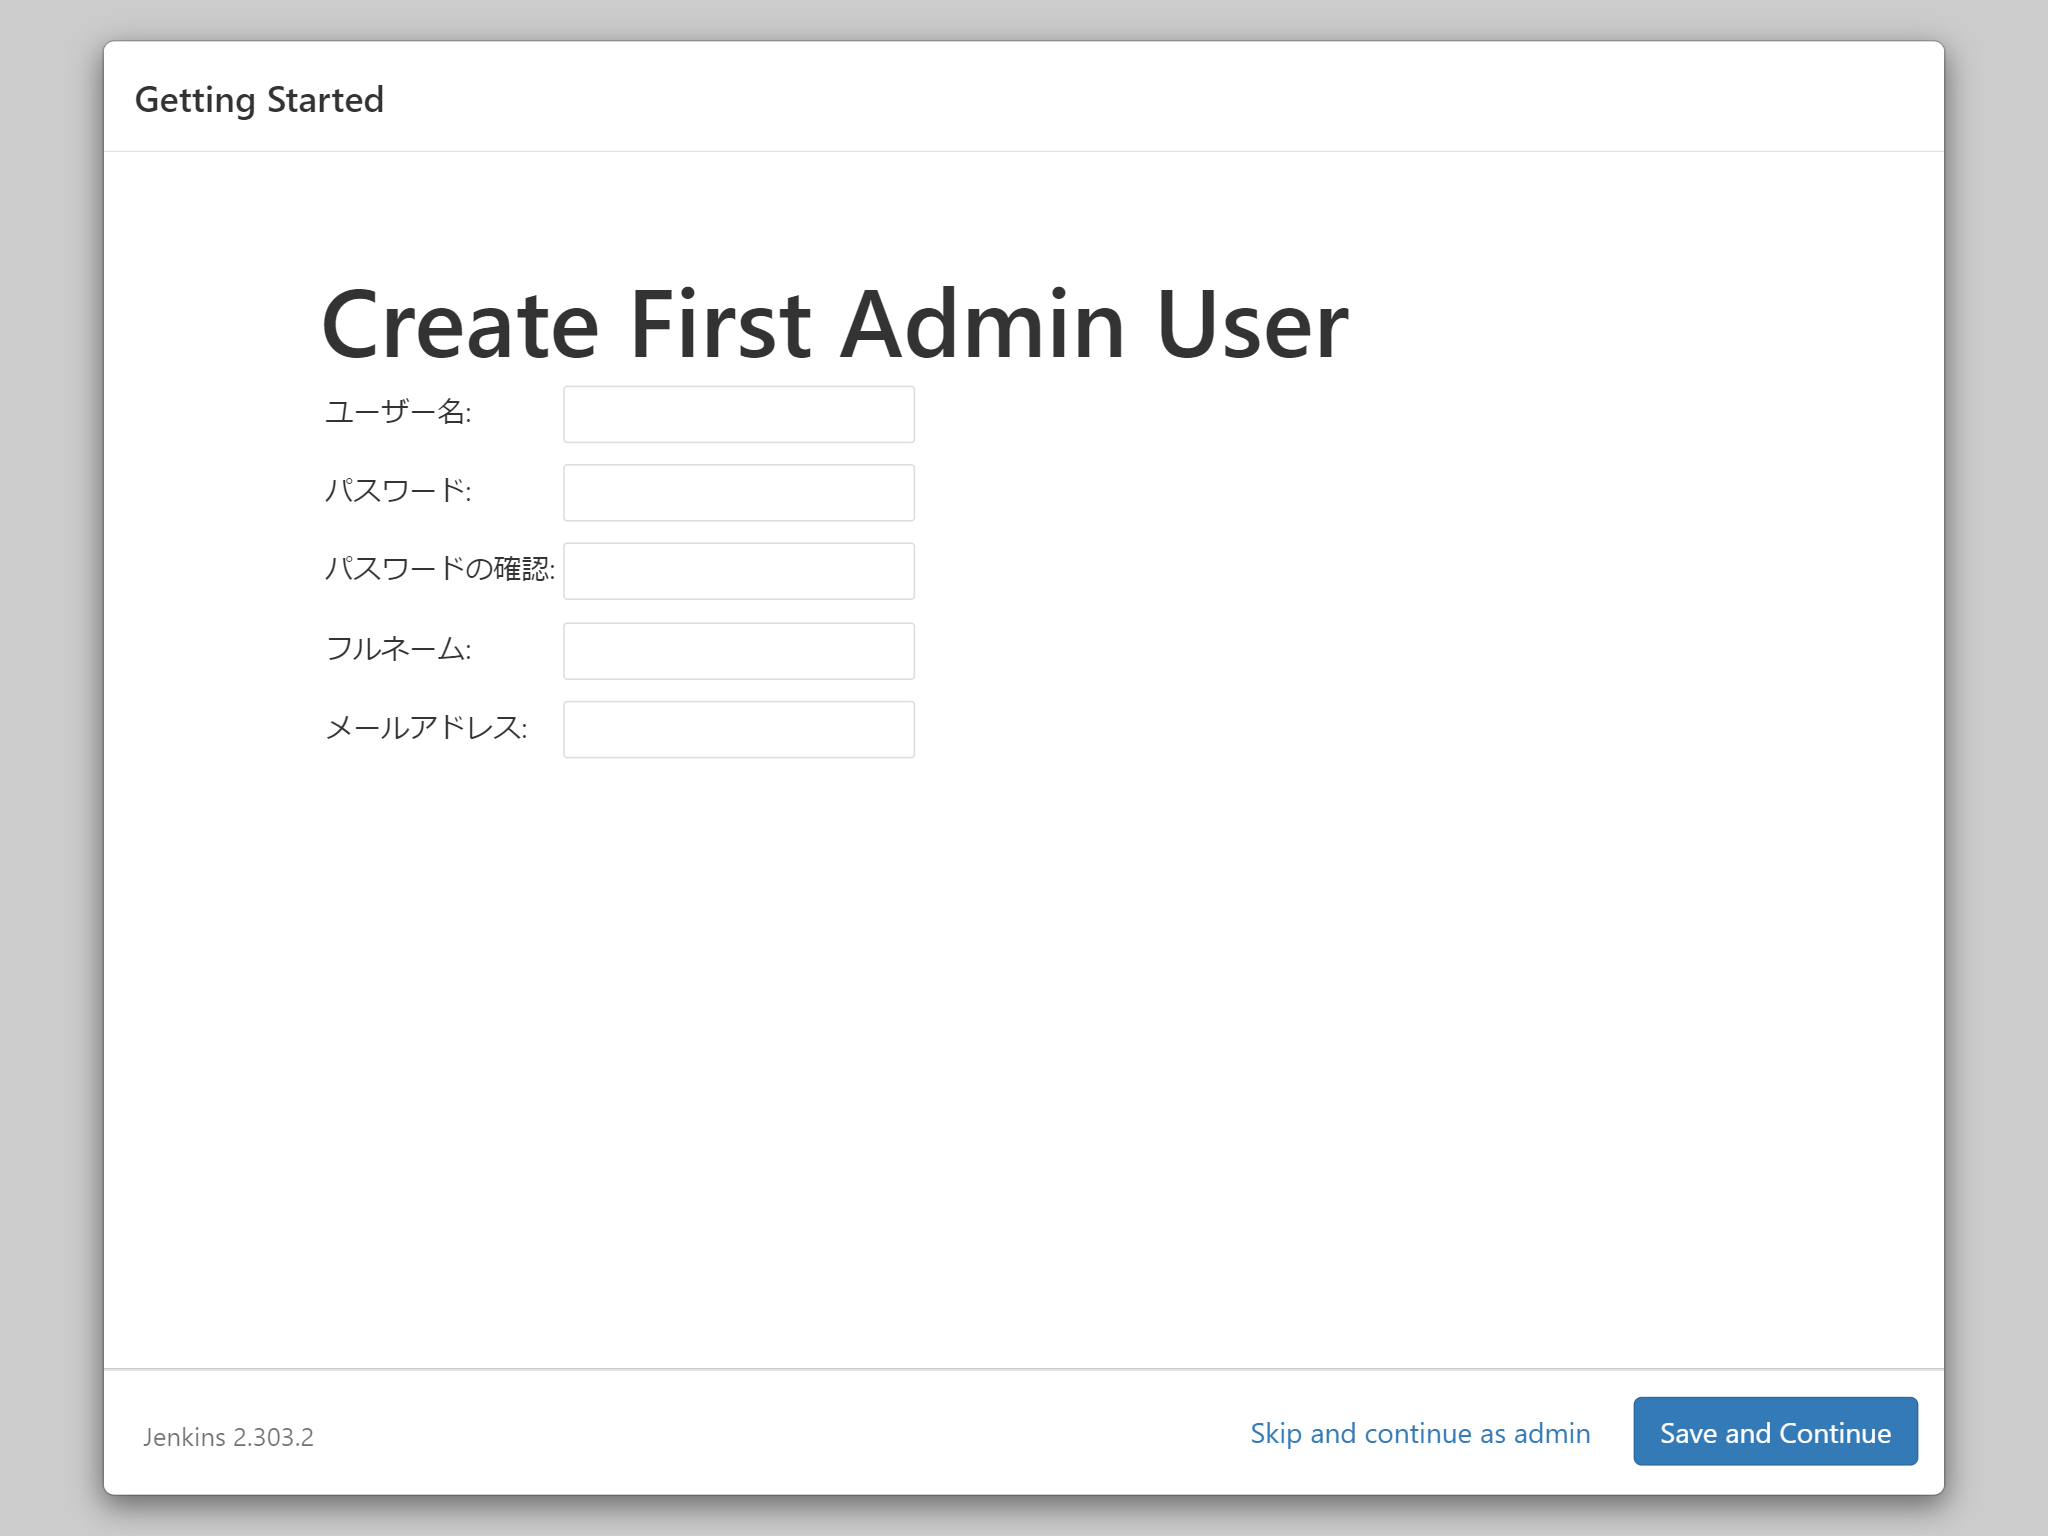
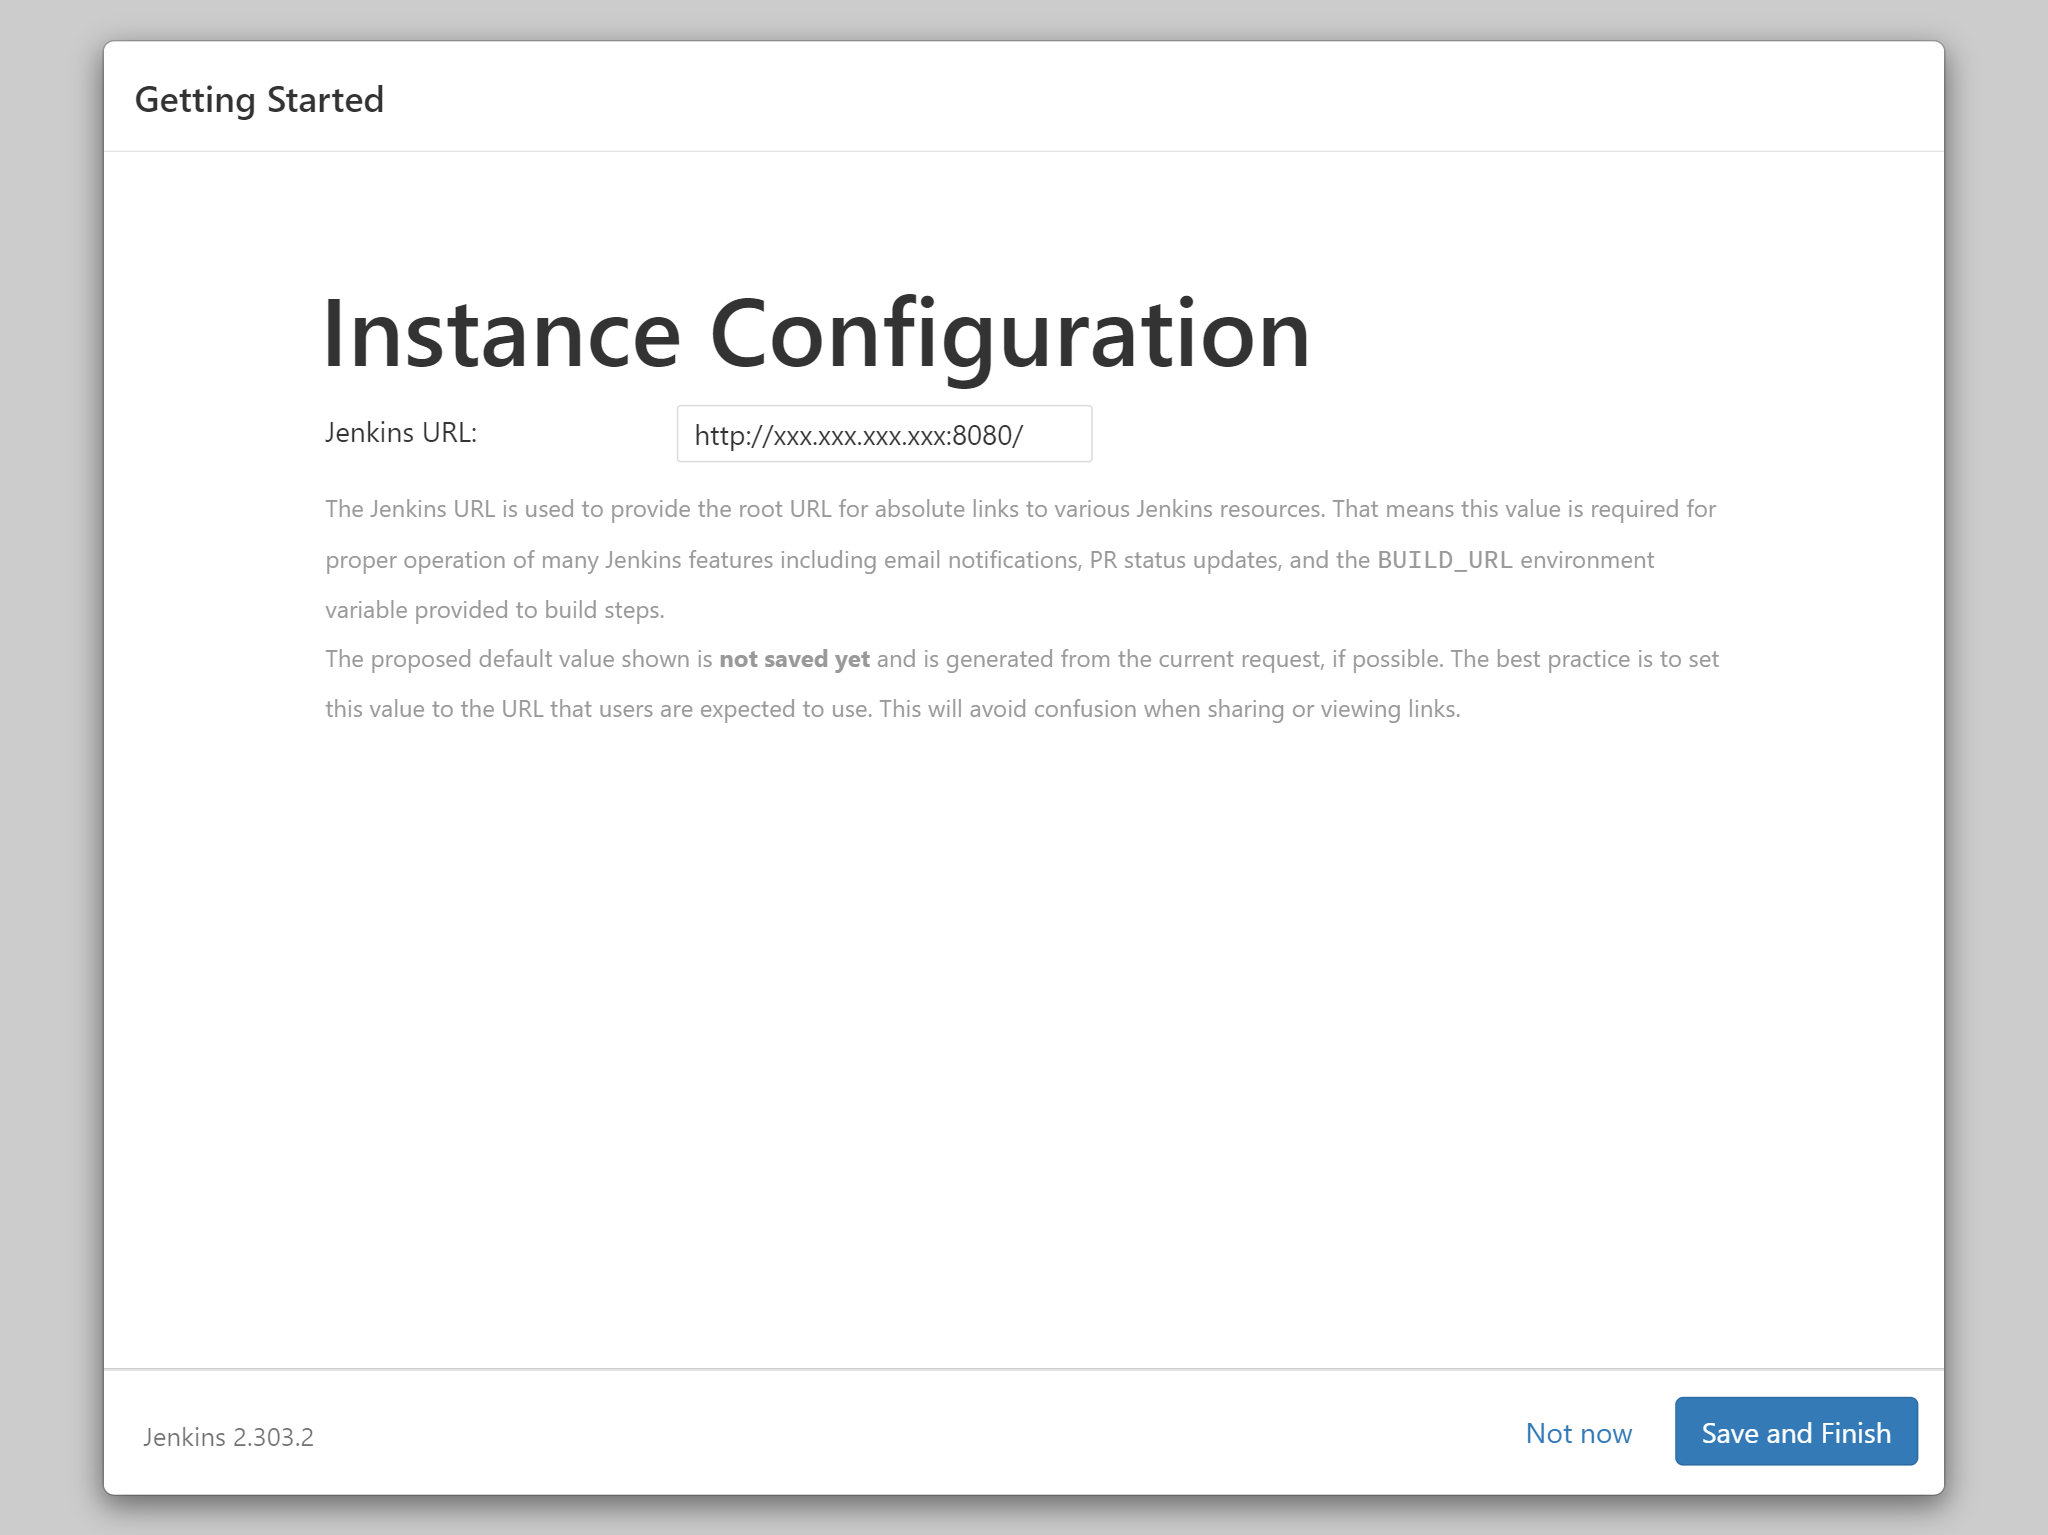
しばらくすると、Jenkinsが起動し、8080ポートで接続できます。
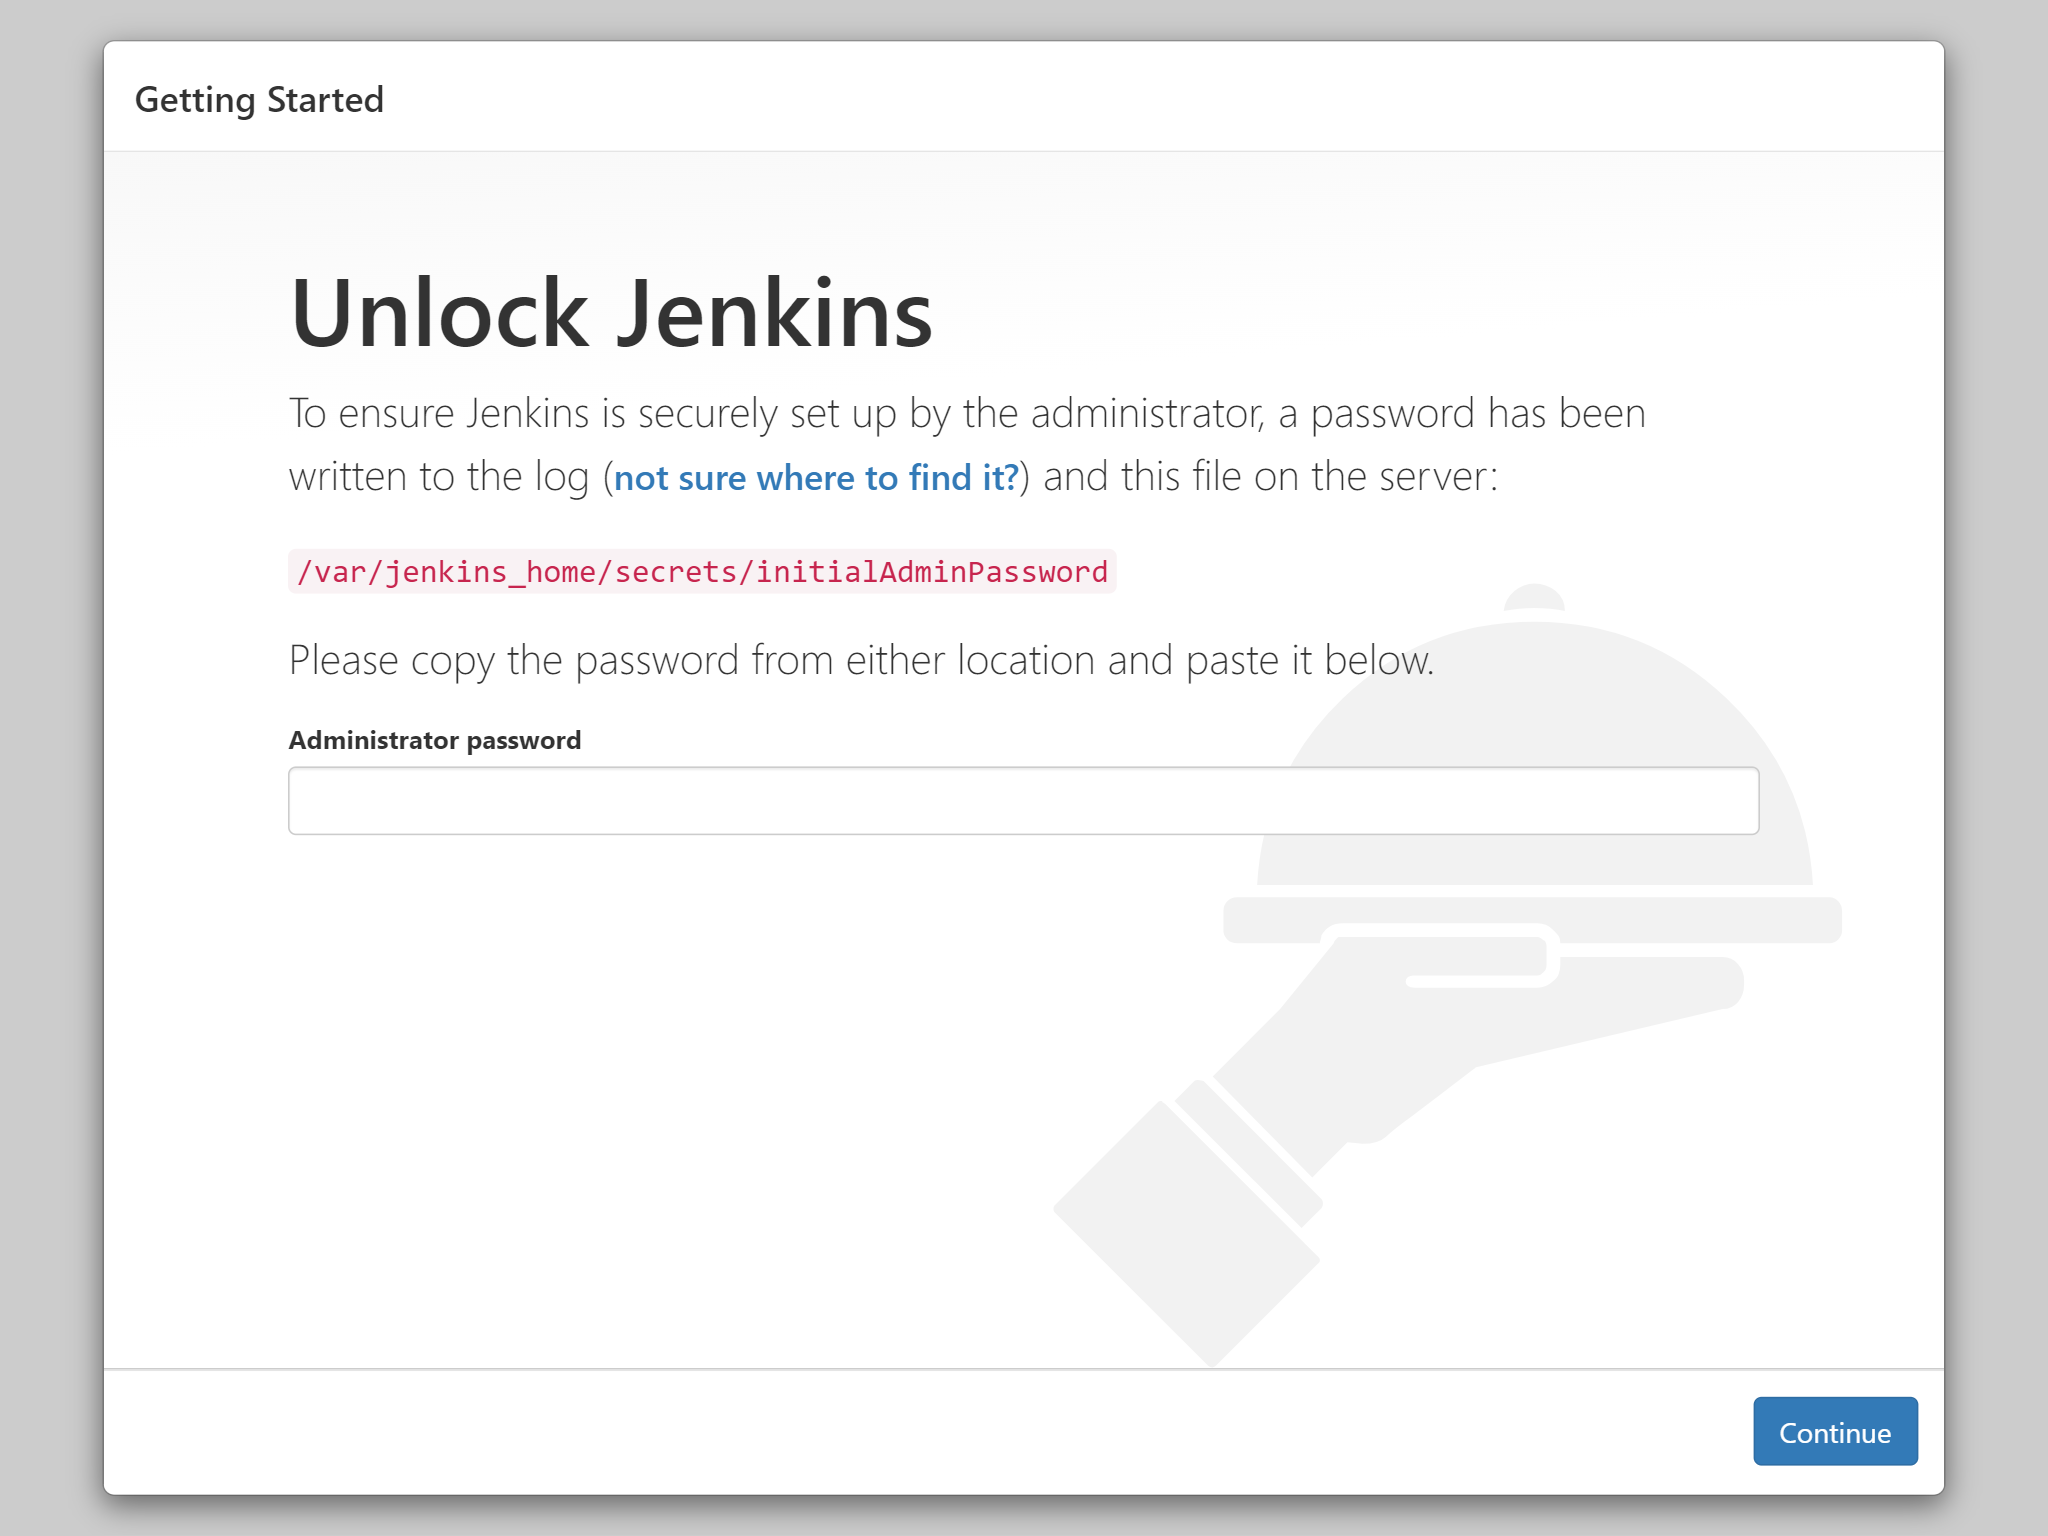
Administrator passwordはログに出ているので、docker compose logsで確認しましょう。
あとはこんな感じです。
